PHD Virtual Backup and Replication for VMware v5.4

I have been looking at the PHD Virtual Backup for VMware v5.4 to compare it with other backup vendors..

The new version has some features that is nice, both the replication function and the FLR with iSCSI target can be useful, not to forget the OpenExport and OpenRestore, where you can restore your VM´s to hosts without PHD Virtual Backup sw as they are exported as OVF and can easily be imported into other hosts.

Here is a list of some of the features

  • vSphere Client integration
  • Support for Changed Block Tracking (CBT)
  • Export Virtual Machine Backup
  • Virtual Machine Replication
  • Application Consistent Backup using VSS (Windows only)
  • Application Object level recovery
  • OpenExport & OpenRestore
  • E-mail notification
  • Support for Thin Provisioned Disks
  • Backup Retention and Archiving
  • Distributed Virtual Switch Support
  • Supports all Operating Systems supported by VMware vSphere

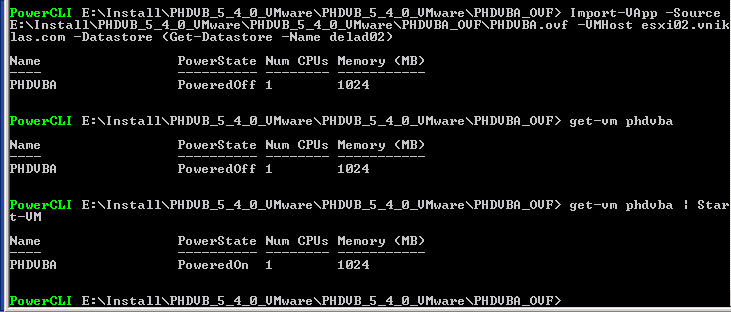
The installation of the product is as easy as VMware Data Recovery, you download and extract the OVF and import it into your environment, as I do things with PowerShell/PowerCLI I can use Import-VApp cmdlet
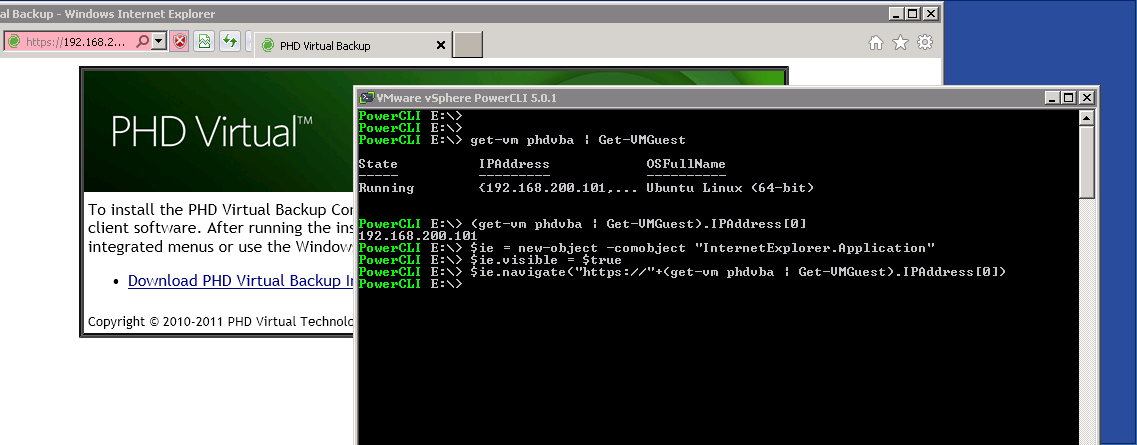
When I then want to install the vSphere Client plugin I can browse the web-service on the appliance and that way get the sw, It is also on the extracted folder you got from the download, but of course you can get the IP adress of the appliance and open an IE window from powershell 😉
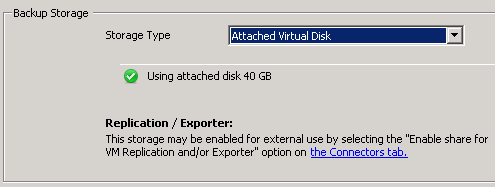
Once installed I need to set up a backup storage and credentials for my vCenter ( If you want you can just enter the ip/fqdn for your ESXi host)

For backup storage i can choose, attached disk/NFS or CIFS share. The most important thing here is that you think this through where you place your backup data, you do not want to put your backups in the same datastores as your VM´s because if you have a SAN-failure you want to be able to restore :-). One thing I want is to be able to use more than one disk but it is not possible in the PHD VBA in this version.
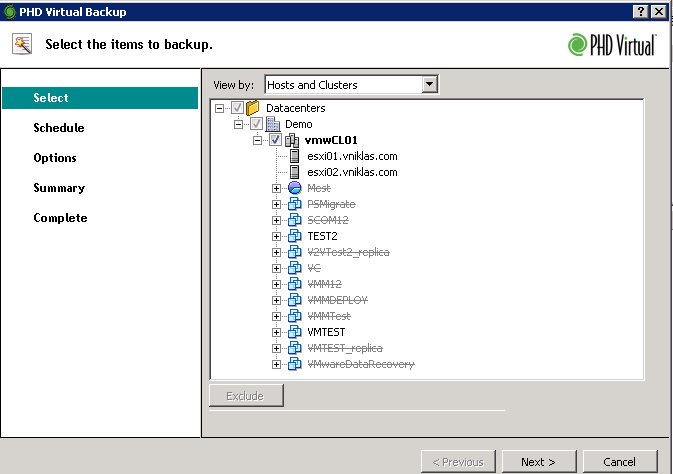
You can then go ahead and start taking backup. Either you can choose the whole datacenter or cluster or just VM´s, the nice part here is that you can select a Host cluster and exclude the VM´s that you not want to take backup on and when doing like this, new VM´s that are added later are automatically added to the backup job.
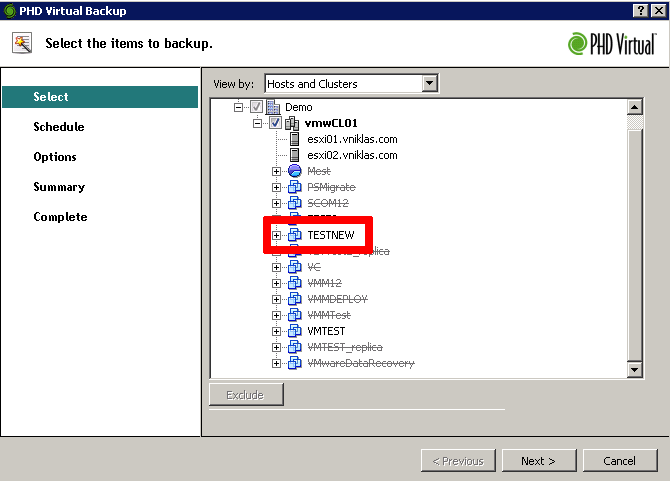
Here you can see that when I later add the TESTNEW VM it is automatically added to the backupjob
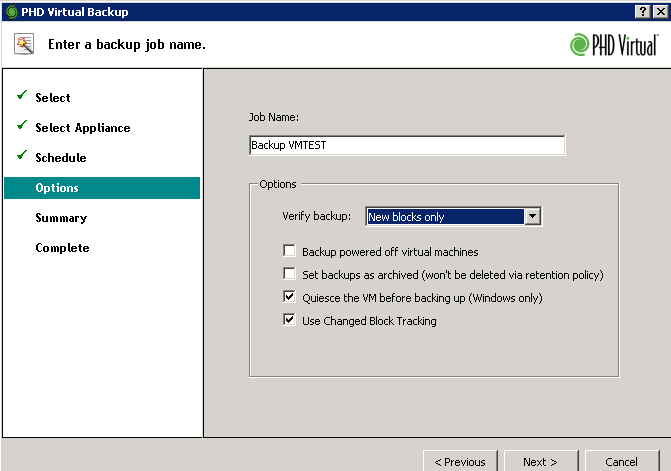
I can use the functionality quiesce VM to get a consistent snapshot for my backup, then my windows applications (that are VSS aware) will be in a good state to take backup, this is not possible to do with other OS (for example Linux), so think a bit if this is enough for your VM´s, maybe you must have an backup solution that uses an agent inside the VM also?!
For the replication functionality I can add an secondary PHD VBA that is on a DR site and it is configured to use the backup store of the first VBA so I will not need to create more than one VM snapshot for both backup and replication. When i fail-over the VM to the backup-site no more replication will occur and i can then start replicating it back when the primary site is back online.

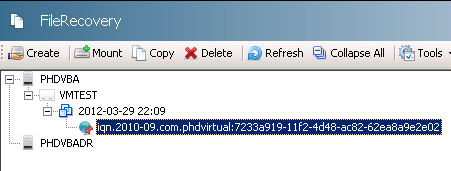
To do File-level restore you select the VM and the backup date and click create, this will create an iSCSI target that you can connect to and get the data that you want restored. To get application level restore you will have to do the same thing and then connect the database etc in recovery-mode.
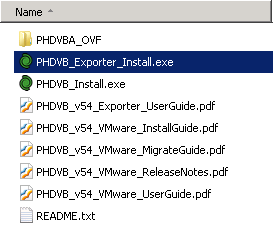
To get the OVF´s in OpenExport function you have to install the PHDVB_Exporter sw, PHD recommend you to install it on a physical machine, but it is supported to install in a VM also.
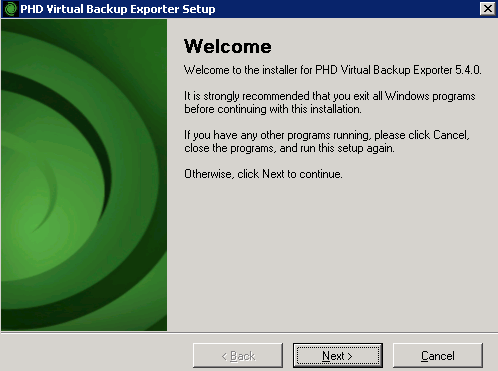
When you have installed it, you have to configure a location for the exported VM´s, also you need to configure where the PHD VBA appliance backups are. When that is done you can continue to create an export job. The export of the backups are set to use the latest backup, this isn not anything I can change in this version.
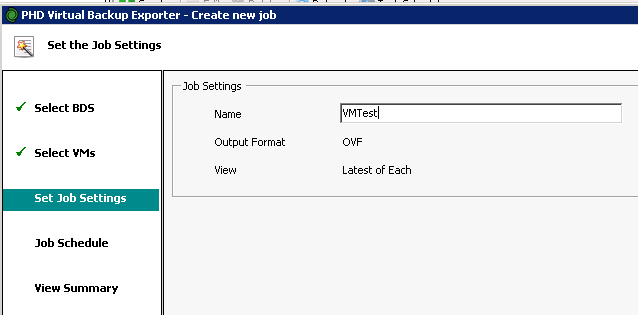
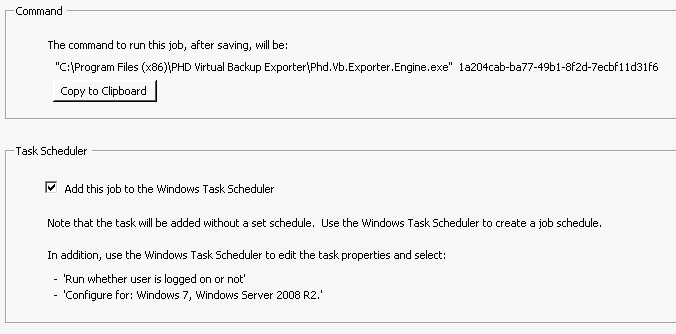
One thing i wish for in the next release is that they fix the scheduling, as of now when the export job is finished it create a task in the scheduled task manager and there you have to configure that it can run without logged on and when it should run, this should be in the gui of the Export software.
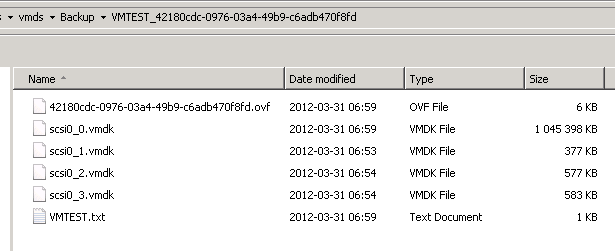
When checking the export directory you can see that the OVF and the vmdk files are there, ready to be imported or backed up by a tape.
Conclusion

What do we need and why is the question when choosing the backup solution. When is Host level backup software enough and when do we need agents in our VM´s? If you decided that Host level backup solution with snapshot technology is enough on your virtualization platform I would say that the reasons for using PHD instead of the VMware Datarecovery are the replication function, File Level restore via iSCSI and the Export to OVF. Also the possibility to set an backup to archive that will exclude that VM backup will be deleted by the retention policy is a powerfull feature for example regulatory reasons. The VMware Data Recovery also require the vCenter and in some cases you maybe do not have that or want to connect to it.

 

A PowerCLI function to manage VMware vSphere Licenses

As always ( or at least in my world) you should do everything in powershell/powerCLI. Now the turn comes to handling licensing in VMware vSphere.

I searched the web and found some information from Luc Dekens post and from Joe Keegan post. I also used the Onyx VMware fling to get some more functionality.

I decided to do some powershell functions and came up with the following, I have created three functions that can do some magic with your licenses

  • Get-vLicense  – query the vCenter for licenses
  • Add-vLicense – add a license or assign an existing license to a host/vCenter
  • Remove-vLicense – remove a license that is not in use

Of course there might be other things regarding licensing i have forgot but see this as a version 0.1 and that you can give me input on what to add or change

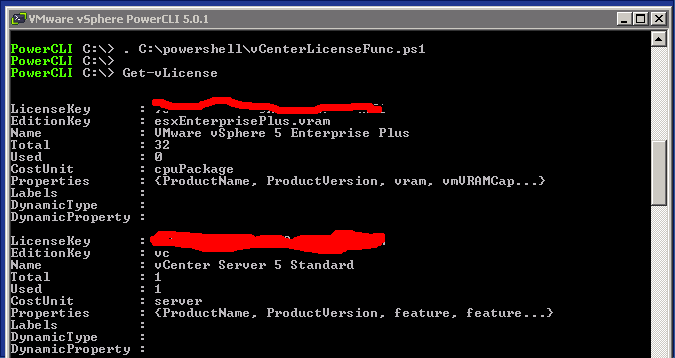
Here you can see how the function get the information:

You have to bare with me and my paintbrush skills, but I cannot show my license keys on the Internet 🙂

I can also use a switch to just show the ones that are not used with

Get-vLicense -showUnused

I would like to move my hosts to the new license that i have that has unlimited cores

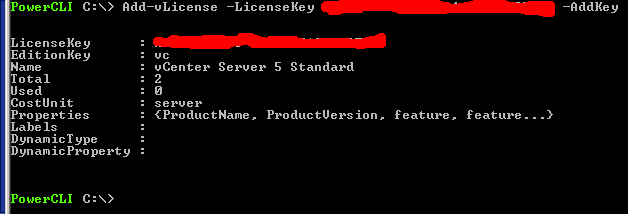
I can also in the Add function just add without assigning the license right now just use the -AddKey switch

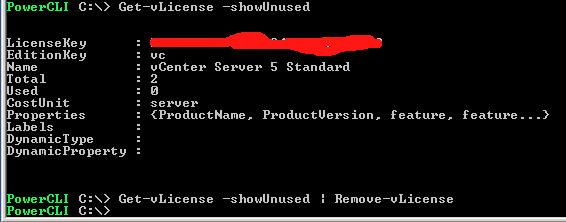
And if I want to remove the unused license I  use the following function, It can utilize a pipeline parameter as you see


And here is the whole code for the functions:

function Get-vLicense{
<#
.SYNOPSIS
Function to show all licenses  in vCenter
 
.DESCRIPTION
Use this function to get all licenses in vcenter
 
.PARAMETER  xyz 
 
.NOTES
Author: Niklas Akerlund / RTS
Date: 2012-03-28
#>
	param (
		[Parameter(ValueFromPipeline=$True, HelpMessage="Enter the license key or object")]$LicenseKey = $null,
		[Switch]$showUnused,
		[Switch]$showEval
		)
	$servInst = Get-View ServiceInstance
	$licenceMgr = Get-View $servInst.Content.licenseManager
	if ($showUnused -and $showEval){
		$licenses = $licenceMgr.Licenses | where {$_.EditionKey -eq "eval" -or $_.Used -eq 0}
	}elseif($showUnused){
		$licenses = $licenceMgr.Licenses | where {$_.EditionKey -ne "eval" -and $_.Used -eq 0}
	}elseif($showEval){
		$licenses = $licenceMgr.Licenses | where {$_.EditionKey -eq "eval"}
	}elseif ($LicenseKey -ne $null) {
		if (($LicenseKey.GetType()).Name -eq "String"){
			$licenses = $licenceMgr.Licenses | where {$_.LicenseKey -eq $LicenseKey}
		}else {
			$licenses = $licenceMgr.Licenses | where {$_.LicenseKey -eq $LicenseKey.LicenseKey}
		}
	}
	else {
		$licenses = $licenceMgr.Licenses | where {$_.EditionKey -ne "eval"}
	}
	
	$licenses
}

function Add-vLicense{
<#
.SYNOPSIS
Add New Licenses to the vCenter license manager
 
.DESCRIPTION
Use this function to add licenses  and assing to either the vcenter or the hosts
 
.PARAMETER  xyz 
 	
.NOTES
Author: Niklas Akerlund / RTS
Date: 2012-03-28
#>
param (
	$VMHost ,
	[Parameter(ValueFromPipeline=$True)]$License = $null,
	[string]$LicenseKey = "XXXXX-XXXXX-XXXXX-XXXXX-XXXXX",
	[switch]$AddKey
    )
	$LicenseMgr = Get-View -Id 'LicenseManager-LicenseManager'
	$LicenseAssignMgr = Get-View -Id 'LicenseAssignmentManager-LicenseAssignmentManager'
	if($License){
		$LicenseKey = $License.LicenseKey
		$LicenseType = $LicenseMgr.DecodeLicense($LicenseKey)
	}else{
		$LicenseType = $LicenseMgr.DecodeLicense($LicenseKey)
	}
	
	if ($LicenseType) {
		if ($AddKey){
			$LicenseMgr.AddLicense($LicenseKey, $null)
		}else{
			if ($LicenseType.EditionKey -eq "vc"){
				#$servInst = Get-View ServiceInstance
				$Uuid = (Get-View ServiceInstance).Content.About.InstanceUuid
				$licenseAssignMgr.UpdateAssignedLicense($Uuid, $LicenseKey,$null)
			} else {
				$key = Get-vLicense -LicenseKey $LicenseKey
				if($key  -and ($key.Total-$key.Used) -lt (get-vmhost $VMHost | get-view).Hardware.CpuInfo.NumCpuPackages){
					Write-Host "Not Enough licenses left"
				} else{
					$Uuid = (Get-VMhost $VMHost | Get-View).MoRef.Value
					$licenseAssignMgr.UpdateAssignedLicense($Uuid, $LicenseKey,$null)
				}
			}	
		}
	}	
}


function Remove-vLicense{
<#
.SYNOPSIS
Function to remove a licenses that is not in use in vCenter
 
.DESCRIPTION
Use this function to remove a license
 
.PARAMETER  xyz 
 
.NOTES
Author: Niklas Akerlund / RTS
Date: 2012-03-28
#>
param (
	[Parameter(Position=0, Mandatory=$true, ValueFromPipeline=$True, HelpMessage="Enter the key or keyobject to remove")]$License
	)
	$LicObj = Get-vLicense $License 
	if($LicObj.Used -eq 0){
		$LicenseMgr = Get-View -Id 'LicenseManager-LicenseManager'
		$LicenseMgr.RemoveLicense($LicObj.LicenseKey)
	}else{
		Write-Host " The license is assigned and cannot be removed"
	}
}

Virtual Machine Snapshots in Win8 Hyper-V massage with PowerShell

In the new win8 there is a function to merge the snapshot taken on a VM without putting it into saved state/turn off. In the Windows 2008 and 2008 R2 there was a big no-no to taking snapshots on production machines, how about now in the new version? Well their replication function uses snapshots so it must be good enough. Then as always you should consider the consequences of taking snapshots and rolling back on different systems as the data in a database may be lost when jumping around.

The Cmdlets that are relevant for Snapshots :

  • Checkpoint-VM
  • Get-VMSnapshot
  • Remove-VMSnapshot
  • Export-VMSnapshot
  • Restore-VMSnapshot
  • Rename-VMSnapshot

If you search among the cmdlets the first CheckPoint-VM is not very easy to find, I am woundering why they(MS) has decided that name?! (I have before complained about checkpoint in SCVMM, maybe it is from there it has the roots)

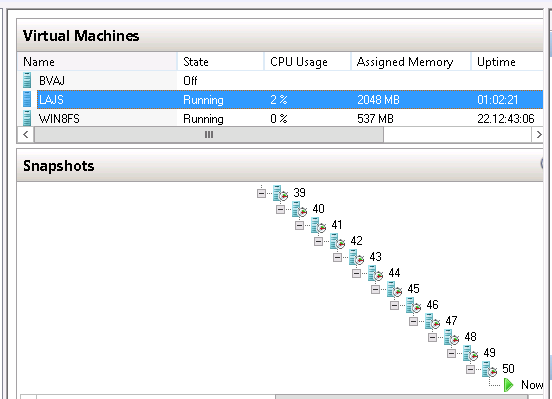
Here is a PowerShell oneliner that makes 50 Snapshots on a VM (the limit of 50 snapshots is still valid as i tested to make 60 snapshots and got errors from 50+)

for($i=1 ;$i -le 50 ; $i++){Checkpoint-vm -SnapshotName $i -VMName lajs}

Here is the error.

How do I know how many snapshots i have on a VM?

Or if you must, check the GUI..

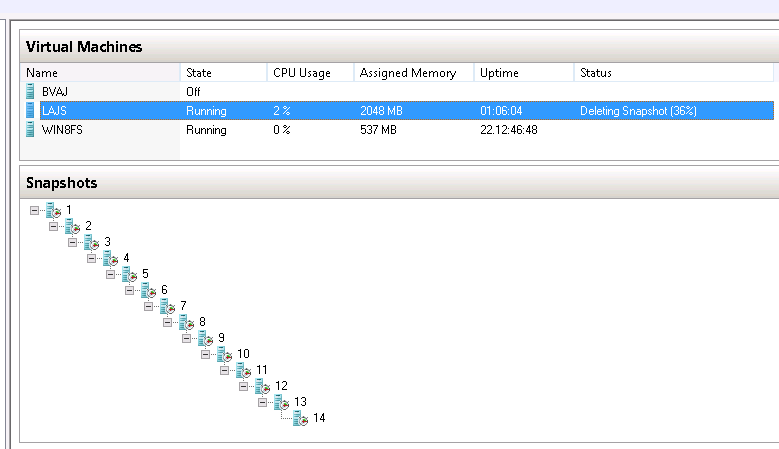
When I now have 50 snapshots I have to remove one before taking a new, the Remove-VMSnapshot has a parameter -IncludeAllChildSnapshots that is quite handy if you have like me 50 snapshots that you want to remove. I use the Select-Object -First 1 to get the first snapshot so i can remove all at once.

Get-VM lajs | Get-VMSnapshot | Select-Object -First 1 | Remove-VMSnapshot -IncludeAllChildSnapshots

How about the cmdlet Export-VMSnapshot, it cannot be run when the VM is running, but it creates an exported VM that is from the snapshot. This can be very useful if you want to have a machine from a specific snapshot built.

How to go to a snapshot with Restore-VMSnapshot then, when I restore I have to confirm but not when deleting?

If you haven´t found the reference page on technet for WIN 8 Hyper-V powershell cmdlets it is here.

Update vSphere 5 hosts to U1 with Update manager and PowerCLI

Today I wanted to update my lab environment hosts to U1 of vSphere 5, of course with PowerCLI, there is no other way or is it?

This reference indicates there is not so many cmdlets but is it enough? Yes it is!

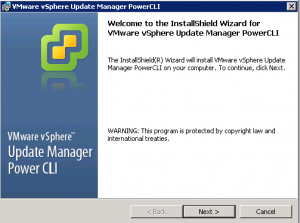
As the PowerCLI installation does not include the VUM cmdlets i had to download and install them

I have already upgraded my vCenter and VUM to U1, this as it is always a best practice to first update the vCenter and then the hosts

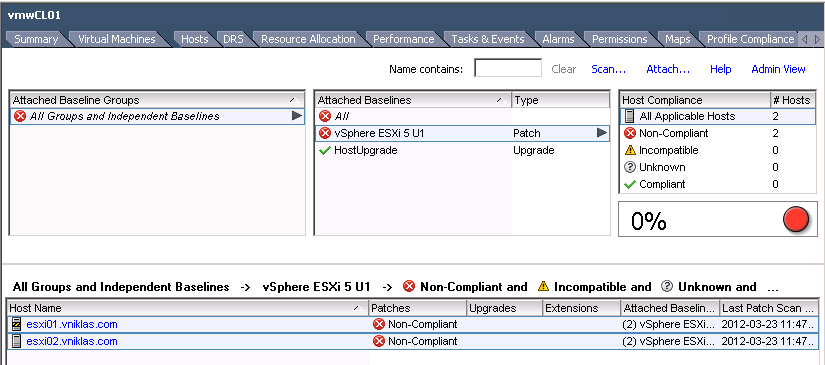
the following script do the whole process of both making a Patch baseline and attaching it to the cluster and then Scan/Remidate (now i only have two hosts but this is quite powerfull if i have lots of more). The script allows some parameters, for example if you already have a baseline you can use that and attach/remediate your cluster, or you want another patch in the baseline.

<#
 .SYNOPSIS
 Upgrade ESXi Hosts to an Update Version 

 .DESCRIPTION
 Create an baseline and upgrade a Cluster to an vSphere 5 update with Update Manager, If you already have a baseline just use the BaseName parameter

 .Author
 Niklas Akerlund /RTS 2012-03-23 (original script from Jonathan Medd)

 .PARAMETER  Cluster
 The name of the host to upgrade.

 .PARAMETER  PatchName
 Enter the name of the Patch/Update
 
 .PARAMETER Name
 Enter the name of the vCenter server to connect to

 .EXAMPLE
 PS C:\> Update-HostsU1.ps1 -Cluster VMWCL
#>
#requires -pssnapin VMware.VimAutomation.Core
#requires -pssnapin VMware.VumAutomation

[CmdletBinding()]
param(
 [Parameter(Position=0, Mandatory=$true, HelpMessage="Enter the name of Cluster")]
 $Cluster,
 [Parameter(HelpMessage="Enter the name of the patch")]
 [String]
 $PatchName = "VMware ESXi 5.0 Complete Update 1",
 [Parameter(HelpMessage="Enter the baseline name")]
 [String]
 $BaseName = "vSphere ESXi 5 U1"
 )

process{

	# Create a baseline to use
	if(!(Get-Baseline -Name $BaseName -EA 0)){
		# Get the update and add a Patchbaseline
		$Patch = get-patch | where {$_.Name -eq $PatchName}
		New-PatchBaseline -Name $BaseName -Static -IncludePatch $Patch
	}
	# Attach the baseline on the cluster
	$Cluster = Get-Cluster $Cluster
	$Baseline = Get-Baseline -Name $BaseName
	if($Baseline){
		$Baseline | Attach-Baseline -Entity $Cluster
		
		# Scan the Cluster 
		$Cluster | Scan-Inventory
		
		# Remediate the cluster with the baseline
		$Cluster | Remediate-Inventory -Baseline $Baseline -ClusterDisableDistributedPowerManagement:$true -ClusterDisableFaultTolerance:$true -ClusterDisableHighAvailability:$true -Confirm:$false -HostDisableMediaDevices:$true
		
	}
}

And here are some screenshots of it running,

One host successfully updated and the remediate migrates the VM´s and start with the other host.

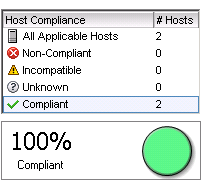
Finally the hosts in the cluster are updated.

I have used some of the code from Jonathan Medd´s post on upgrading from 4.0->4.1 to create my script.


Automatic installation of SCVMM 2012 RC & SQL 2008 R2 and WAIK 3

Today I have been researching how to make a script that deploys a working installation of a VMM 2012 RC with a local SQL server without needing to manually type in anything.

What is strange is that the WAIK itself does not give you an option to do a quiet install! I had to use msiexec Transform to massage it to allow for an unattended install.

I used this MyITforum page to get a SQL config file, and this post by Christoffer got me the waik installation bit.
One thing i changed in the SQL config was this line:

SQLCOLLATION=”SQL_Latin1_General_CP1_CI_AS”

because when i install on a OS with Swedish it will try to install with another Collation, this is no worries until you want to use this database server for SCOM 2012, because it requires the above Collation! 🙂

I am using the Start-Sleep cmdlet to get some time between the installations, also I have a check that the Setup process is still running and delay until it has finished,

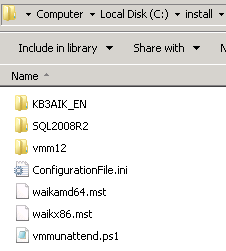
You will have to download the WAIK 3.0 and the SCVMM 2012 RC, also you will have to copy all files from the SQL 2008 R2 ISO into a folder, as my script refers. Copy the content to subfolders like my screen dump and you should get it working. The .Net feature is installed during the SQL installation so i do not need to add it on its own.

# Install VMM unattended
#
# NIklas Akerlund /RTS

# Install the SQL server
c:\install\sql2008r2\setup /ConfigurationFile=c:\install\ConfigurationFile.ini

# Install the WAIK
msiexec /qb /i C:\install\KB3AIK_EN\wAIKAMD64.msi TRANSFORMS=c:\install\waikamd64.mst

Start-Sleep -s 60
# Install the VMM server and console

C:\install\vmm12\setup.exe /server /i
Start-Sleep -s 30
while (Get-Process | where {$_.ProcessName -eq "SetupVM"}){
Write-Host "Still installing server"
Start-Sleep -s 2
}
Start-Sleep -s 10
C:\install\vmm12\setup.exe /client /i
Start-Sleep -s 30
$Process = Get-Process | where {$_.ProcessName -eq "SetupVM"}
while (Get-Process | where {$_.ProcessName -eq "SetupVM"}){
Write-Host "Still installing Console"
Start-Sleep -s 2
}

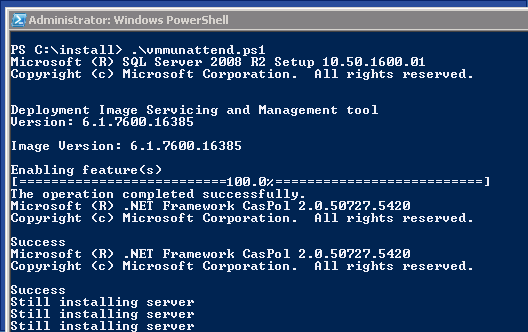
When i run it, it looks like this

There are some configuration files that could be used to set up other parameters for ports/license keys etc and they reside in the VMM setup directory and their names are VMServer.ini and VMClient.ini, for my demo/test setup i decided to not change anything. If you want to know more parameters in the VMM setup, just run in powershell console or CMD, setup /? and you will get a dialog with options

Change SCSI controller with PowerCLI on win 2008 R2 VM from Paravirtual

I found this KB 2004578 and thought that of course should this be done with PowerCLI

I made a function to be able to do it just by sending the VM parameter, it can be done if the VM is already shutdown with a simple one-liner

Get-VM v2vtest2 | Get-ScsiController | where {$_.Type -eq "Paravirtual"} | Set-ScsiController -Type VirtualLsiLogicSAS

But I wanted a more sophistical approach where my function shutdown the VM properly and then change the controller and starts the VM, the tricky part here was to check that the VM actually had shutdown before I change controller 🙂

function Change-ScsiController{
<#
.SYNOPSIS
Stop a VM and replace the SCSI controller and start it again

.DESCRIPTION
Use this function to change scsi cntroller

.PARAMETER  xyz 

.NOTES
Author: Niklas Akerlund / RTS
Date: 2012-03-21
#>
    param (
   [Parameter(Position=0,Mandatory=$true,HelpMessage="A virtual machine",
    ValueFromPipeline=$True)]
    $VM
    )
	$VM = Get-VM $VM	
	
	Shutdown-VMGuest -VM $VM -Confirm:$false
	while ($VM.PowerState -eq "PoweredOn")
	{
	$VM = Get-VM $VM
	Start-Sleep -s 1	
	}
	Get-ScsiController -VM $VM | where {$_.Type -eq "Paravirtual"} | Set-ScsiController -Type VirtualLsiLogicSAS 
	Start-VM -VM $VM
	
}

System Center Online Seminars: Deep Dive VMM 2012

Today Me self and Joachim Nasslander did our last Live Meeting about the System Center VMM 2012 in swedish for Microsoft. We did not have time to show all our demos so i thought that it would be an idea that i show them here in a blog post. There is no sound on the demo-videos, hopefully the LM that was recorded will show up on the Swedish MS technet soon…

The first thing that i showed was the Bare Metal Deployment of hosts, this is done with the help of a prepared VHD and a WDS (Windows deployment Server) that is registered to the VMM server. I have cut a bit of the waiting when the server was finalizing the configuration.


The next demo was after deployment of the host I used the built in functions in VMM 2012 to add hosts to a cluster


After this I show how to use the integration between the WSUS and the VMM which gives the opportunity to update a cluster and set the cluster nodes into maintenance mode and then update rolling through all hosts and the VM´s live migrating to the hosts.


I also made a demo on how to v2v migrate a VM from vSphere host to a hyper-v host when they are all connected to the same VMM 2012


Lastly I have made a demo on how to use Powershell within the VMM 2012 and how to use it to both do reporting and changing things, I have already made some blog posts about how to use the VMM 2012 powershell cmdlets.


Using SCVMM 2012 SP1 CTP to administer my Win 8 Hyper-V hosts

This night I saw that MS, listened to my tweet 😉  where I asked for possibility to manage Hyper-V 3 with the SC VMM2012. I have children that let me wake early and so I could start immediately to investigate the new SP1 and see how it works to handle Win8/HyperV3 hosts.

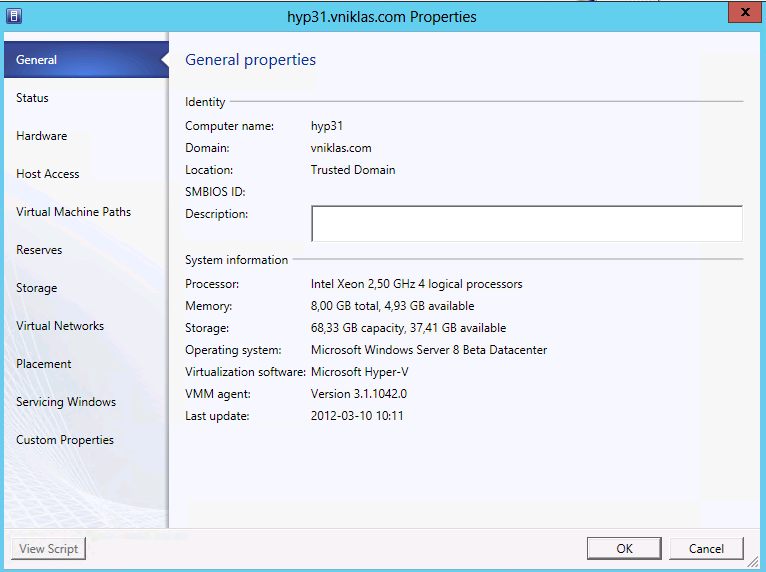
In my test environment I have two hosts  hyp31 and hyp32, I have also a virtual machine for the VMM (vmm3) and a virtual file server all of them running the Win8 Server Beta.

The installation was pretty straight forward, The only problem was that I had to have a internet connection to be able to get the .Net 3.5 feature installed.

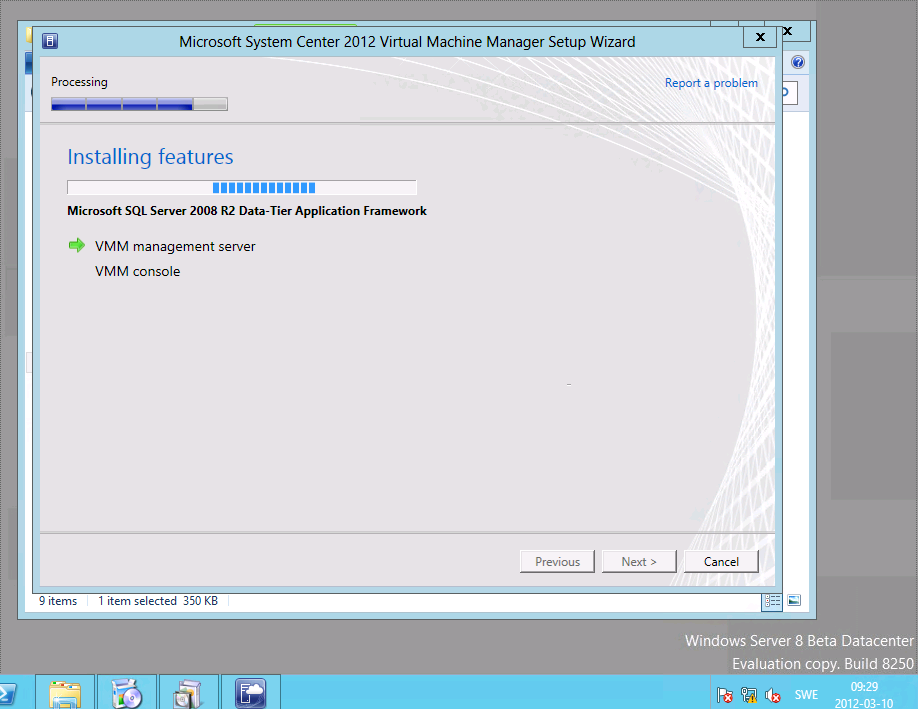
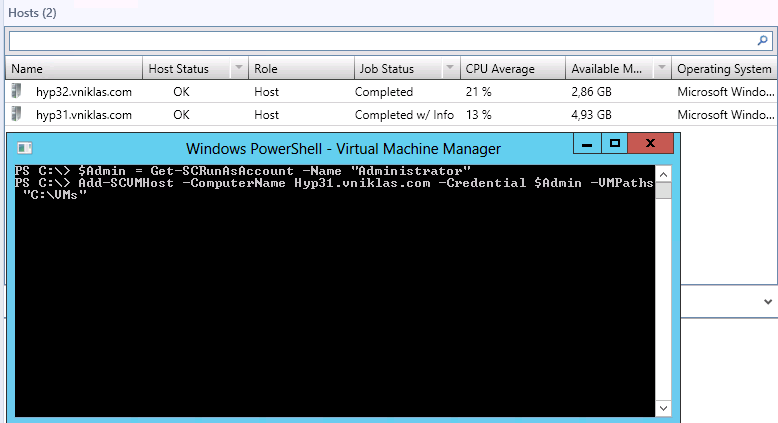
When the VMM server and console was Installed I could login and add some hosts

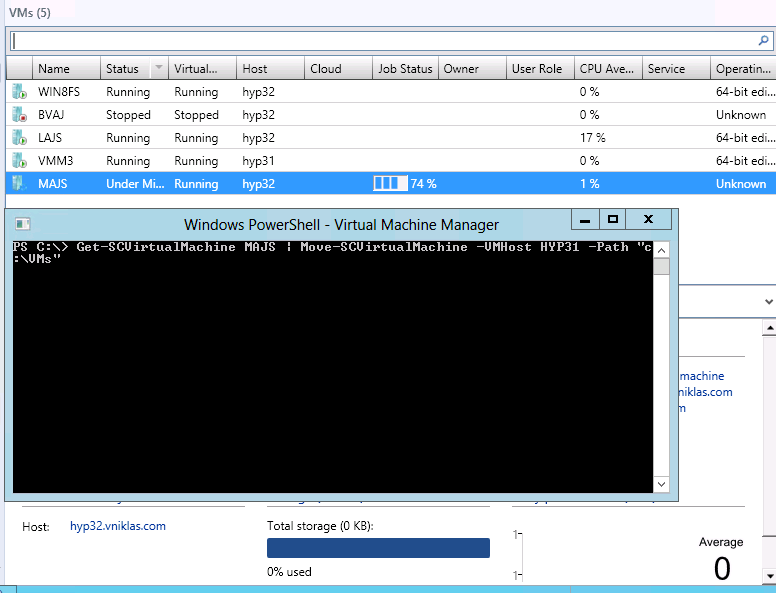
As I already had set up the host and had VM´s on the fileshare it was easy to start testing Live Migration between the hosts (they are not in a cluster but both can access the fileshare).

Get-SCVirtualMachine MAJS | Move-SCVirtualMachine -VMHost HYP31 -Path "c:\VMs"

I have to use the -Path parameter but only a xml config file resides on the host and my vhd harddisk remains on the fileshare \\win8fs\vmds , will do some research building a cluster and see how that works with the files later..


Using Windows PowerShell Web access for VMM2012 Administration

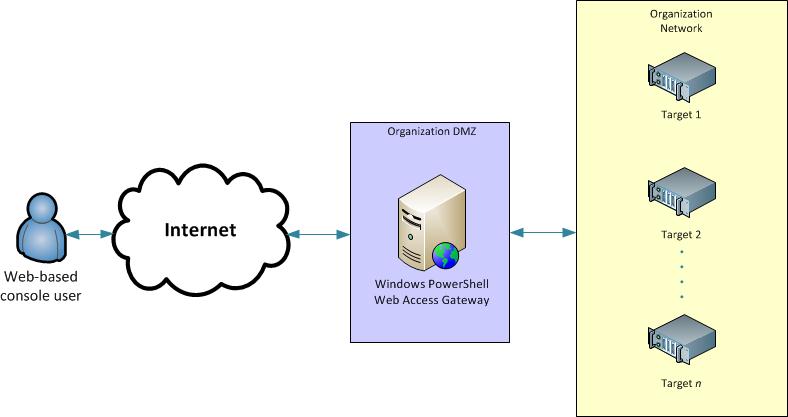
Today i had the pleasure to install and configure the Windows PowerShell Web Access in Windows 8. This gives you an opportunity to administer your internal servers with a Web Powershell Console. The really nice part here is that when I have enabled this I can connect to an Windows Server 2008 R2 with Powershell v2.

I have configured it with Authorization to everything, now this is a test environment but in your maybe you should be more restrictive,

Get-WindowsFeature WindowsPowerShellWebAccess | Add-WindowsFeature
Install-PswaWebApplication -UseTestCertificate
Add-PswaAuthorizationRule * * *

So I can connect with for example a Ipad and administer my Hyper-V Cluster in SCVMM2012 😛

In this link you can see how to configure this on your Windows 8 Server Beta.

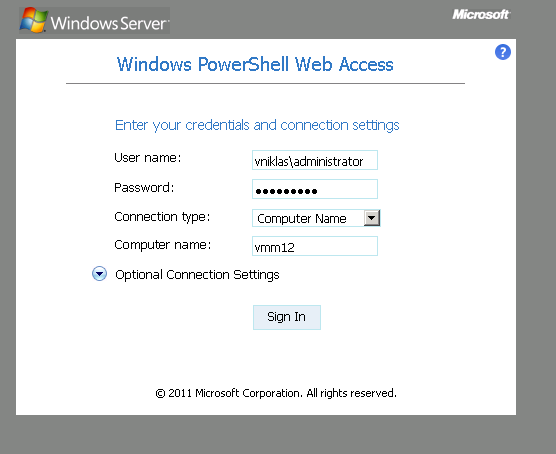
Here is the login prompt…

And here you can see how i run commands in the console, As you can see I must use Import-Module to import the VMM 2012 cmdlets before I can use them. This is a flash embedded video from youtube (where i uploaded it to) If you do not see it you can go to this link


I still have to find out why I cannot use the PowerCLI PSSnapin, I get an OutOfMemory exception when trying to connect-viserver 🙁 will have to dig a bit deeper to check that one out. Maybe there is a bug in the PSSnapin, an excellent time for VMware to make a Module instead!

Enable/Disable Core mode on Windows 8 Server Beta

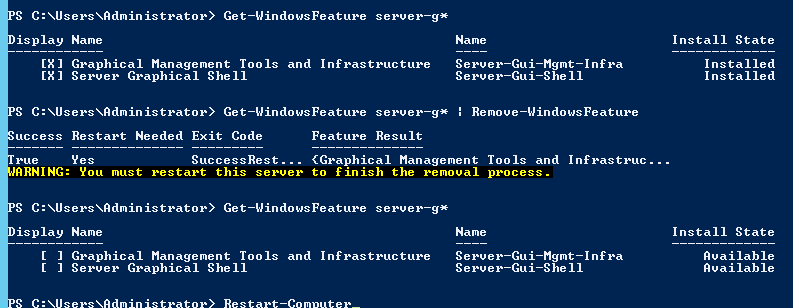
Today I have been researching about how to enable and disable the GUI on the Windows 8 Server beta. As it is a best practice to run your Hyper-V hosts in Core I wanted to know how to do this, you might want to configure some things in full GUI mode and then run the server in core after you are done. Going from the full gui to Core was quite easy, i just ran the following commands in powershell and rebooted, then i was in the cmd console world of Core.

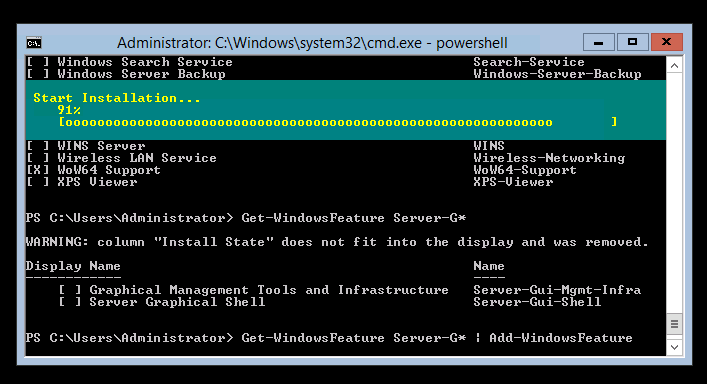
When i then wanted to get back to the GUI world i just ran the command Add-WindowsFeature instead of remove

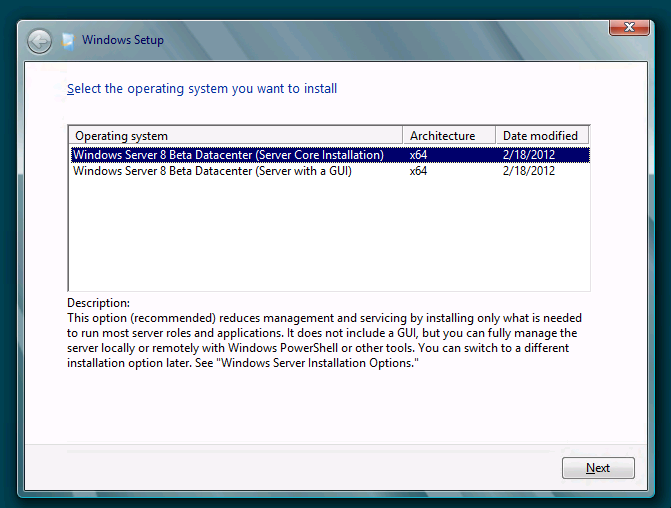
Then i had to test to install a Core and try to get it to full. The Beta does only have two editions to choose from.

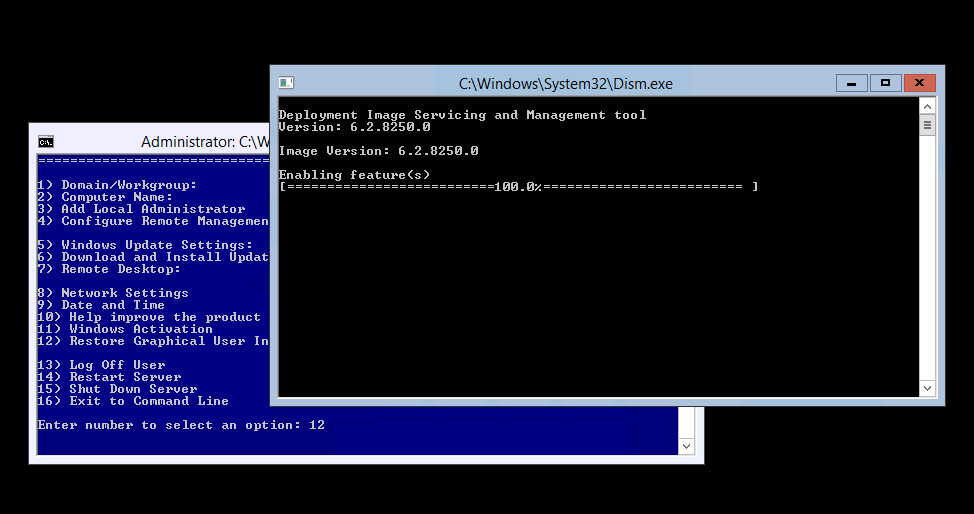
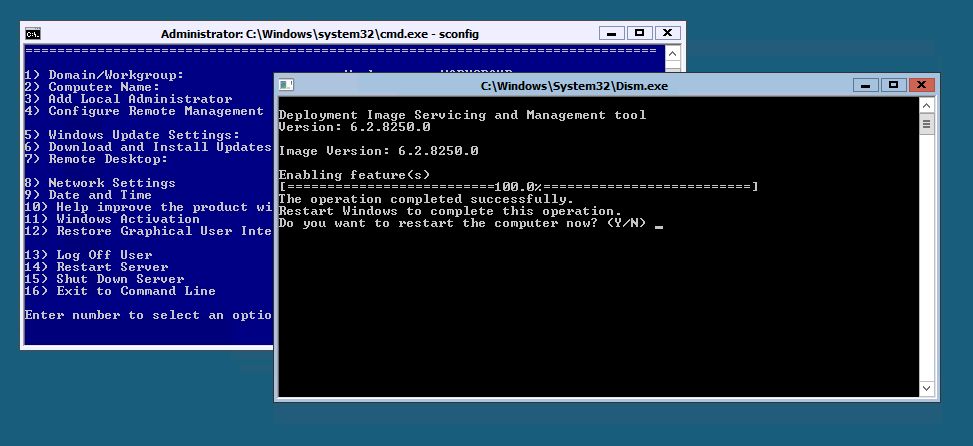
When the machine was finished i tried to use the Sconfig tool that is a configuration helper in Core, and in that you have a selection 12 that are supposed to enable GUI, but despite that it said 100% nothing happend, so this was a bit trickier because when i choose the Core in the installation, not all files are deployed in the installation, this to save space and unnecessary files/functions. This does however create some extra work when you realize that you want the GUI, at least nowadays you do not have to reinstall the whole machine :-).

How do i solve it then, I found a presentation from Jeffrey Snover and Andrew Mason at the Build conference which led me to the imageX binary that i can mount the install.wim file. one would think that just mounting the win8 ISO would be enough but no, i had to do some imageX magic, i used the one from the Win7 WAIK and copied it into the core machine, as i am a ps-fan i copied it with powershell ,then i had to mount the wim file with the imagex and then run the cmdlets to enable the GUI. At least it feels easier using powershell than DISM /Online bla bla..

copy-item \\win8fs\share\imagex.exe c:\temp

mkdir c:\win8wim

.\imagex.exe /mount d:\sources\install.wim 2 c:\win8wim

I ran the following, and as you can see i had to specify the windows folder on the wim where the winSxS (this is where the missing files are) is a direct subfolder,

Get-WindowsFeature Server-G* | Add-WindowsFeature -Source C:\win8wim\windows
Restart-Computer

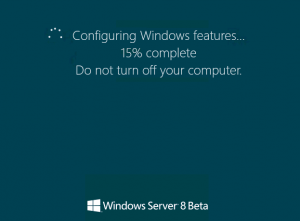
When going from core -> full or the other way around it is some waiting when the configuration is done.. it is not quite as easy as the Linux and the run-levels (init 3, init 5), maybe MS should have been looking a bit there when implementing their solution.

Update: As Snover commented below, it actually works to use sconfig and “Restore GUI”, but this is when your server is connected to the Internet and can download the files needed, I tried it and it took over 1 hour and then it asked for a restart to finish. Not every organisation do connect their servers directly to the Internet, maybe it could work then with a local WSUS server?!