DELL Compellent – Auto Storage Tiering

In two days i have had the opportunity to test the Compellent SAN solution and i find it really cool and smooth. When integrating it with your vCenter you get the single pane of gui to handle the whole solution. You have to on every vmware client install the Compellent plugin to be able to administer the compellent and get the tabs that are plugin specific, you will also have to add the compellent management address and also a user with password and of course some rights to do SAN stuff.
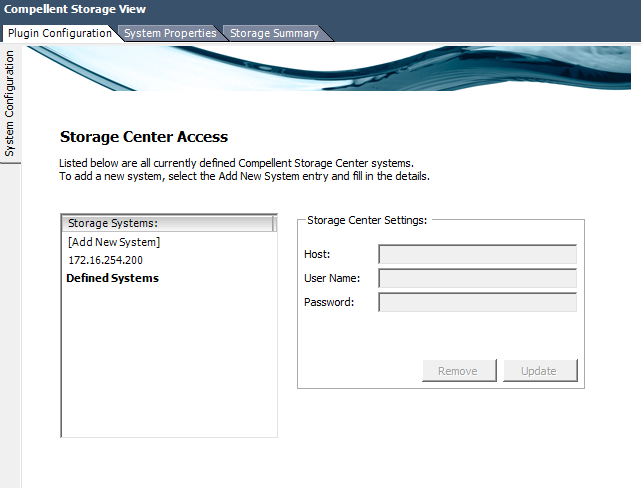
After adding the Storage Center you get the following tabs:
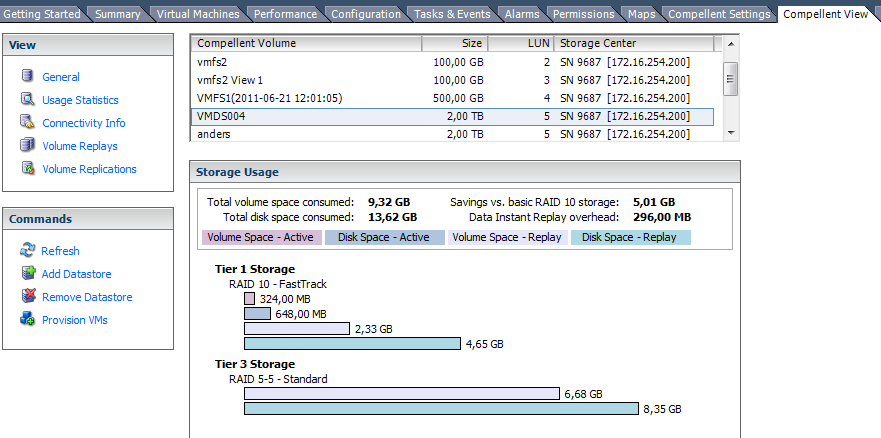
As you can see on the Compellent view, you can add and remove datastores, if this is done in here the compellent plugin will also format the datastore with vmfs and rescan datastores on the hosts. Also as you see on this screenshot you can for each datastore see where your data is and how much of it resides where, Tier 1 is the fastest and if you have setup with more than two different hdd you will get a Tier 2 and a Tier 3. The active blocks are moved to faster or slower disk depending their demands.

With the Replay function you can get SAN backup functionality and also for full consistent backup you can install a agent in the VMs to get them to prepare a vss snapshot before running the replays. Really cool to be able to take SAN snapshots this way.

another thing as you can see also on the screenshot is that the datastore is 2 TB but only 9,32 GB is used! Of course you have to size your solution to cope with the amount of data that you are going to store.

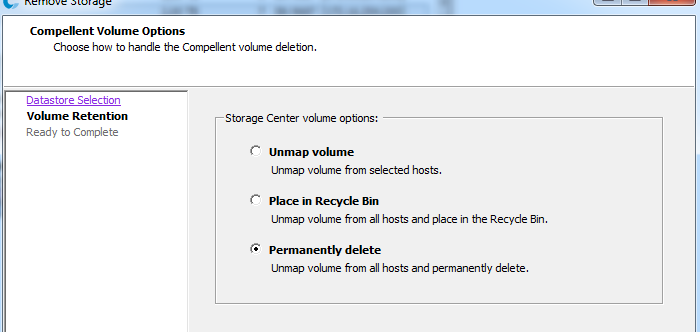
When deleting a Datastore you get the following choices, if you put it in the Recycle bin, you can get it back as long as not the space will be needed by some other data, as long as there is space in the Compellent you can restore the datastore and that can be handy if you had some VMs that you need later and did not migrate to another datastore.
The Compellent solution is very powerfull and has much more functions than i have highlighted here, i hope that i will get some more time to test and use it in the near future!

SC Orchestrator 2012 Beta installation

Today i used some of my valuable time to install the newly released System Center Orchestrator Beta that can be downloaded.

The installation process have been quite worked through and compared to the Opalis it is really simple and smooth now to get it installed, up and running. First i looked at the pre req and installed the required features and also a SQL 2008 R2 on the same server.

I had an unexpected error after install but i think it was because my service account was not a user of the database, after fixing that and starting up the Orchestrator Management service i could start the Runbook Designer and start making Runbooks without any problems…

As you can see on this screenshot there is some Opalis left in this beta, it will probably be updated when the product is released. For those who have worked in opalis before you will recognize yourself in the GUI cause not so much has changed as far as i have tested right now..

If i find something smashing during further testing i will do a new post 🙂

Disaster recovery of vSphere after disk array failure

Yesterday i had the opportunity to help a customer that had a disk array failure where both their PDU died and one hdd broke, after the hw supplier had replaced the parts some virtual machines had hdd´s and databases that where corrupt.

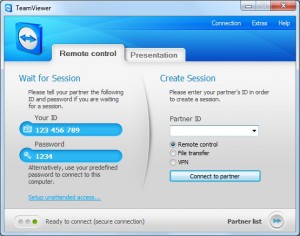
To be able to assist the customer i used the TeamView program that works excellent and is fast to get up and running, no need to get the fw guy to open new ports or get a new vpn account! For personal use there is a free version that works in two hours at a time, but the enterprise license is not to expensive and should be considered as the tool is so powerful!


This leads to the most important lesson of this is that you will have to be very thorough in your design and not put all your eggs in one basket. In this particular case the vRanger backup server, domain controller, sql server and vCenter server was on this datastore, luckily the vRanger did not have any corrupt data and we could restore the whole vCenter server. When the vCenter was restored we could continue and restore mailbox, sql and domain controller. I did restore the vCenter to another VM and when we saw that restore was ok we deleted the old vCenter server, but as the customer had vSphere Essentials we will have to manually rename the vCenter-Temp and how to do it you can read on this link, otherwise if you have Enterprise or higher as your license you can rename it and then do a storage Vmotion and the files will get the right names, its kind of difficult to do a storage migration when connecting directly to the ESXi host.

The following points should be considered

  • Ensure the placement of the vCenter server by datastore and host affinity to know where it is in a disaster recovery scenario
  • Make sure that the backup server can be used in case of a total datastore blackout
  • After implementing a backup solution, check that you actually can do a restore also!
  • Do not put all Domain controllers and DNS servers in the same vSphere cluster and datastore
  • Make sure that you do not use Thin disks and over commit the datastore without the appropriate alarms set.

Using a backup solution that can do backup on the virtualization platform and not inside the vm is the most effective solution to be able to recover fast and easily in the case of a total datastore failure. Most backup solution providers can offer this feature and for those not using it today should definitively consider it. For example the Quest vRanger can do file level restore from a VM backup.

Funny Hyper-v Ad on Slideshare vSphere Storage presentation

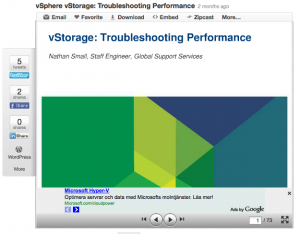
I had to screendump the following presentation from Slideshare, I found it from some other blog and thought it was  interesting as much of the virtualization success depends of the storage and how it is performing. I am wondering if this of course is intentional and MS actually pays google?! and also pays for setting this ad on vmware related stuff…


If someone is interested in this presentation follow this link, I really recommend that you get to know what esxtop values to look at and also if you have not checked it before, Align the VM-disks! This is done automatically when using win 2008 and later but check your win 2003 servers. If your storage can support the new VAAI i recommend you to enable it in your vSphere environment as long as it is at least version 4.1, this can be set with powerCLI of course and gives performance gains when doing provisioning, cloning or storage vMotion and also get better cluster locking and meta data operations…


Pimp my Macbook Pro with powerCLI

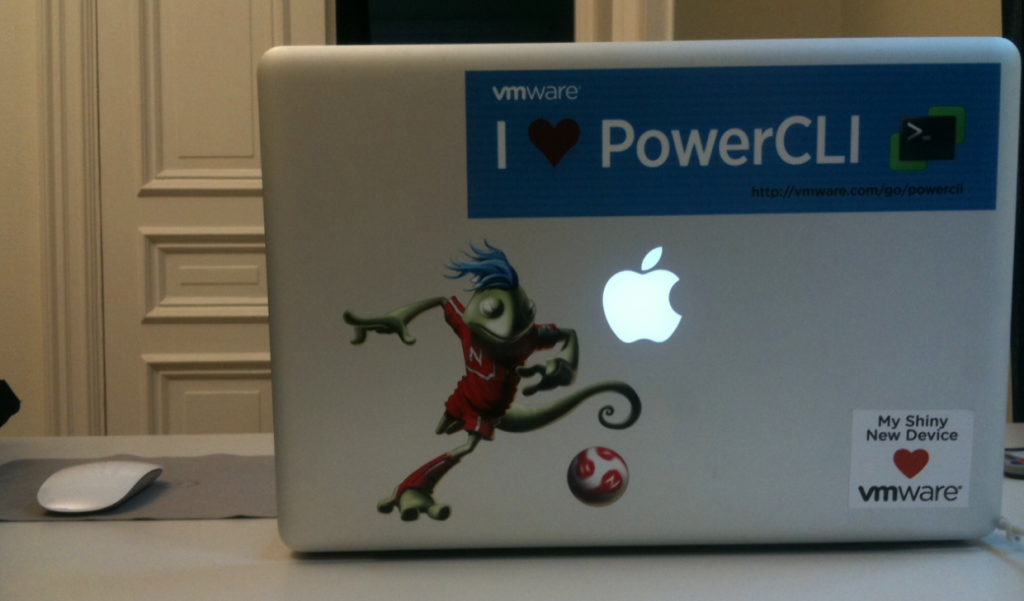
Probably some Mac fanatics will go crazy when they see my MB Pro and what i have done to it but i think it is quite funny and if I can get more attention by giving my mac a fine VMwarish look i think its cool..

I had to big ambitions when i wanted to find a VM and in what datacenter it was located at a customer today with powerCLI, at first i thought that it was not so easy as it really appeared to be 😉

i started by tinking after looking at Get-Datacenter | Get-View and Get-Datacenter | Get-Member that i needed something like Get-Datacenter | where {$_.vmfolder -eq (get-vm partVM | Select-Object VMfolder)} (that command gave me nothing)

I then read the excellent VMware powerCLI cmdlet reference and got happy as i realized that i only needed to use the following command and get the datacenter where the vm resided


Get-Datacenter -VM partVM

or i could also pass the VM object to the Get-Datacenter cmdlet


Get-VM partVM | Get-Datacenter

if i want to get what cluster it is in i use the Get-Cluster cmdlet instead


Get-VM partVM | Get-Cluster

Second day of VMware vSphere PowerCLI Automation Course

Friday was the second and last day of the Automation course, i would say that i now have learned some more of the powerCLI and also of powershell. As the material was for the vSphere 4.0 and powerCLI 4.0 u1, some of the lab commands came up as deprecated (which means that there is a new cmdlet that could be used instead) because the lab kit that we used had ESXi 4.1 u1 and PowerCLI 4.1.1. Also i would like an update of the lab material in some task that could be shortened (which i showed my lab partner) instead of of setting variable that is only used once. At some parts of the lab material there are sometimes used alias and sometimes the cmdlet, could cause confusion, but it is also good that it shows different ways of getting the same result, as long as the student think and not only write what it says. I don´t know if just our group was faster than others but we did complete all labs quite fast. I would have liked that either the instructor or the material included some more examples, scripts and other stuff that a VMware Automation Admin uses! I showed a fellow student mr Renoufs vCheck Script, and he really liked it 🙂


On twitter i got a question to blog about my tweet that said deployment of servers from a csv file, as there is more than one way to do it i found a shorter way as i said above than in the labs, this is the edited command from a presentation of Alan Renouf and Luc Decens that also uses a template and a OS customization file for the deployment.

Import-CSV C:\Scripts\Servers.csv | Foreach { New-VM -Name $_.Name -VMHost <code>
(Get-VMHost bimini02.rtsvl.local) </code>
-Datastore (Get-Datastore SharedVMs) <code>
-Template $_.Template </code>
-OsCustomizationSpec WinSpec02 -RunAsync}

And when you are ready playing around you run the following command,

Get-VM Br* | Remove-VM -Confirm:$false

This of course that your playing machines are called something like Br… and that no other production machines are named starting with that 😉

First day of VMware vSphere PowerCLI Automation Course

Today i have been attending the VMware vSphere Automation course for powerCLI. I don´t know how my fellow students think but i think the course could benefit of a little update and get some more content! There are some good resources that have much more information on the internet and also the VMware PowerCLI web with the powerCLI poster etc. The VMware PowerCLI reference book is going to be mine as soon as it comes to Kindle!

One thing i learned on my own with some help from the Internet and a powershell guru is how to recalculate a result and show it in antother unit for example GB instead of MB, the cool part here is that you include the math library to be able to minimize the number of decimals, this can of course be used on any result you want to remake..


Connect-VIServer localhost

Get-Datastore | Select-Object -Property Name, @{Name="FreeSpaceGB";Expression={[math]::Round(($_.FreeSpaceMB/1024),2)}}

so instead of the screendump below

i get the following:

Another thing that can be done with powercli is to set the Mtu for a vmkernel port to enable the jumbo frames support when using ip storage, as i understand this has to be done in some kind of script/cli to enable because it cannot be done in the gui, and also as important, you cannot edit an existing vmkernel port and change the Mtu so if you have set it up with default Mtu you will have to remove and recreate. Do not forget to edit the vSwitch also because if the Mtu is not set on the vSwitch or the physical switches you will not get the benefit of using the larger frames..


$VMHost = Get-VMHost -Name esxi02.test.local
$pnic = (Get-VMhostNetwork -VMHost $VMHost).PhysicalNic[3]
$vSwitch = New-VirtualSwitch -VMhost $VMHost -Nic $pnic.DeviceName -NumPorts 64 -Name vSwitch3 -Mtu 9000

$PortGroup = New-VirtualPortGroup -Name iSCSI -VirtualSwitch $vSwitch
New-VMHostNetworkAdapter -VMHost $VMHost -Portgroup $PortGroup -VirtualSwitch $vSwitch -IP 192.168.20.68 -SubnetMask 255.255.255.0 -Mtu 9000

If i find something cool in my journey in powerCLI tomorrow i will give an update 🙂

Xsigo I/O virtualization will change the datacenters…

Last week we had Xsigo visiting us on the office, at first i felt reluctant to another thing you have to put in and pay for when deploying a virtualization platform. but soon after we got into the presentation i started to get the picture and realized the huge capability of their solution and the gap in virtualization solutions that they fill.

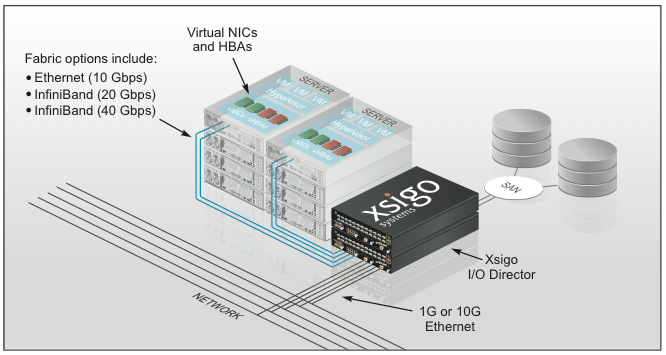
So what do their solution do? The whole point is to not only virtualize the servers with some hypervisors and buy expensive storage with autotiering and leave the middle layer with the SAN and Network connections untouched, in a large deployment there will be cables to connect, lots of cables..  So the point is to connect all storage and network to the Xsigo I/O Director and from that you connect your servers (blade or rack) with Infiniband cards and cables (they can support up to 40 Gbps), this leads to quite a lot of savings on cables. But the smartest thing with this is that you get intelligence in the Xsigo box which gives you the opportunity to choose what bandwidth you would like to assign to what traffic, because you connect everything to it (FC, FC0E, iSCSI, IP etc). If you have servers that SAN-boot you can very easily with their management software point this profile to another hardware and all MAC´s and WWN´s will be the same! Also as you can make Server profiles, your deployment of new hosts will be very rapid and with no delays from example the networking team or SAN teams cause you have already defined this when doing the connection of the exisiting SAN and network devices :-). Another thing that is worth mentioning is when for example you are changing storage from iSCSI to FC, you will not have to put HBA cards and cables at each server.


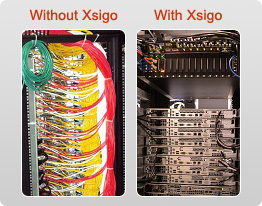
As you can se on the picture there is massive amount of cabling that can be reduced with this solution. What is also cool is that they have a plugin för the VMware vCenter so you can manage their system via the VI Client.

The Xsigo I/O Director is of course not for free but can be a real cost-saver and utilizer when deployed in a new datacenter or when redesigning an existing.


I hope to in a near future get more knowledge about this product and also implement it. if you look at their site you can see that they have some large customers that have adopted their technology.

Certification MCITP: Virtualization Administrator

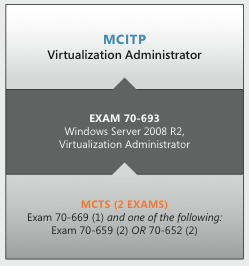
Today i took the 70-669 exam to become Windows Server 2008 R2 Desktop Configuration Technology Specialist, it was a little hard in some areas cause some of the questions was on MED-V that i have not so much experience in, but APP-V and Presentation virtualization was a bit easier. As always with the exams, read the question thoroughly and think about what they want and then look at the answers.

On tuesday i took the 70-693 PRO exam. and last year i took the 70-659 so now i am MCITP: Virtualization Administrator.

here is a graph of the path to become MCITP: Virtualization Administrator:

I have worked quite a lot with Hyper-V and System Center products and to study for the Desktop Virtualization i found this page and also used a free ebook to read, there are lots of free information on the internet and also some courses. The post that i wrote about earlier this month about the Microsoft Jumpstart videos also gives good information.

i have been teaching this 10215A on Addskills that is the course for Implementing and Managing server virtualization and i can recommend it for interested technicians that want to get to know the Microsoft virtualization technologies on server and presentation.

The course 10324A for Implementing and managing Desktop virtualization is quite new and i have not looked at it yet and as far as i know, no course centers offer it as of today at least not in Sweden.

Good luck in taking the exams! With the Second shot that Prometic offers at least some of the preasure is off your back to succeed the first time 🙂 although i have never had to use it …

5Nine Manager free for Hyper-V

I found a blog post about the 5Nine Manager for Hyper-V, the cool part about this tool is that it can be run on the Server Core installation and provide a GUI for management of the Hyper-V role and the virtual machines. If for example your host has problems and has network connectivity issues this tool can be handy and use to for example check the eventlog on the core server. It is developed on the Hyper-V public API´s and coded in .Net. The best part is that it is free, there is a 99 $ licensed edition where you also in Core can access the virtual machines console and configure hyper-v networking, but the free version is enough when in troubleshooting a failing host.

Features and Benefits:

  • Hyper-V Management – 5nine Manager for Hyper-V allows managing virtual machines, virtual hard disks and networks on both local and remote Hyper-V servers. Use 5nine Manager for Hyper-V to manage Hyper-V on Windows 2008 R2 core and Hyper-V Sever installations without resorting to remote management via the Microsoft Hyper-V Manager or Virtual Machine Manager Server. 5nine Manager for Hyper-V can also be used to administer Hyper-V R2 hosts joined to a domain that is managed by a guest operating system, thus overcoming cyclic dependency issues.
  • Network Management – 5nine Manager for Hyper-V provides comprehensive virtual network management as well as the management of virtual connections and bindings. Use 5nine Manager for Hyper-V to troubleshoot and fix network connections and related problems that cannot be fixed via remote management. 5nine Manager for Hyper-V Virtual Network Manager also allows reviewing and editing virtual network ports used by the virtual network interfaces and guests.
  • Secure your Hyper-V Hosts – 5nine Manager for Hyper-V does not extend a potential attack surface on managed Hyper-V servers and does not install or require any additional components.
  • Simple and Easy to Use – 5nine Manager for Hyper-V offers a simple and easy to use User Interface that is familiar to most of Windows 2008 Server users. In addition to this, 5nine Manager for Hyper-V further simplifies the administration tasks on Windows 2008 core installations and Hyper-V Server 2008 R2 by providing a Graphical User Interface for file system views and operations.
  • Maximize Host Performance – 5nine Manager for Hyper-V has a small memory footprint and does not consume any resources on managed Hyper-V servers when it is not running.
  • Follow Best Practices – 5nine Manager for Hyper-V is a valuable tool for managing the virtualization stack on production environments that are utilizing Windows 2008 R2 Server core installations according to Microsoft Best Practices as well as the Microsoft Hyper-V Server 2008 R2.