I had Honolulu in an earlier release installed on a Windows Server Insider 17035 build and wanted to try the new feature that came in 17079 with inplace upgrade, that did not however work out as wanted and I had to run a clean VM instead! I have not looked more into why the upgrade failed, probably because the documentation said that it was supported from 1709…
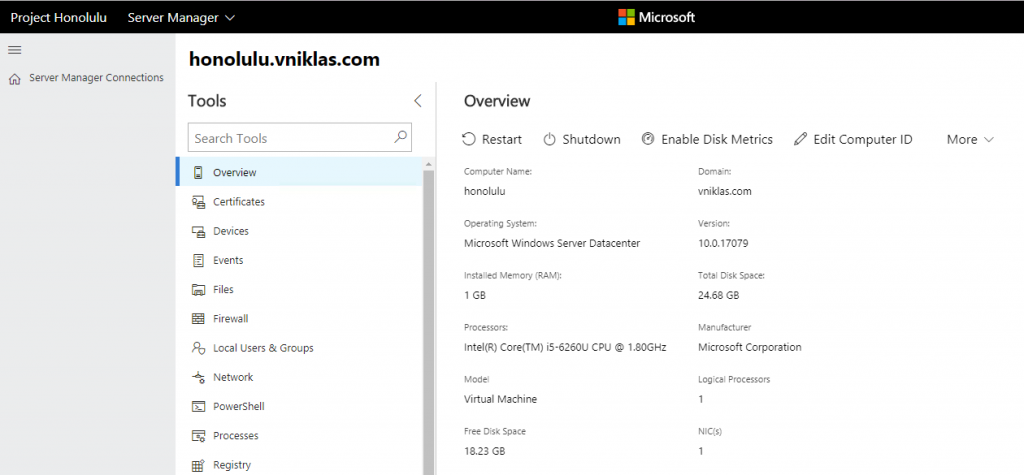
Thanks to the insider system it is already a VHDx there that I could download and use and add it to my domain.
Once that was done I could add the honolulu msi into the VM with the magnificent Copy-VMFile cmdlet
And after a simple install I could connect to it from a Chrome browser! (IE is not supported)
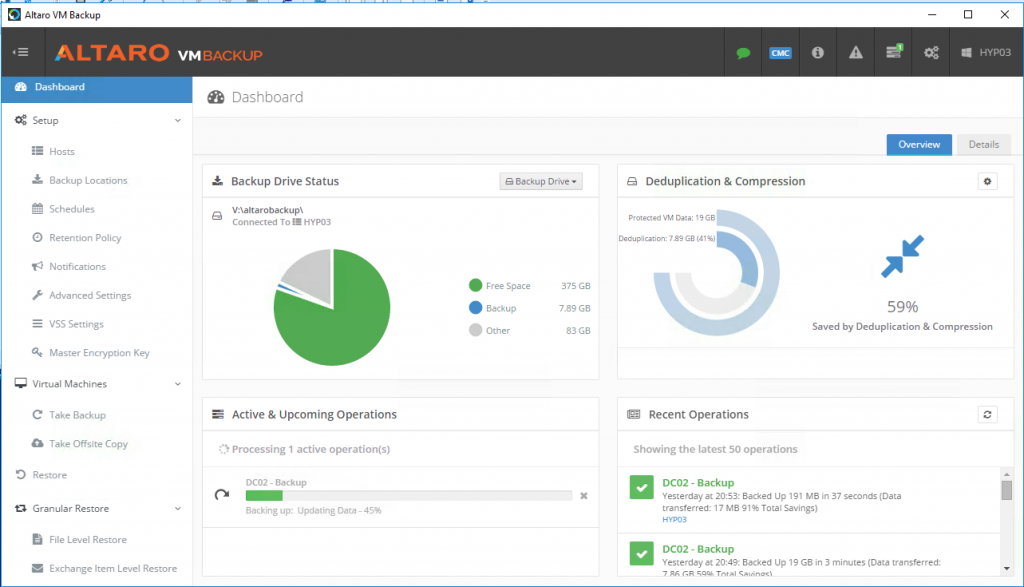
I have been trying out the Altaro VM Backup in my lab. It is a Backup solution that have been around for quite a while but also got support for VMware which was not part of the product in the start! Quite a few companies have both Hyper-V and VMware and having different backup solutions is not viable and place a burdon on the backup admins!
They have several very nice features:
Backup and Replication features
Drastically reduce backup storage requirements on both local and offsite locations, and therefore significantly speed up backups with Altaro’s unique Augmented Inline Deduplication process
Back up live VMs by leveraging Microsoft VSS with Zero downtime
Full support for Cluster Shared Volumes & VMware vCenter
Offsite Backup Replication for disaster recovery protection
Compression and military grade Encryption
Schedule backups the way you want them
Specify backup retention policies for individual VMs
Back up VMs to multiple backup locations
Restore & Recovery features
Instantly boot any VM version from the backup location without affecting backup integrity.
Browse through your Exchange VM backup’s file system and restore individual emails
Granular Restore Options for full VM or individual files or emails
Retrieve individual files directly from your VM backups with a few clicks.
Fast OnePass Restores
Restore an individual or a group of VMs to a different host
Restore from multiple points in time rather than just ‘the most recent backup’
Restore Clones
They do also have a REST api that can be utilized for automation which in todays world is a requirement for most business because of their standardisation and automation work to get better quality and speed.
The VM Backup Installation and configuration
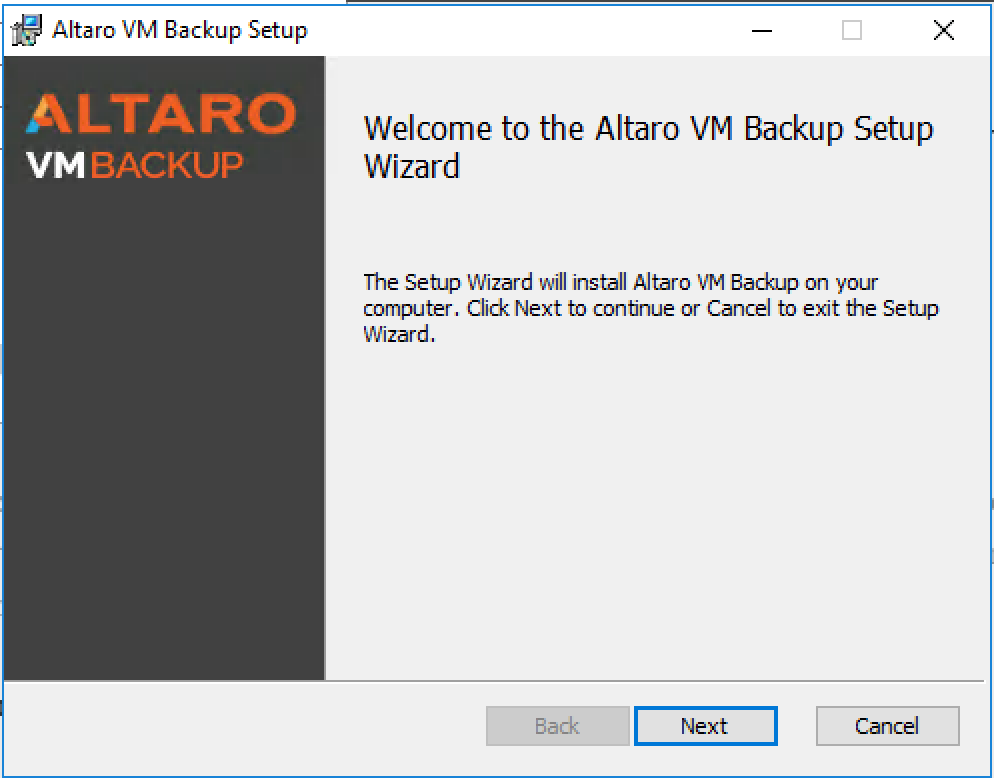
It is very easy to get started with Altaro VM Backup.
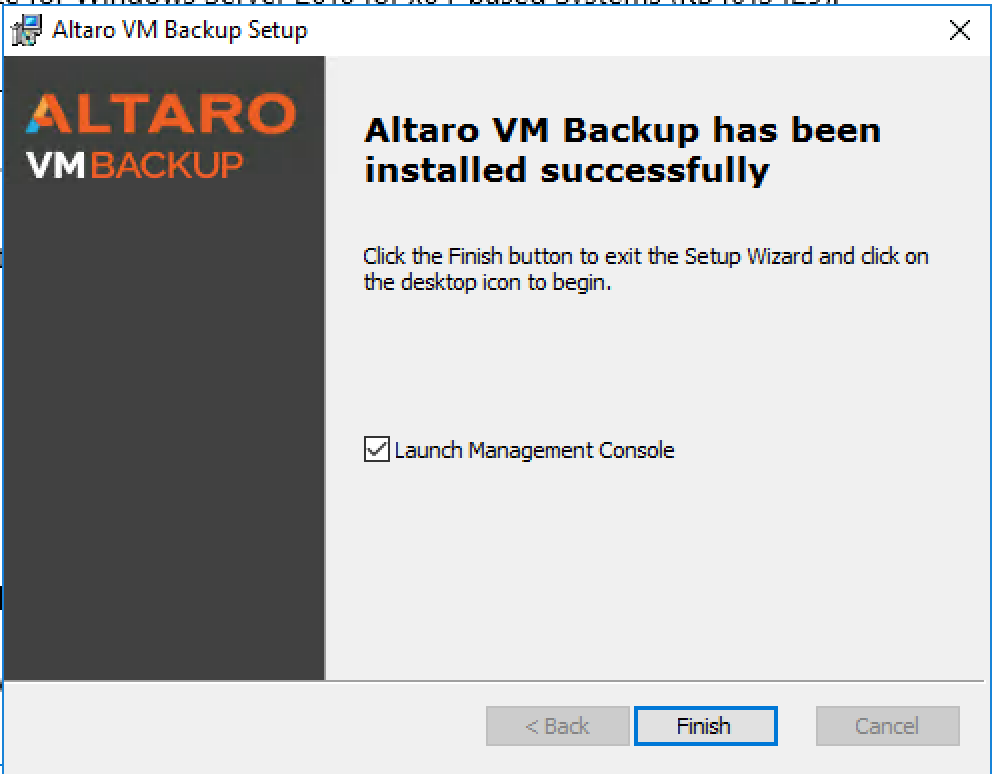
And once finished you can start the management console to configure the backups and also the repositories
The console is very easy to find your way around in and configure advanced settings
For the trial there are no limits so you can test it for all your VM´s in 30 days. You can also download the Free Hyper-V Backup or the VMware version. You will be able to back up 2 VMs for free forever.
Altaro has still a license that is not bound to cores or cpu and uses a host license instead!
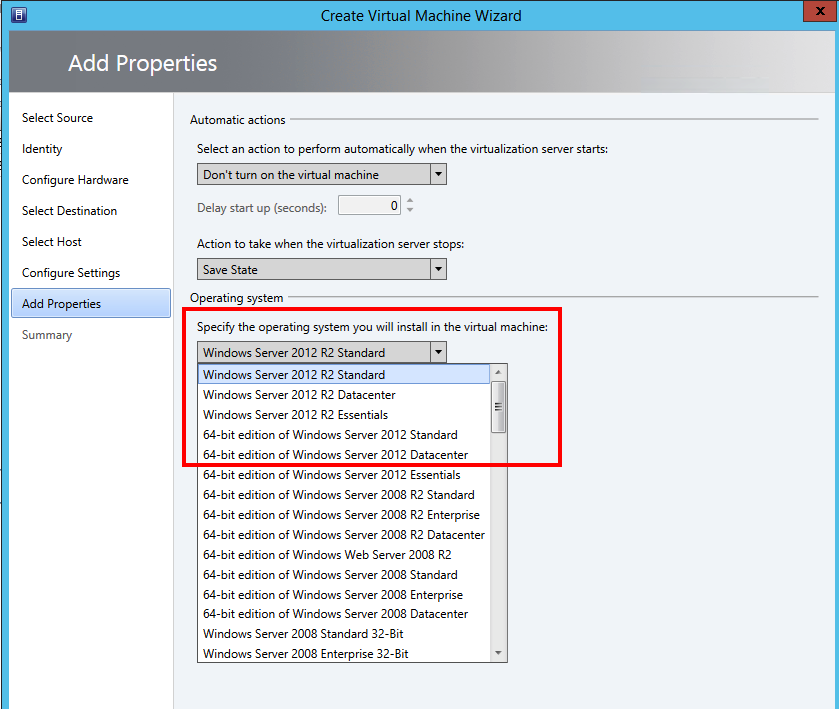
So I am working on a customer and their path of upgrading to 2016 versions. The first step was to make sure that the VMM 2012 R2 server was updated to latest UR and that I can deploy guest vm´s with 2016.
After the update of VMM to UR11 I checked the list of OS,
So to be able to see the 2016 as a guest OS i have to add a hotfix and that took some time but what ever you do, do not cancel but wait and wait and wait and the never ending progress bar will eventually go away 😉 . And yes you have to add one hotfix for the console and one for the vmm server!
Today I was at Microsoft Sweden and did a webinar on Windows Server 2016 Hyper-V and System Center VMM. This was the first of 5 webinars that Microsoft have this week focusing on the highlights on the new release.
The webinar was in Swedish and I will post a link to it when it will become available!
During Ignite 2016 in Atlanta, Microsoft announced the technical preview 2 of AzureStack and finally now this friday I got my hardware available (the dang server was not responding on the ILO port and I had to go to the datacenter to give it a kung-fu-devops-kick) so I could deploy the new bits.
First things first! Read the documentation about how to proceed and you will more likely succeed in your deployment!
The download for AzureStack is 20 GB so if you have a slow internet connection it will take some time!
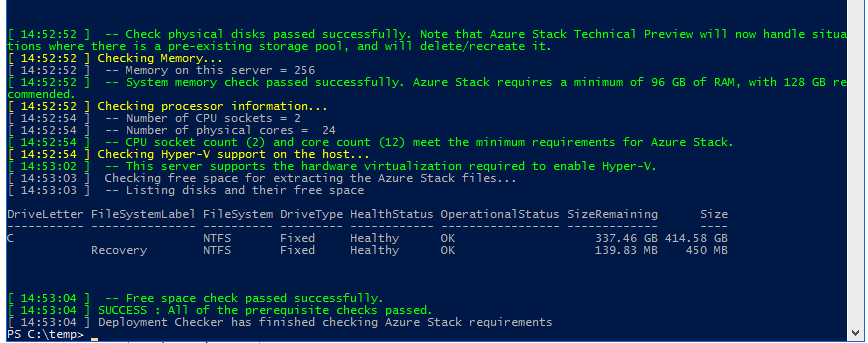
Before getting started i suggest you to run the pre-check script that can tell you if there is some immediate issues,
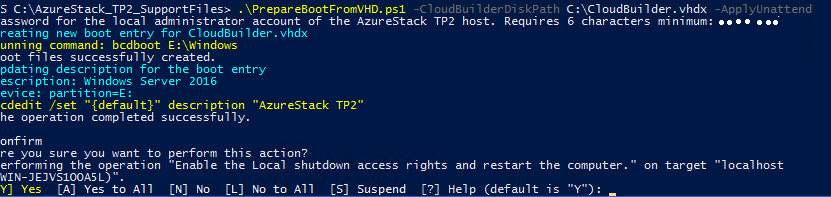
And then you can unpack and follow the instructions to prepare to vhd-boot into the cloudbuilder disk with the next script:
Once rebooted you want to make sure that you only have one nic enabled and then kick of the deployment which will take about 2-3 hours if you have a decent hardware like me 😛
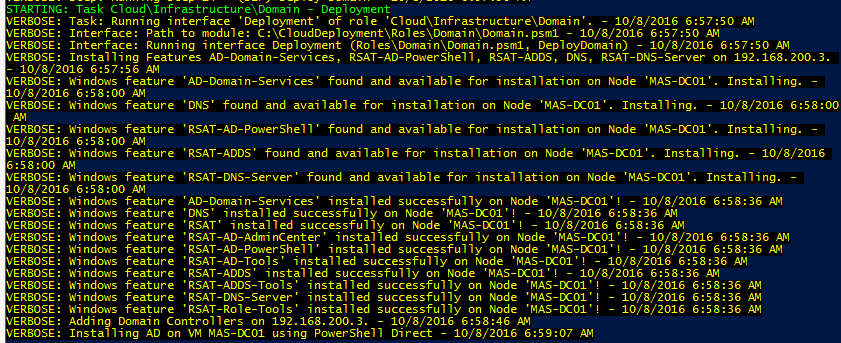
As you can see the install process uses both desired state and powershell direct (which is a lovely feature in Hyper-V 2016)
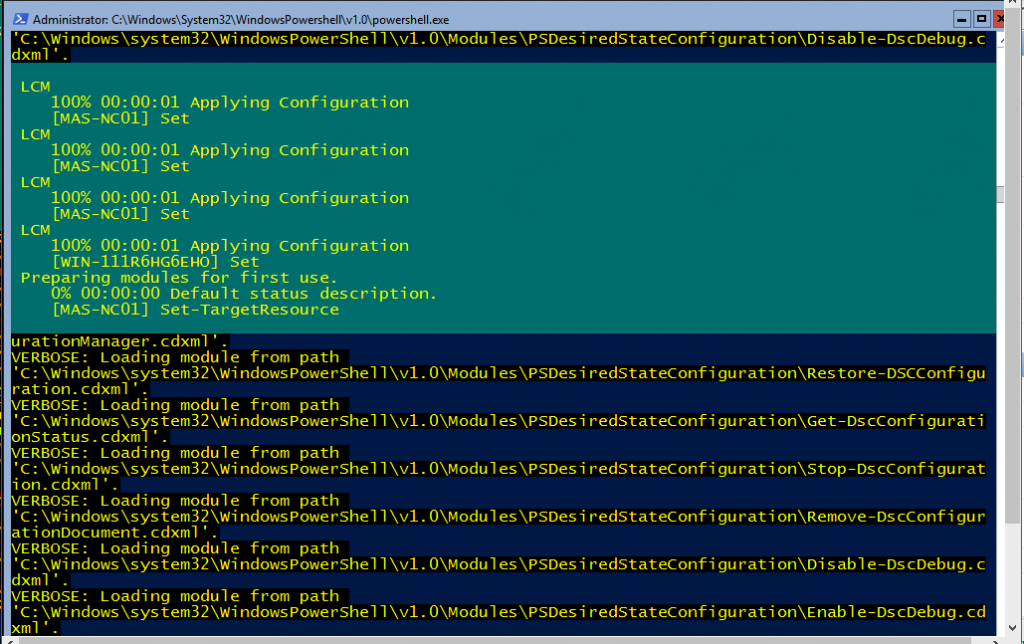
And if you are patient and then log in as a azurestack\AzureStackAdmin on the physical machine you will see the status of the deployment. Do not log in as a local user on the server and try to start the deployment again!
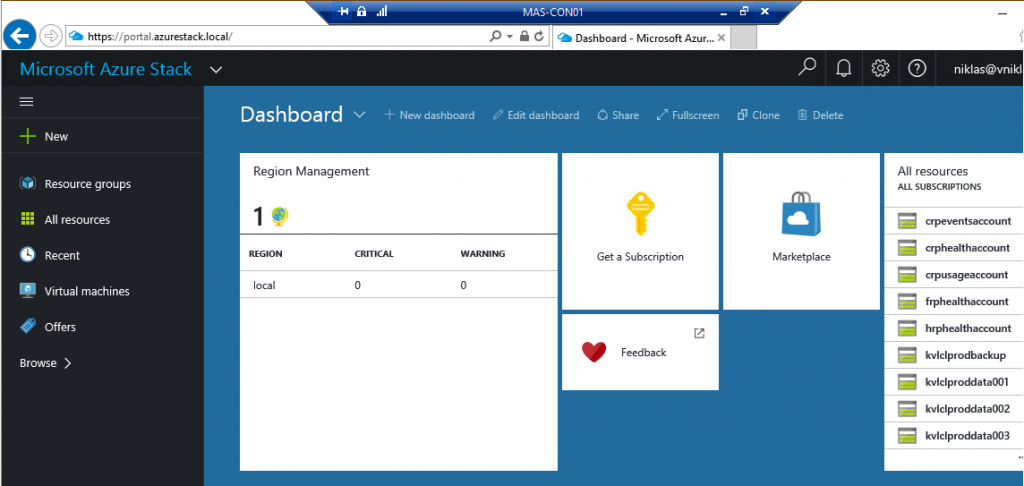
Hopefully you will end up with the same result as me:
And then you can log in to the VM MAS-CON01 to connect to the portal,
Maybe I was lucky but I believe that the Stack-Team has done some serious work since TP1 and the deployment process have been thoroughly developed, tested and works really good now.
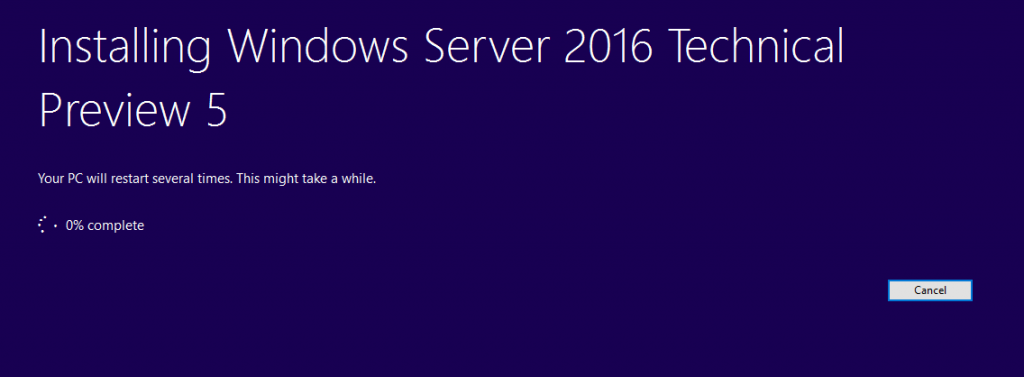
So the day have come when finally the new TP5 bits have been released! And I of course downloaded and wanted to test to upgrade one of my hyper-v servers in my home lab.
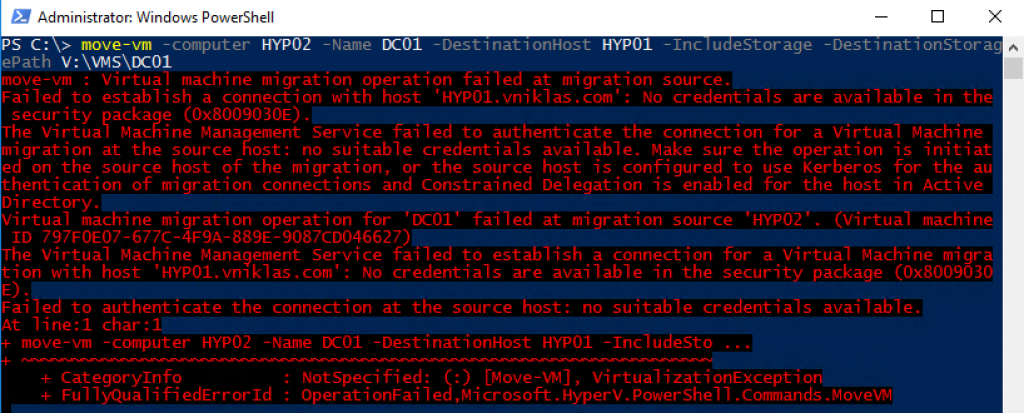
Once installed I tried to migrate a VM from the hyper-v manager at the new TP5 node, I had of course set up kerberos and delegation before but still it gave me an error. To see if it was just in the GUI or also in PowerShell I tried the same move and got the same issue
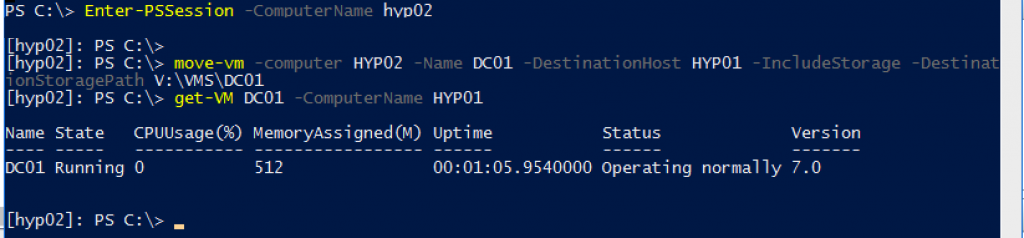
So powershell remoting to the rescue to test that I could live migrate my VM´s from the TP4 to the TP5 and that worked nicely. I will dig some more into if there is an issue with the AD objects or what causes this and do an update if I find anything…
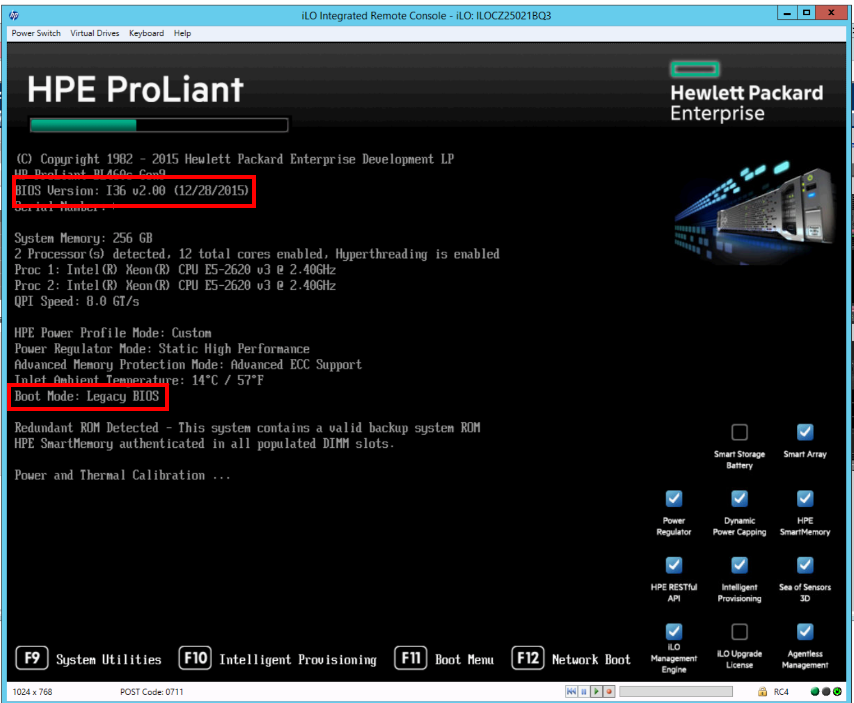
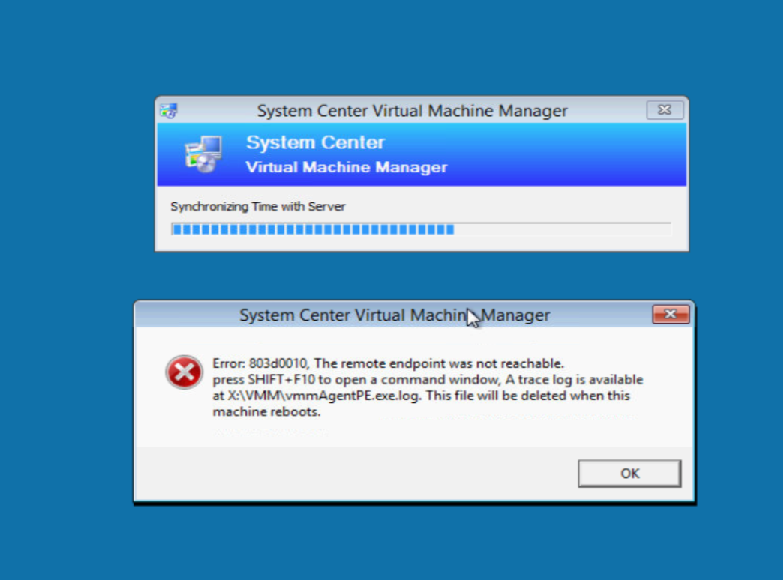
During last week I was working on some bare metal deployment on some Hyper-V hosts with System Center VMM. We had deployed them before using legacy boot but now we had updated the BIOS to latest version and got into some trouble.. Maybe it was because of the HPE instead of the HP 😉
During the deployment the WinPE got an error and could not connect to the VMM server,
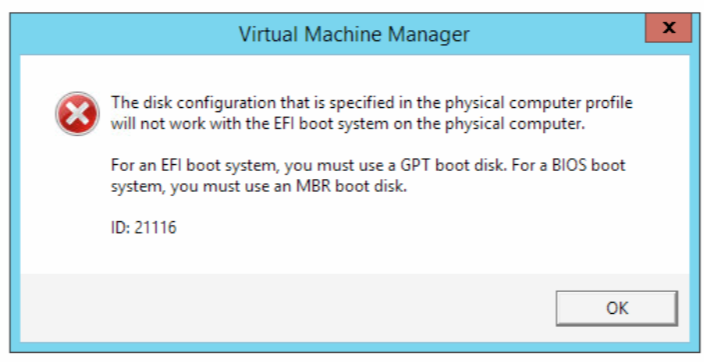
We tried to update NIC drivers and stuff on the WinPE image but that did not help. During the testing we started the server and configured it to boot with EFI instead of legacy boot and olala it worked to connect to the VMM server but thus as the Hyper-V VHD was MBR we got the following error:
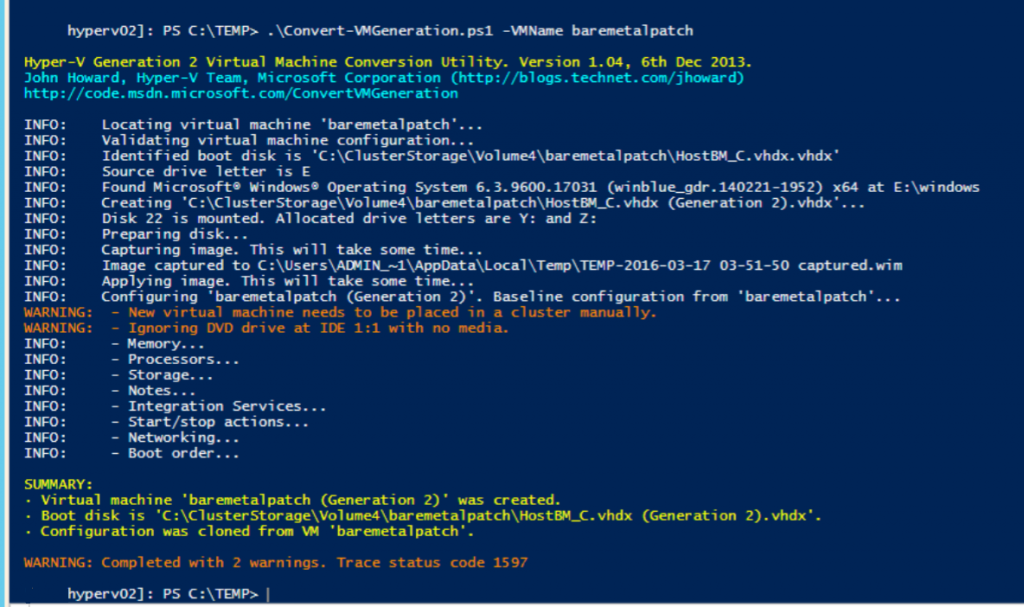
The easiest way I could think of right there and then was to create my new GPT based VHD to boot the Hyper-V host with a powershell convert script from the original MBR vhd. The script required to be run on a Hyper-V host so I connected to one of the Hyper-V nodes in the test cluster and ran the script on a patched VM that was sysprepped:
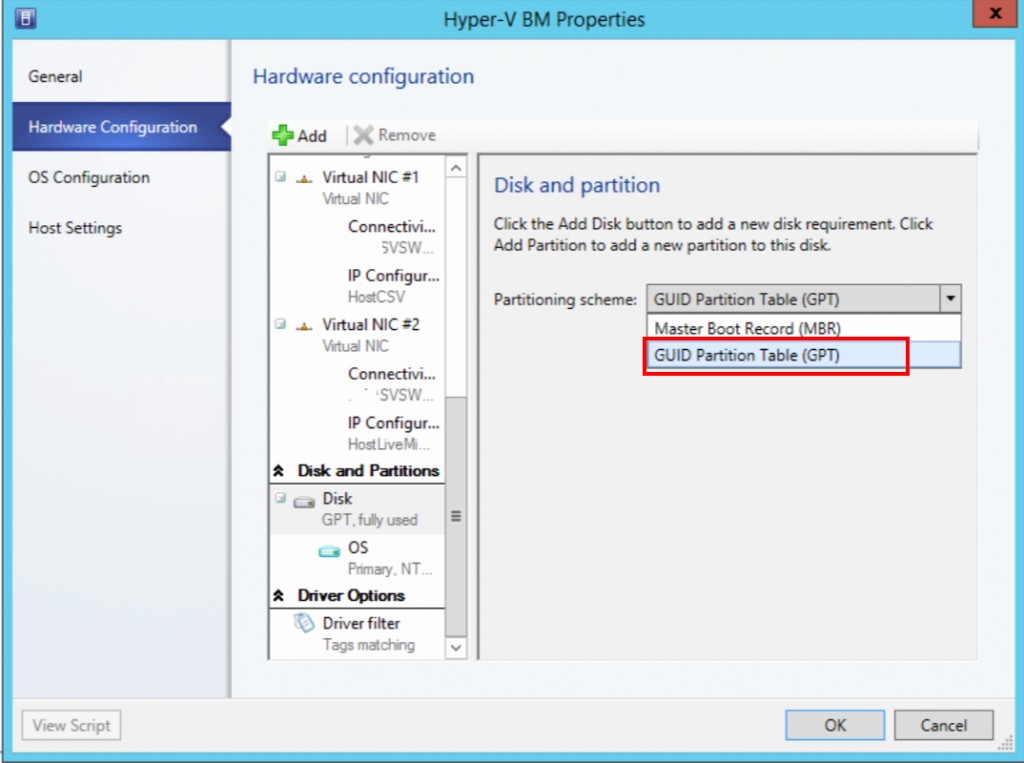
And once that was done I had to update the Physical profile to set the disk to GPT instead of MBR: