Schedule Hyper-V VM replication for non-office hours with PowerShell

If you have set up Hyper-V replica and are replicating your VM´s to a disaster site or maybe a branch office and that office might have a small WAN connection to the datacenter and you cannot get a faster connection from the ISP and for example you might want to stop the replication during the office hours and resume it on the night you can use the new Powershell version 3 feature scheduled jobs.

This will of course imply on your recovery when there was a disaster. But this can be compared to having an offsite DPM server that you sync to every 24 hours.

Anyway, if you want, you can enable a scheduled job that suspends and resumes a VM replication. I created earlier a blog post about setting up scheduled jobs. The following Cmdlets am I using in this case:

  • Suspend-VMReplication
  • Resume-VMReplication

A simple example, I have a VM that I am currently replicating and want it to be suspended during the day and then resumed when all my users have gone home and I have all bandwidth again.

First I add a replication receiver host for my replicated servers

PS C:\> Set-VMReplicationServer -ComputerName HV02 -ReplicationEnabled $true -AllowedAuthenticationType Kerberos -ReplicationAllowedFromAnyServer $true -DefaultStorageLocation c:\VMs

And then I need to set up the VM replication

PS C:\> Enable-VMReplication -VMName Brun12 -ReplicaServerName HV02.vniklas.com -ReplicaServerPort 80 -AuthenticationType Kerberos -ComputerName HV01.vniklas.com

PS C:\> Start-VMInitialReplication -VMName brun12 -ComputerName HV01

So How do I schedule then, as you can see on my screendumps, I have used other times for my scheduled jobs than you might want in your environment, you can also use other parameters than -Daily . Use Get-Help New-JobTrigger -full to get the help and there you can see all the options
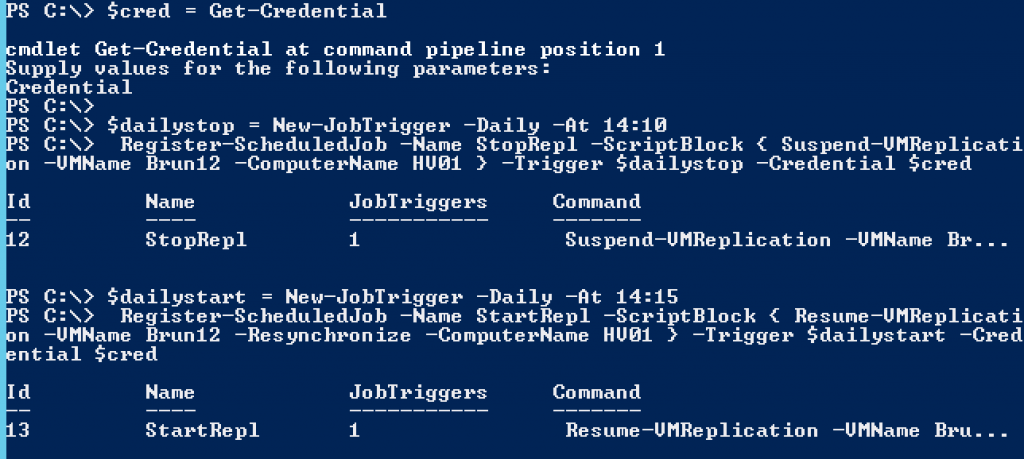
PS C:\> $cred = Get-Credential

PS C:\> $dailystop = New-JobTrigger -Daily -At 14:10
PS C:\> Register-ScheduledJob -Name StopRepl -ScriptBlock { Suspend-VMReplication -VMName Brun12 -ComputerName HV01 } -Trigger $dailystop -Credential $cred

PS C:\> $dailystart = New-JobTrigger -Daily -At 14:15
PS C:\> Register-ScheduledJob -Name StartRepl -ScriptBlock { Resume-VMReplication -VMName Brun12 -Resynchronize -ComputerName HV01 } -Trigger $dailystart -Credential $cred

And here on this screendump you can see that it works,
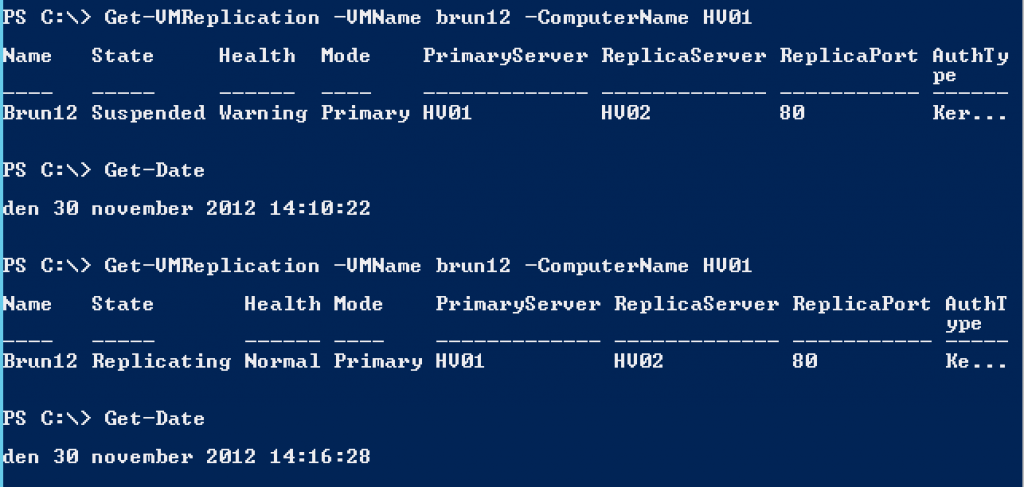
Another minor detail, If you have a VM that changes lot of data on the virtual disks during the day, it will take a while for the resyncing after a longer suspension.

Using the SC Orchestrator 2012 Sp1 to handle Azure

After I had installed and configured the System Center Orchestrator 2012 SP1 I wanted to evaluate and test how it works to create runbooks for my Azure subscription

As you can see on this link the prerequisite to get this working is

  • System Center Orchestrator 2012 SP1
  • Azure (well kind of obvious or? ;-))

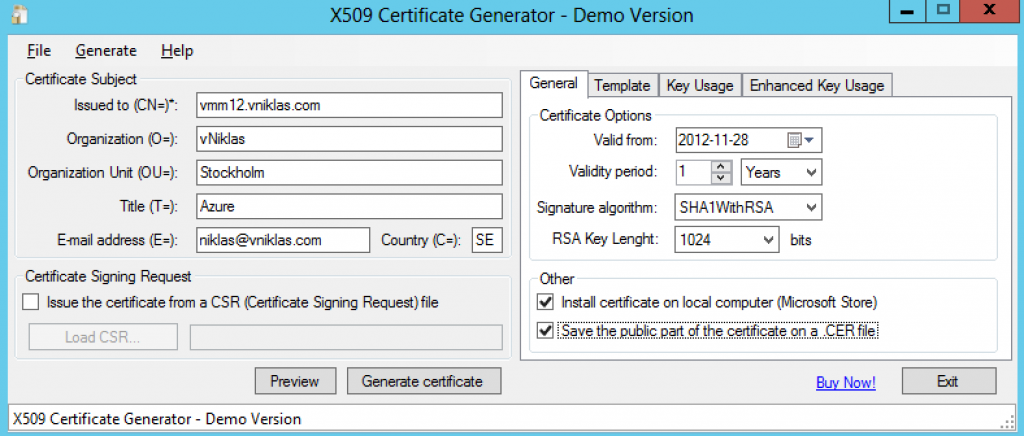
Also to get the connection working to Azure we need a x.509 certificate that we upload to the management site. The first x.509 certificate I tested did not work. Then I created one with another trial certification tool

The only thing that was negative with this tool, the cert is only valid for one month. I will make a cert with openssl instead but that another time!

When I have uploaded the certificate in the Azure Management site it looks like this,

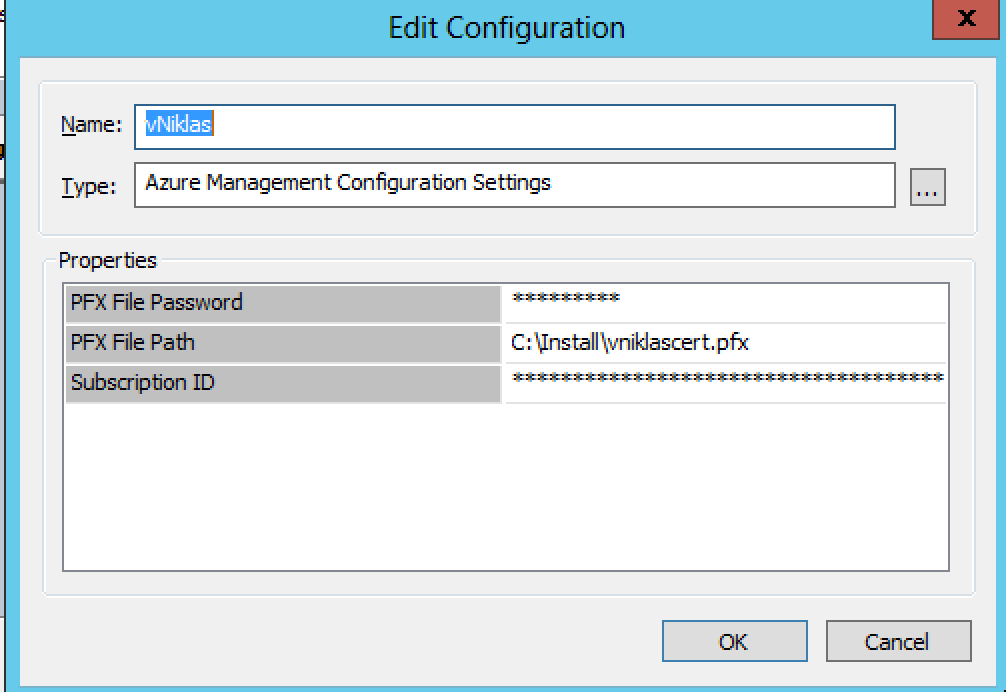
So now when I had a certificate I can configure the Orchestrator, I need the password for the .pfx and then also the path as you can see in the configuration dialog, and last but not least the subscription ID for my Azure subscription.

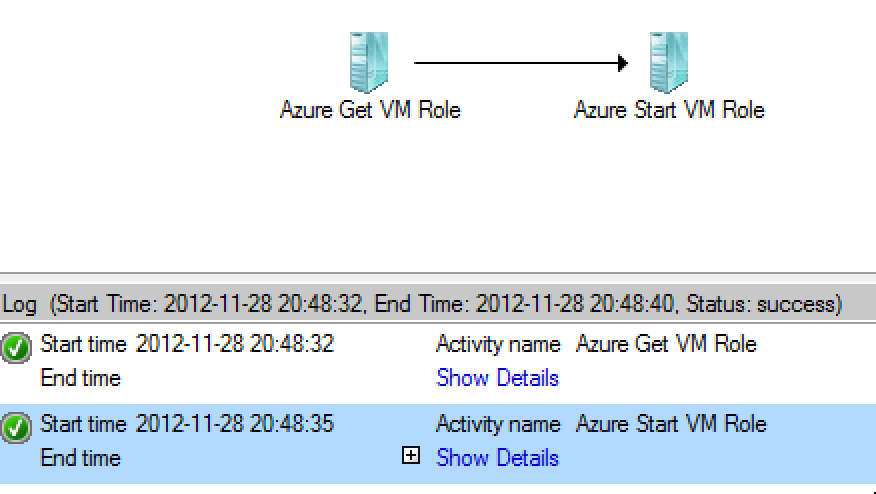
Then we are prepared for the creation of a Azure Runbook. In this technet page you can see what we can do with the IP for Azure. My first example is very simple, I look for a specific VM role and start that one just to see that I can connect and execute stuff in the cloud, and as you can see I successfully find my VM and started it.

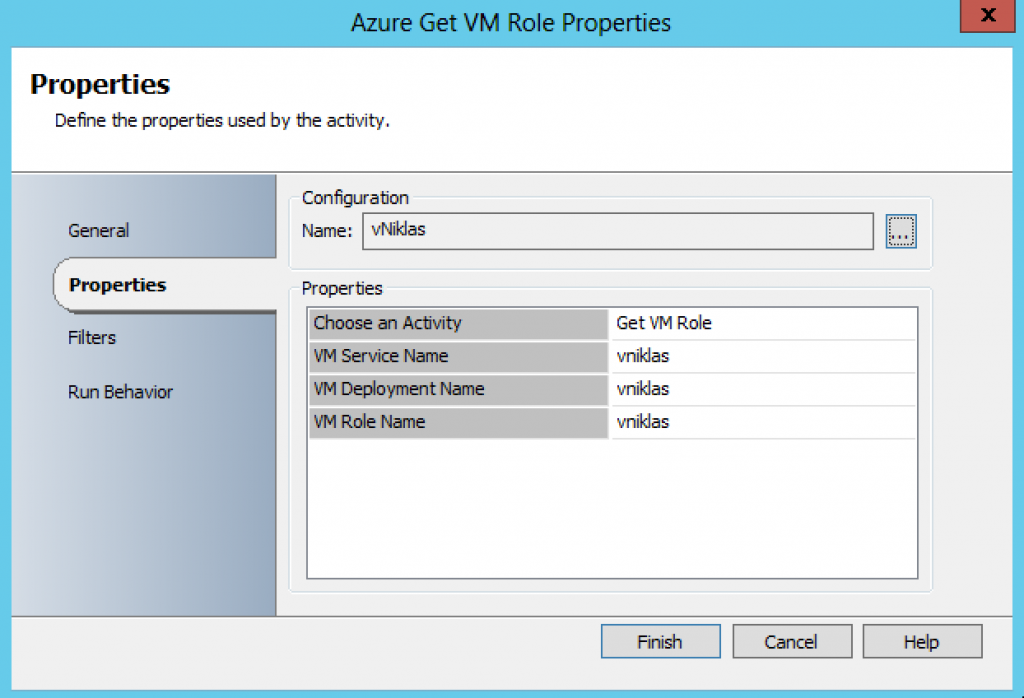
One thing that was not totally clear was the different properties that was to be entered, If I omitted one of the properties or entered a wrong value I got an error.

Now I have a trial subscription but if you have a paid plan one of the ideas of a runbook could be that you start or shut down some VM´s  at different times when you are using them. Each Visual Studio with MSDN license (except the test) that you buy have Azure compute hours that can be used and then of course you do want to have a bit control of them, and one way could be with SC Orchestrator or via Powershell cmdlets for Azure.

Installing SC Orchestrator 2012 SP1

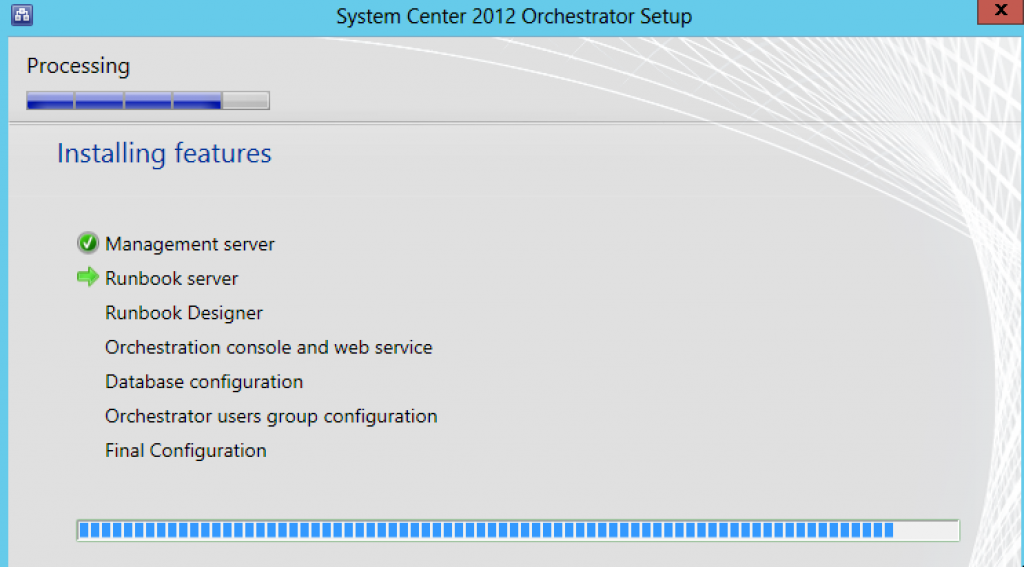
Today I have been exploring the SC Orchestrator and its functionality with Hyper-V 2012 and SC VMM 2o12 SP1. First of all to get it installed I had to run the installations in “run-as” otherwise it failed during the wizard. I installed it on a Windows 2012, and one prerequisite is that you have the .net 3.5 installed also.

One annoying thing is when you add Integration Packs, unlike for example Operations Manager and importing management packs, you can only add one IP at a time when importing.. And if you want to add like 10-20 first time it is a bit tedious! Please fix that in the RTM.

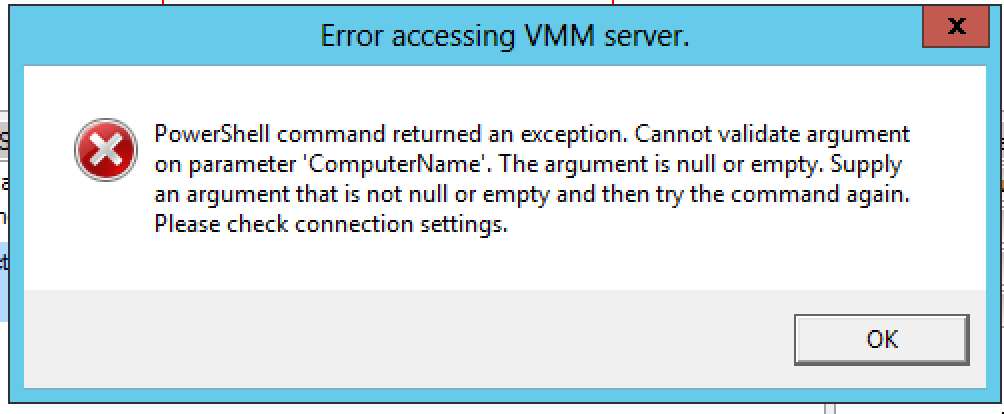
Another thing that I encountered was an error I did not first understand. When I had added the SCVMM 2012 SP1 IP and wanted to use it, I first added some configuration data but apparently it was not enough cause when I tried to use it I got an error

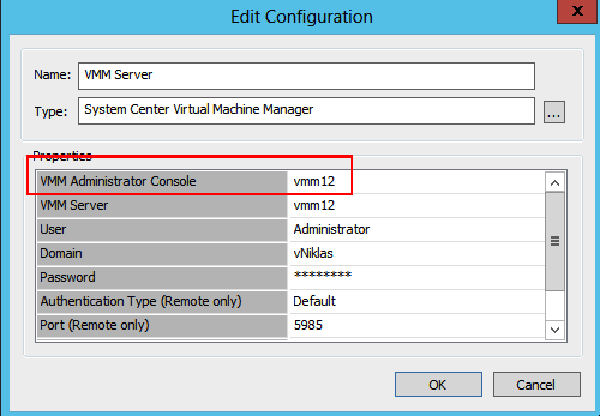
So what was the error, I had not entered the VMM Console information in the following configuration dialog and apparently the IP uses Powershell under the hood and connects to the powershell console with the vmm module.

When that was configured correctly I could continue to create my first runbook, look at this link to get some SCORCH examples (really handy to get the idea of how to use it and that in runbook examples to have in your Orchestrator designer)

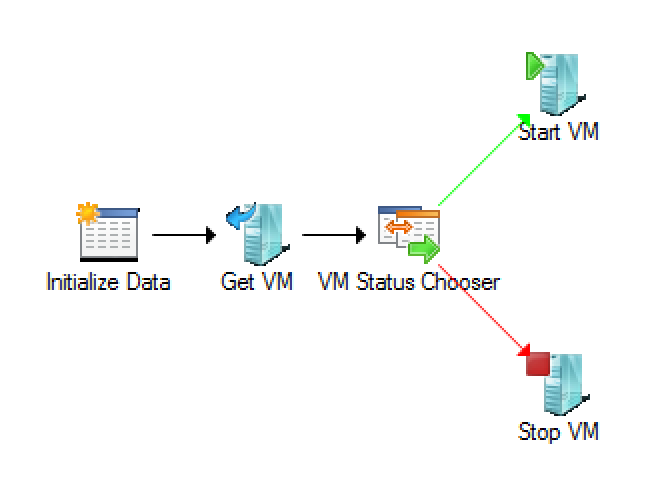
Here is an easy example, I enter a VM name and if the state is “Running” I stop it, and if the state is Stopped I start the VM:

I have been using Powershell quite a bit and not looking so much at the Orchestrator but it is really easy to get up and creating your runbooks. Try it out and see for yourselves.

SCVMM 2012 Evacuate VMHost and maintenance script

A customer found the bug that exists in the System Center Virtual Machine Managers function for setting a host in maintenance mode. The bug is that when you set a host in maintenance mode it will live migrate all VM´s to the next node in the cluster. This is kind of impractical when you for example want to patch the Hosts and you end up with the last host that is filled with in worst case all  VM´s on it and it takes longer time to live migrate them. The VMM bug should be fixed in the SC SP1 that is coming soon This of course depending on if you have enabled the Dynamic Optimization, that function helps you with the distribution but that will take some time before it runs.

He made a script for evacuating the host and distributing the VMs to the other nodes in the cluster. I have added a bit of logic that also set the host group to not allow dynamic optimization during the scripted evacuation.

The load balancing in my script is quite easy because right now the only thing I look at is the host memory and migrate the VM to the Host that has most memory left at the moment.

<#
.Synopsis
   A function to evacuate a host in vmm and set it in maintence mode
.DESCRIPTION
   This function migrates all your VM´s to other nodes in the cluster based on available Host memory
.EXAMPLE
   Evacuate-SCVMHost -VMHost hyp02 -HostGroup DC01
.Notes
Niklas Akerlund/Lumagate 2012-11-25
#>
function Evacuate-SCVMHost
{
    [CmdletBinding()]
    [OutputType([int])]
    Param
    (
        # What VMHost you want to set to maintmode
        [Parameter(Mandatory=$true,
                   ValueFromPipelineByPropertyName=$true,
                   Position=0)]
        $VMHost,

        # In what hostgroup the host resides 
        $HostGroup
    )
    # Get The cluster and disable the dynamic optimization during evac 
    $HostGroup = Get-SCVMHostGroup $HostGroup
    $HostGroup | Get-SCDynamicOptimizationConfiguration | Set-SCDynamicOptimizationConfiguration -ManualMode 
    $VMHost = Get-VMHost $VMHost
    # Evacuate the host
    $VMs = $VMHost | Get-VM
    foreach ($VM in $VMs){
        # Find the most apropriate Host in cluster for each VM
       $VMHostTarget = Get-SCVMHostCluster -VMHostGroup $HostGroup | Get-SCVMHost | where {$_.ComputerName -ne $VMHost.ComputerName} | Sort-Object AvailableMemory -Descending | Select-Object -First 1
       Move-SCVirtualMachine -VM $VM -VMHost $VMHostTarget  
        
    }
    # Set the host in maintmode
    Disable-VMHost -VMHost $VMHost -MoveWithinCluster
    # Enable dynamic optimization
    $HostGroup | Get-SCDynamicOptimizationConfiguration | Set-SCDynamicOptimizationConfiguration -AutomaticMode
   

Internet Explorer 6.0 in my Win8 Enterprise version

Yesterday I too the challenge from VMware Sweden to be the first presenting an image of an working Thinapp 4.7.3 packaged Internet Explorer 6.0 on a Windows 8.

This function within ThinApp is quite powerfull. Think of the enterprise applications that have an legacy webapp and that does not allow you to upgrade your web browser cause then it stops working. So how do you do when your users also are connected to the internet and the vulnerabilities out there when you do not have an updated web browser.

Here the ThinApped Internet Explorer comes in to play. You can use the ThinApp ThinDirect for those url containing the corporate web sites that require an older web browser and without the user needing to do anything they get the virtualized IE6 connecting to that site.

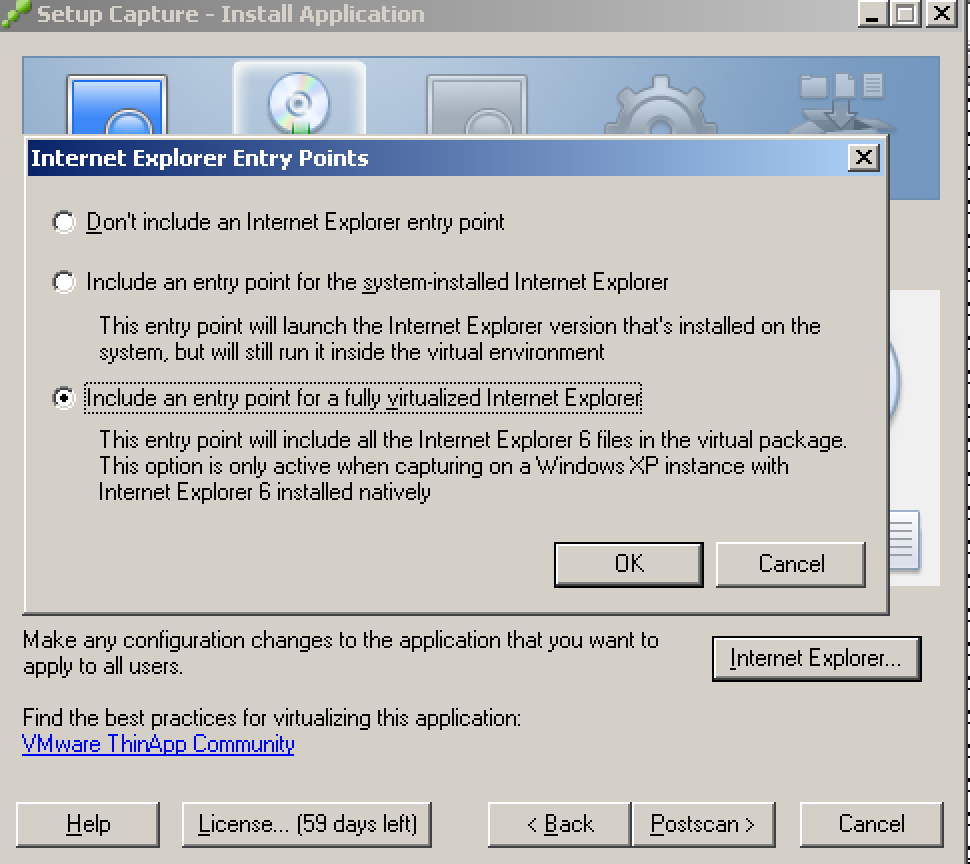
Here is a screendump on the configuration dialog for the Internet Explorer, and if I want the Internet Explorer 6 extracted from the OS ( in this case I am getting mine from a win 2003 Sp1)

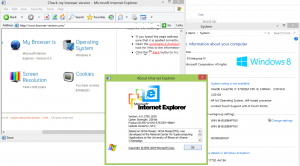
And here you can see when I am running the IE6

I think that it is really easy to create ThinApped packages and also so powerful as you can see!

Scheduled Defrag in Windows 2008 R2 disabled by default

I was at a customer yesterday and got a tip about the defragmentation in Windows 2008 R2. It came up when we where discussing about the SCOM and an alarm in Operations Manager regarding fragmentation on monitored volumes.

I thought that it was doing things automatically but the scheduled task that is responsible for the defragmentation is disabled by default. Now there is different best practices regarding if you should be defragmenting the volumes if it is virtual machines residing on a SAN. If you have physical servers with local drives I would definitely say that you should be doing defragmentation.

So how do you see if your defragmentation task is enabled or not?

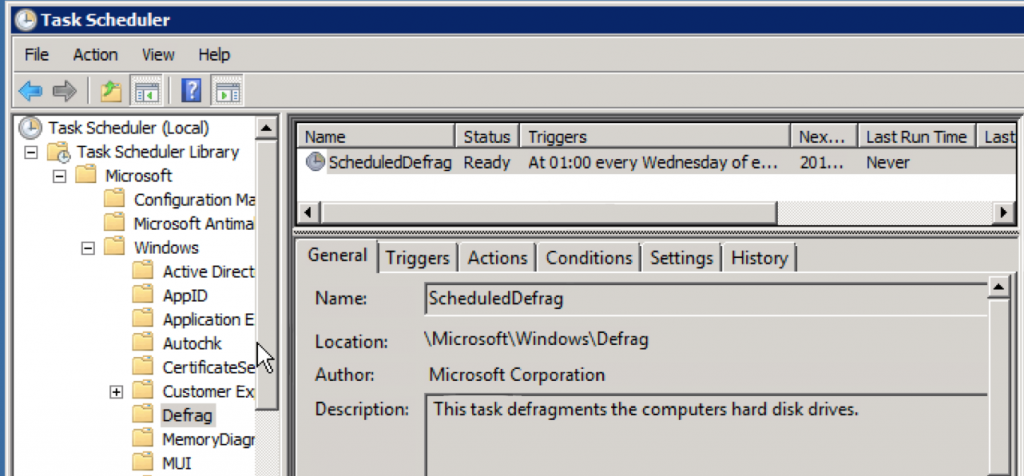
Open the Task Scheduler from Administrative Tools and go to Defrag

Then if you check the properties by changing to triggers on the scheduledDefrag task and look, you will see that it is disabled by default, double click on task and you can edit it.

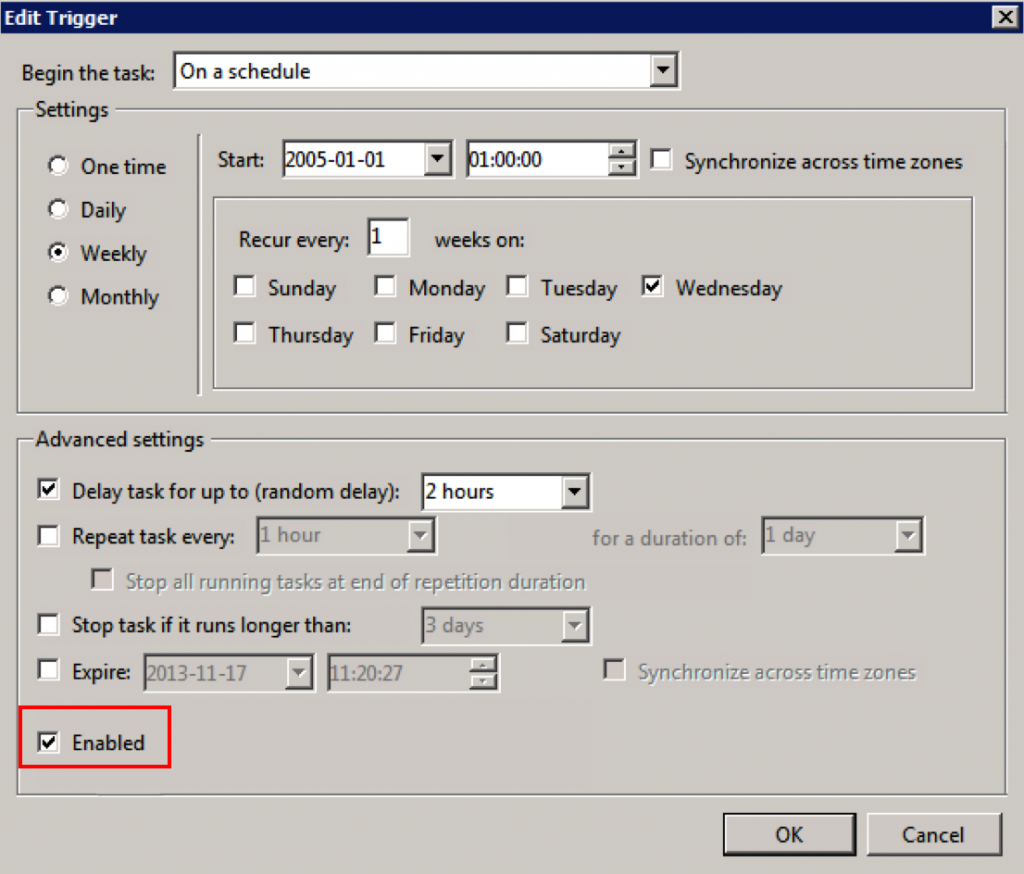
You can then press the edit button and enable the task

Then your task is enabled and on every wednesday at 01:00 the defrag task will be running. As I wrote above, enabling this in a virtualized environment with 100+ VM´s can impact on your storage system quite seriously if all VM´s start to defrag at the same time. One way to mitigate this is to set the start day and start time different on all machines.

Some PowerShell and Windows Hyper-V 2012, find VM´s not connected

Digging around in the powershell module for Hyper-V have given me some ideas on what you can do.

Have you ever wondered about if you have a VM that is not connected to any network?

First you use the script part I showed in an earlier post, how to find Hyper-V servers in your AD :

$VMhosts = Get-ADObject -Filter 'Name -like "*Hyper-V"' | %{$_.DistinguishedName.Split(",")[1].replace("CN=","") }

And then you can run the following to list all VM´s that are not connected to any virtual network

$VMhosts | %{ Get-VM -ComputerName $_ | Get-VMNetworkAdapter | where SwitchName -eq $null}

In this little screendump you can see for all my Hyper-V hosts what VM´s without a network connection, you can also easily change the -eq $null to a switch name and then get what VM´s are connected to that particular virtual switch on all your hosts

good luck 🙂