Noticed today that during the Build conference that Microsoft released an update to Windows 8.1 and also for Windows Server 2012 R2.
The improvements have been blogged at this MS link
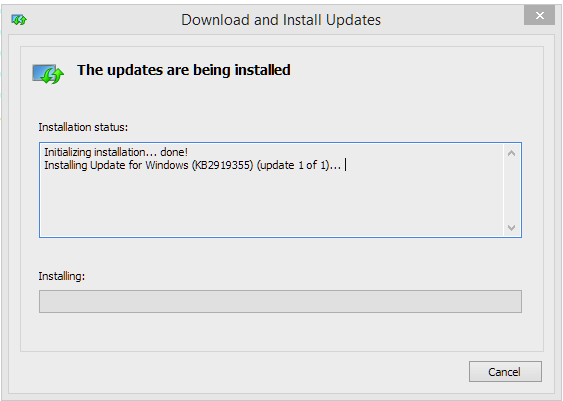
I downloaded from my MSDN and started installing
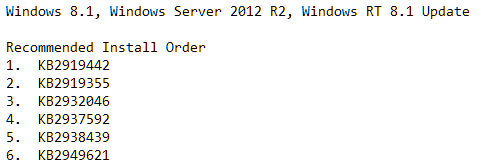
In the Update zip there is a text file describing which KB that should be applied first and in what order.
No problems during the installation but several reboots though 😛
And once installed I can among other things see that when logging in I get to the desktop directly and I also can find the power button and search from the startscreen!
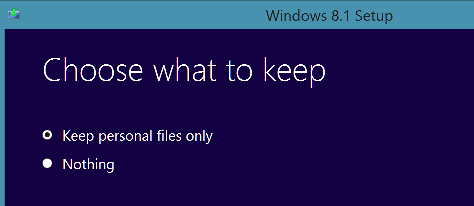
Today I wanted to upgrade my Windows 8.1 Preview to the RTM release as it was released yesterday 🙂
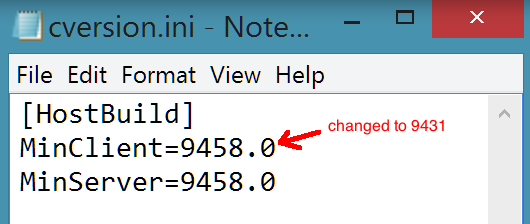
In the RTM version you cannot upgrade from the preview to RTM and retain the installed apps without altering the magic cversion.ini file and I am a lazy guy and do not want to install all my apps again after installation ( or just curious to see if it works).
This is not a supported way of doing things of course, but it is possible.
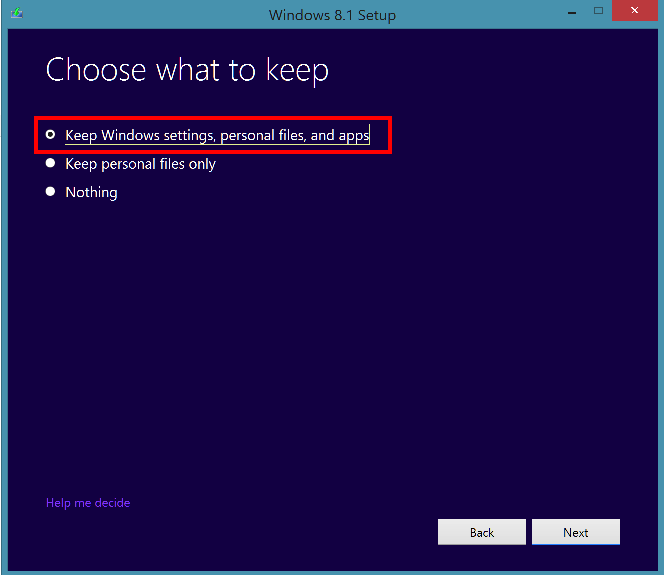
So I edit the cversion.ini and change the build number to the preview version and voila the option to retain both apps,personal data and settings appear. The cversion.ini file is found under the Image\Sources.
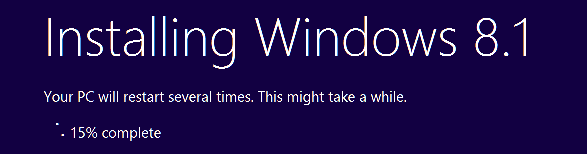
And then the upgrade started..
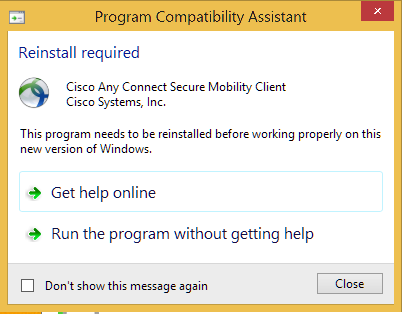
Although after the installation finishes some application reinstallation occurs and my vpn client wants to be reinstalled with the new version.. well you cannot get everything 😛
Lync started directly after I logged in but when starting Outlook I had to restart the computer as you can see below and then it also worked nicely 🙂
Today I read on a forum that they where discussing how to get a folder and the files from a virtual machine running on Windows 8 client Hyper-V by enabling and fiddeling with the network. In some cases you do not want to enable networking on that guest to the Win8 host and then you can use the way that Ben showed.
Or you can use an VHD that you first connect to the Win8 host and then copy the files and when you are done you can disconnect it from the host machine and connect it to the virtual machine, with this approach instead of the snapshot you can also add files from the host to the virtual machine and the other way around.
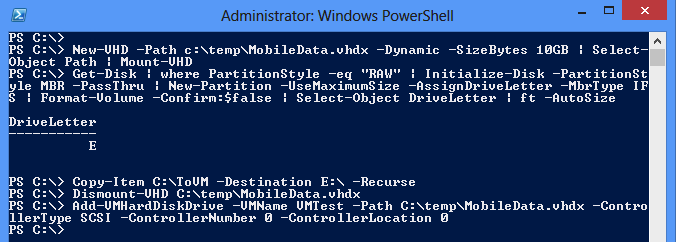
So With PowerShell I first create an VHD and mount it to the Host, create a partition and format it and then I copy the data I want to transfer and then also mount it to the VM.
As you might know, why I use the SCSI controller is to be able to hot-add the virtual hard disk to the VM while it is running and not having to shut it down 🙂
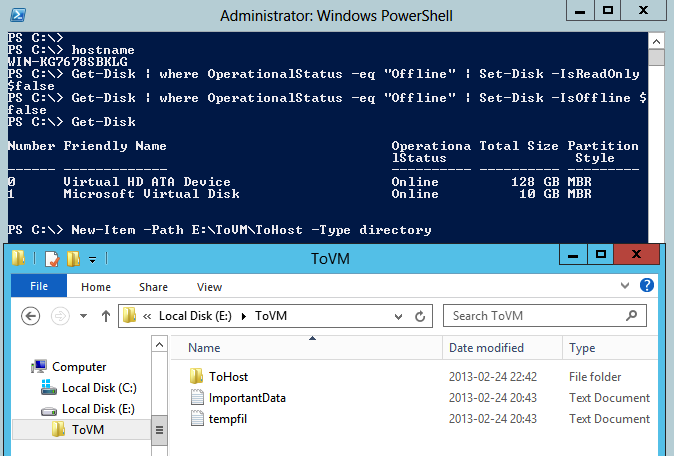
The first time in the VM I have to do some massage on the disk before it appears but the next time the VM´s OS recoginize it and it can be used directly.
And as you can see in the screendump above of the virtual machines folder with the files and also you can see that I can add data inside the VM to my virtual disk. If I would just use the Set-Disk -IsOffline $false I would get a volume that was write protected and here I wanted to add files and folders from the virtual machine also.
And when I am done moving files I can easily disconnect the disk from the VM from the host by using the following PowerShell cmdlet
This weekend I have been trying out Microsoft Assessment and Planning toolkit that late last year came in version 8.0. Last week I was attending a partner training in the DCCM PA on VMMT and one of the components in that is the MAP. The VMMT uses both SC Orchestrator and Veeam Backup and Replicaton to help in automating migration of VMware VM´s to Hyper-V.
I have been working a lot in NetIQ Platespin Recon and had some pointers to the MAP team last year at the MMS in Las Vegas, but not all ideas has yet find their way into this product and yes it is free to download so maybe the resources to this team are limited. I will show you two of the most annoying things later in this post.
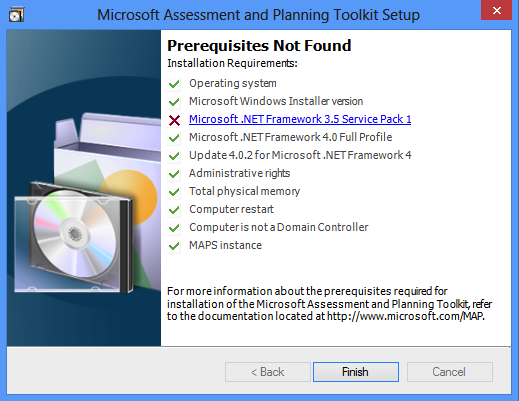
I tried to install it on a Windows 8 and got the following error,
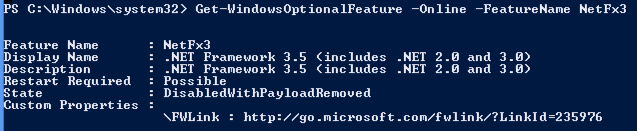
So with powershell I easily add the .Net 3.5 (It is not in there by default)
As you can see the output says it does not need a restart but when you try to install there will be an requirement error that says you must restart. and after that everything is ok and I successfully installed MAP.
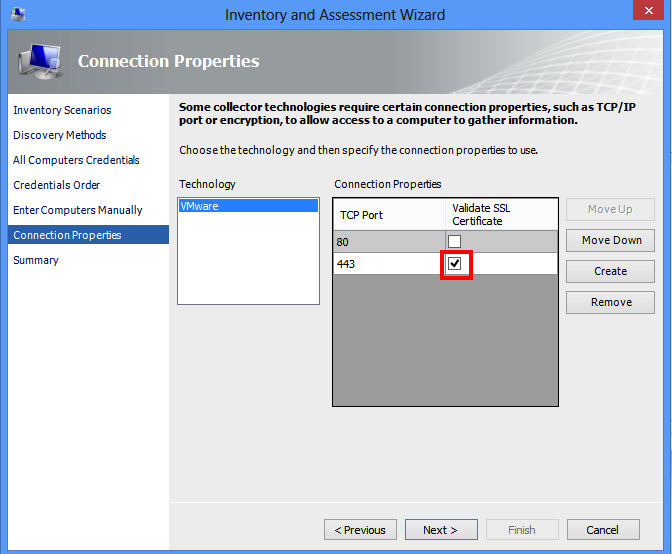
As for when you want to inventory your VMware environment you do not need to enter every host, Point out the vCenter and an account to that and you are fine, MAP will then analyse and inventory that for hosts and VM´s. If you, as many customers I have been at, not changed your SSL certificate after installation of the vCenter it is important that you uncheck the following SSL verify check or you will not get any inventory data and it helps to also add an account that can talk wmi to the VM´s so you get more information about them.
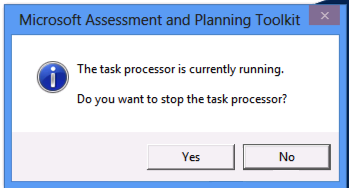
So what is the annoying things with this great product. first of all it is not an service so when you want to capture performance data you have to have the application up and running the whole time it is collecting (and no that is not good design). In an migration and consolidation project you want to get data for at least a week and probably a month or more and then have to rely that the application is not closed during this time is not so good (fix that in MAP 9 please). The following screendump shows what dialog I get when I try to close the application
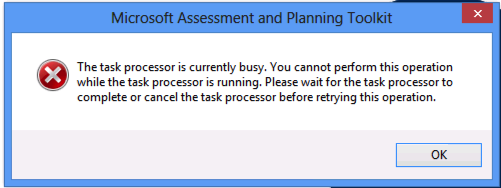
The next thing is that you might want to get some reports during the performance capture but that is not possible because the task processor is busy (well I heard about single thread applications but did not think they lived in 2013).
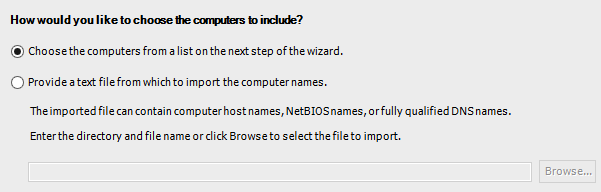
One thing they have fixed is when you are going to collect the performance data you no longer need to add the computers from a csv file as in earlier versions (did not try the 7.0 so do not know if it was fixed already then) but now actually get a list you can choose from!
Besides these small feature requests or what we should call them I think MAP is a great free tool to help you in getting good answers in your environment. It is not only for virtualization but also helps with answering if you can upgrade your servers to 2012 and also If your clients can run windows 8 and so much more.
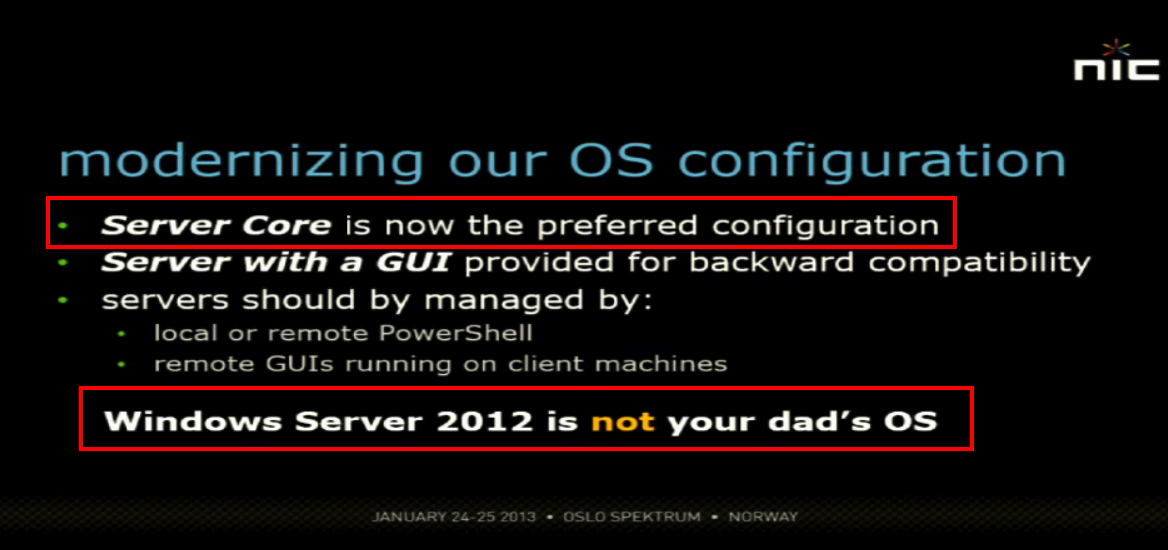
Last week on the NIC keynote we could hear Jeffrey Snover talk about Windows 2012 and also that the preferred version when installing is Core, but then you will not have the Hyper-V manager locally (yes you could use the PowerShell module….).
So how do we enable our management station for remote Hyper-V tasks…
If you have a Windows 2012 you can easily just enable the Remote Server Administration Tools for Hyper-V and that preferably with PowerShell
And if you want to check if you have the Hyper-V management features installed you can use the Get-WindowsFeature
I usually also add the Failover cluster RSAT feature also to be able to manage the cluster.
If you want to add the Hyper-V tools in a Windows 8 you would guess that you have to use the DISM tools and there are some DISM cmdlets, You might have noticed that the Hyper-V tools are not part of the RSAT package for windows 8 this as the client Hyper-V role is part of the OS. But either I am doing something wrong or someone in Redmond has not thought this part through regarding the enabling of features in PowerShell for Win8!
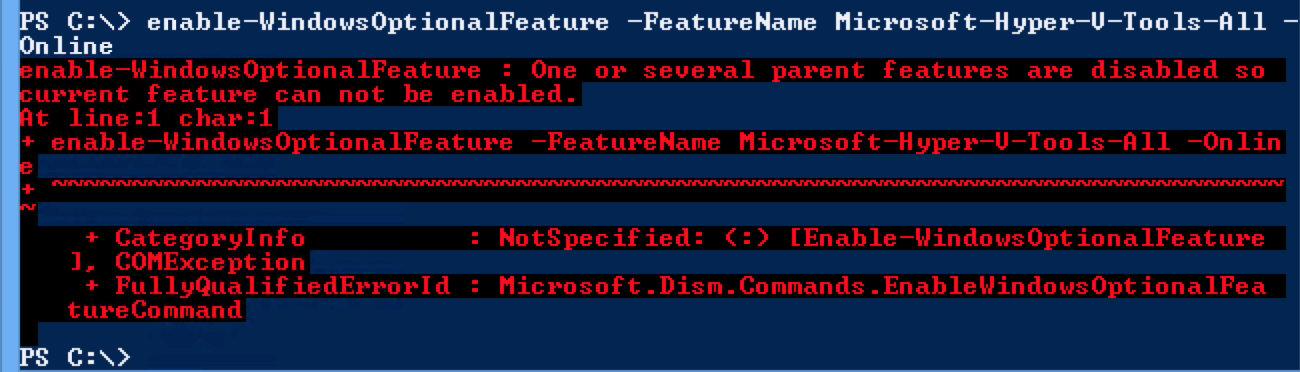
because when I try the following Cmdlet with parameters
The PowerShell console barf out an error because when trying to add the Management tools with the powershell cmdlet I get info that it needs a parent feature which would be the Hyper-V feature and in this virtual windows 8 client that is not what I want,
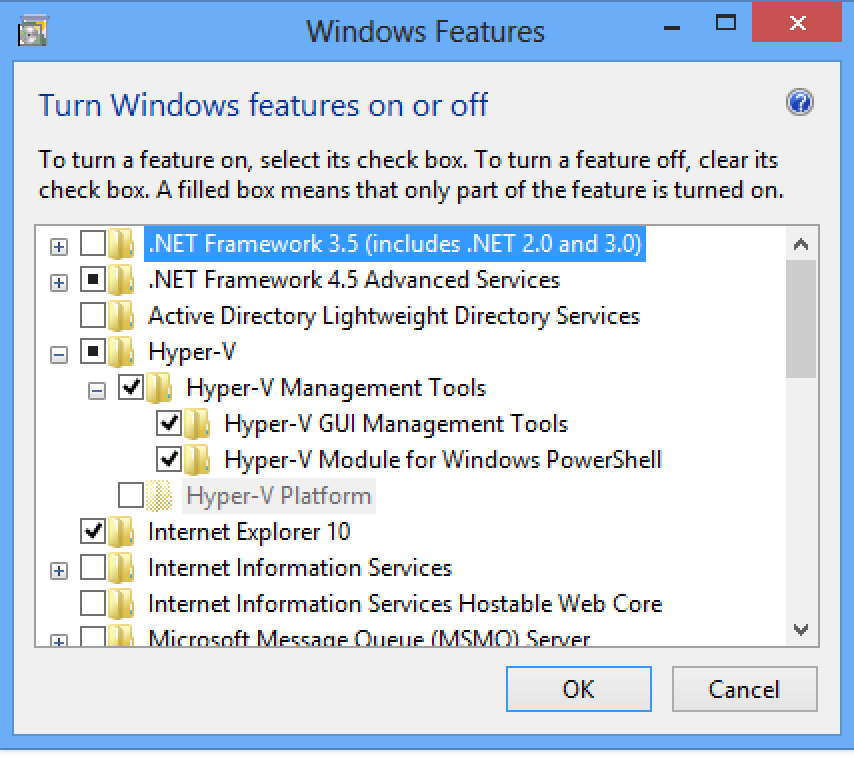
When using the Control Panel, Add/Remove software/Windows Features you can add the Hyper-V Management tools in your Windows 8 without adding the Hyper-V Platform!
I will pursue this with some smart PowerShell gurus and see if they have an answer to why this happens 🙂
In the meantime good luck in creating your management pc!
Yesterday I too the challenge from VMware Sweden to be the first presenting an image of an working Thinapp 4.7.3 packaged Internet Explorer 6.0 on a Windows 8.
This function within ThinApp is quite powerfull. Think of the enterprise applications that have an legacy webapp and that does not allow you to upgrade your web browser cause then it stops working. So how do you do when your users also are connected to the internet and the vulnerabilities out there when you do not have an updated web browser.
Here the ThinApped Internet Explorer comes in to play. You can use the ThinApp ThinDirect for those url containing the corporate web sites that require an older web browser and without the user needing to do anything they get the virtualized IE6 connecting to that site.
Here is a screendump on the configuration dialog for the Internet Explorer, and if I want the Internet Explorer 6 extracted from the OS ( in this case I am getting mine from a win 2003 Sp1)
And here you can see when I am running the IE6
I think that it is really easy to create ThinApped packages and also so powerful as you can see!
I have installed and configured my Win 8 Enterprise but did not enter any key when I was deploying. Now when I wanted to do some customization I saw this.
Well ok, I tried to activate but got this error,
In the GUI there was no way like in win 7 to enter a new product key, so I had to use the slmgr.vbs script. Why have not Microsoft developed this function in powershell instead?
What you will realize is that you need to run it in an elevated powershell or cmd console.
slmgr.vbs -dli <- this shows the product key that you have now
slmgr.vbs -ipk 0000-0000-0000-0000 <- Installs the product key
Now I have an activated Windows 8 client with a valid license 🙂
So first I have to shrink the partition inside the VM, for this I use the New-CIMSession (instead of powershell remoting and such) and then I shut down the VM and shrink the VHDx file, As someone correctly noted, this shrink of the virtual disk file is only possible when using the new VHDx format.
The VM is part of the same domain as the hyper-V server from which I am running the script, this made it easier to make a cim connection. The VM is also a Win 8 beta cause I need the latest win framework with powershell 3.
As you can see, the disk in my VM is 60 GB and I want to shrink it to the minimum size * 20% (so i get at least some space left 😉
Now I will run my little script and here is what that looks like
And here you can see the result, a quite simple solution..
Good luck in your shrinking 🙂
Update: I totally missed that Ben had done a post about doing it with powershell, just after his other post when i was making this post… At least my solution show how to connect to a VM with CIM 🙂
I did see that a new version of VMware Fusion has been released as a technology preview and in the release notes I could find that it was possible to run ESXi host-vm with nested 64 bit VM´s in. Of course I had to test and see if I also could get a new Windows 2012 (8 beta) with Hyper-V role enabled and running.
There was some problems that had to be adressed before I got it working, google and help from fellow IT-neerds that had done the same in VMware Workstation solved my problems. And yes it is actually usefull, because I can run a test environment on my Apple laptop to test/demo things 🙂
After a clean install i got this error when trying to enable
I had to add these lines to the vmx file inside the VM package
hypervisor.cpuid.v0 = FALSE
vhv.enable = TRUE
I also manually set the preferred virtualization engine to Intel VT-x with EPT
Then i could add the Hyper-V role, but when rebooting i got a nice new kind of blue screen with the error HAL_MEMORY_ALLOCATION.
That was solved with the following line in the vmx file, I have no idea what it means exactly but it has to be something with the memory allocation,
mce.enable = TRUE
Here you can see my screendump on my Hajper-V VM with a Hyper-V VM running inside it 🙂
I have not installed VMware tools in the host, this because when enabling the Hyper-V role the OS that is installed becomes an Parent VM, so the tools will not be utilized on the Fusion VM´s hardware.
I am working on setting up my lab environment for the M50273 Design course that I am going to teach next week.
The import process is a bit heavy without powershell, cause it is 18 VMs that has to be imported. In a MOC (Microsoft Official Course) the lab setup consists of several VM´s that have base vhd disks and then several tiers of differential disks that need to be connected before import, in every directory there is a .bat file that creates the symlinks, I decided to keep them but run them in a script.
And here you can see the result of running the .bat file
The setup guide for the course says that I should install a Windows 2008 R2 host and then import the VM´s but i want to use Win8 instead, this to be able to run the built-in hyper-v cmdlets and also test if I could run the course VM´s on it.
I did not have this problem (Matthew Dowst) when importing my VM´s to the host but another networking issue occured, when checking the VM settings as you can see in the screen dump that the virtual network adapter is there but not working correctly, a little powershell again helps 😛
And this powershell command that takes the network adapter on the vm and connects it to the Internal switch :
So to automate the import process I created a small script that looks in a directory for VM´s in folders to import, then starts each .bat script to create the symlinks and imports the machine and lastly renames it (cause in the import process it is named REARMEDxxx) and connects the vm to the right network
As you can see, in this script i have not created a function or fancy parameters, that might come in a version 0.2.