Windows Updates eats up the system drive and how to mitigate this
I had a instance that I provisioned within the cloud and after running for a while it has been slowly eating up space on the system drive and if the system drive is not large enough once provisioned there is no easy way to just expand it online…
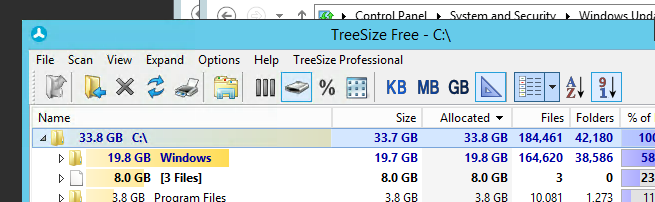
So how can I remove stuff from the Windows\WinSxS folder in a safe manner, and yes removing them by just deleting is not the way to go because that will get you into trouble big time!
So how do you do it then?
Jan has written a blog post about using DISM and you can then massage so the files that have been superseded by a new patch or service pack can be removed thus saving space
To analyse if it is needed you can run the
DISM /online /Cleanup-Image /AnalyzeComponentStore
And then you can as described in Jan´s blog post either run
DISM /online /Cleanup-Image /StartComponentCleanup
or
DISM /online /Cleanup-Image /StartComponentCleanup /ResetBase
Where the later cleans out so you cannot uninstall updates or servicepacks (although there is more cumulative updates rather than servicepacks nowadays )
But what do you do when it fails?
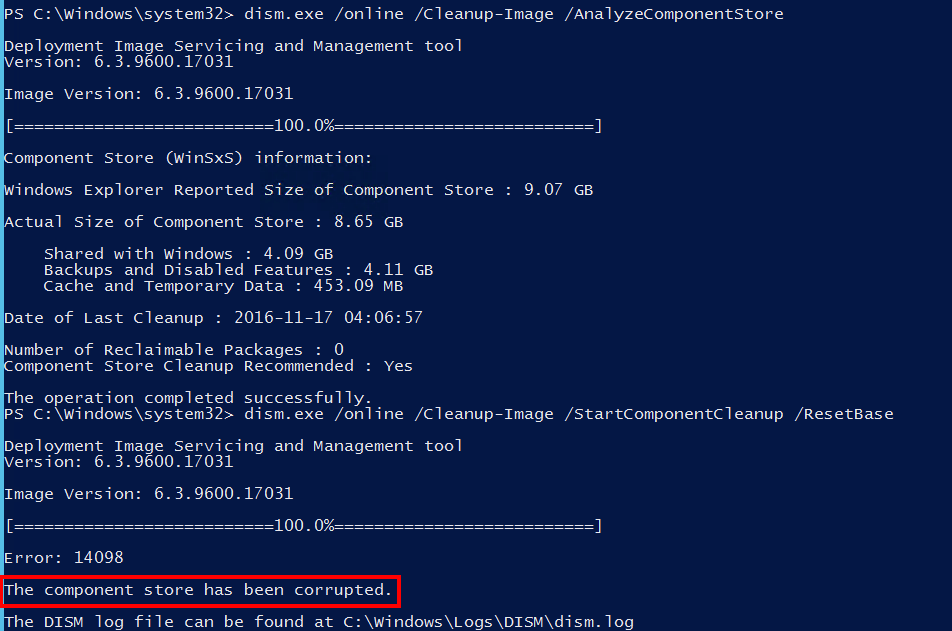
There is a switch for the command that helps out here
DISM /Online /Cleanup-Image /RestoreHealth

after running this and I had actually to repair twice before I could get a successful cleanup 🙂
And yes I know the best way is to respawn instances instead of patching them and in a perfect world that would be the best of course…