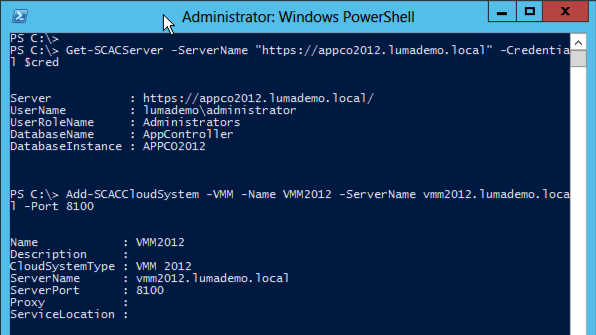
Now I will show you how to add your Private and Public Cloud to your App Controller with the PowerShell cmdlets.
First off I will add my SC VMM server, and as you can see I first connect to the App Controller and then add the VMM server.
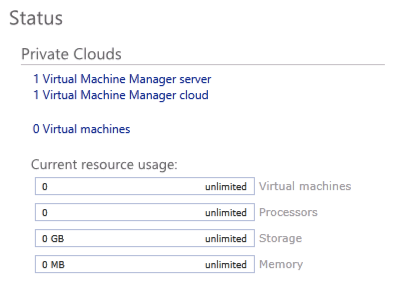
I do not know if it is my silverlight that has some issues or, but the web console did not reflect the addition of the VMM Server until I logged of and then on the App Controller portal
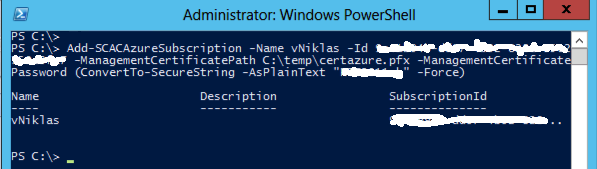
Then I will add my Azure account and that is done by adding an subscription, here you will need the certificate with the private key for the management certificate that you uploaded to your Azure subscription. And yes I have cluttered out the password and subscription Id in the screendump so it is not your monitor that broke 😉
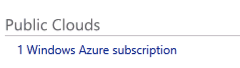
Pretty easy and now I have two clouds in my App Controller, I can also add a SPF cloud connection from a third party vendor to get a truly hybrid cloud, that I have not set up yet though so it will have to be in another post.
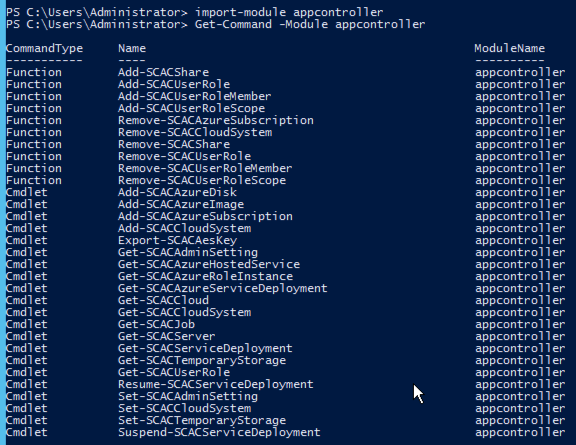
Today I have been exploring the System Center App Controller 2012 SP1 and the PowerShell module that it has.
There is not so many cmdlets in this but maybe it is enough… will find out soon 🙂
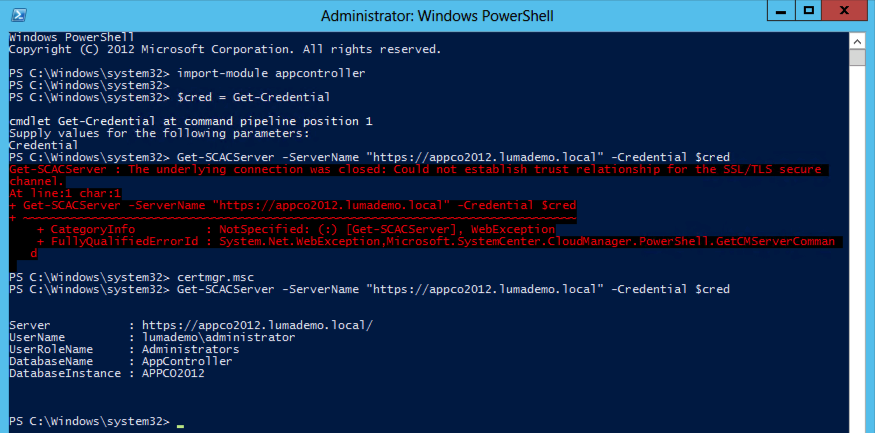
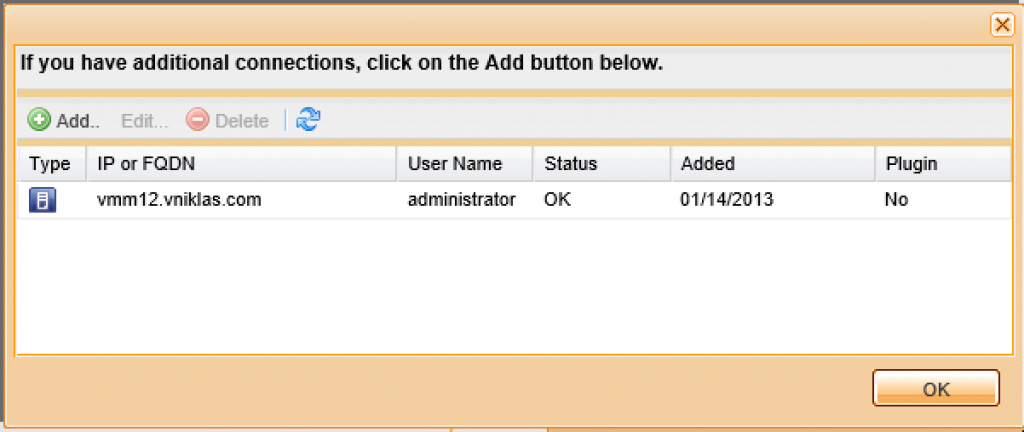
One cmdlet that is necessary is the Get-SCACServer if you are running the powershell module remote. Here comes the small problem when like me not using a certificate from a trusted CA like the AD CS or bought by a small amount of $$$ from verisign or other vendor of certs. As you can see on the next screendump I get a small error that the cmdlet does not like the certificate, well as there is no -force parameter on the cmdlet I went for another aproach and I added the self-signed cerificate from the App Controller server that was used in the IIS to the trusted root certificate authorities certificate store in the cert manager on the Management machine where I wanted to run the appcontroller PowerShell module. And now the cmdlet did not complain and I could get the App Controller server 🙂
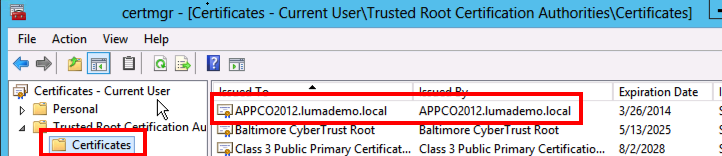
Here you can see where I added the cerificate,
When using the App Controller PowerShell module locally on the same server as the App Controller Server resides this trust of the cert is already taken care of 🙂
A good post on how to create your own certificates for example using in management of your Azure or your IIS SSL you can find here on this link.
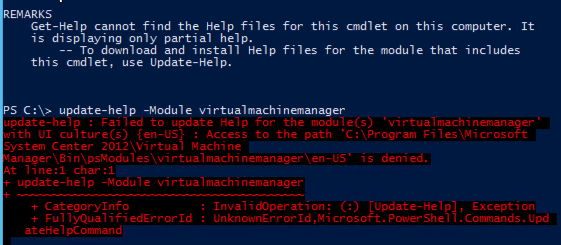
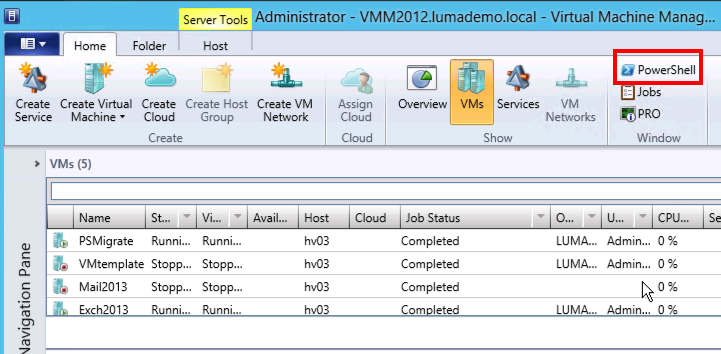
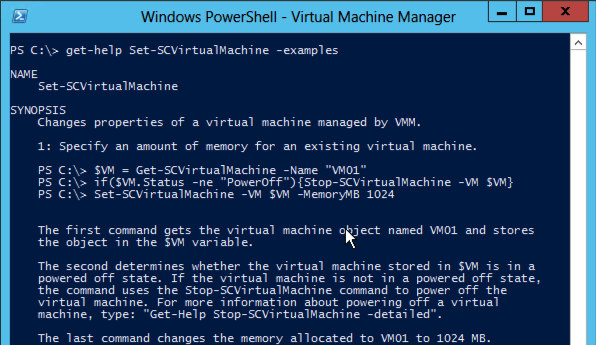
Today I wanted to use the help in SC Virtual Machine Manager PowerShell console and found that I had to download the updated help before I could see the whole, and of course I tried to do that but encountered the little error that follows in the screendump as you see,
I had used the PowerShell shortcut in the VMM Console, and was using my own login account, It is part of administrators/domain admins but still had not proper rights on the VMM server.
I opened a new PowerShell console by right click on the shortcut on the taskbar and chose Run-As Administrator and typed:
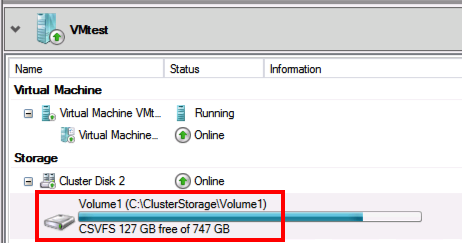
I was talking to a customer today about an issue they had with their SC VMM 2012 SP1 and when they where doing some storage migrations between their CSV SAN volumes in the Hyper-V cluster.
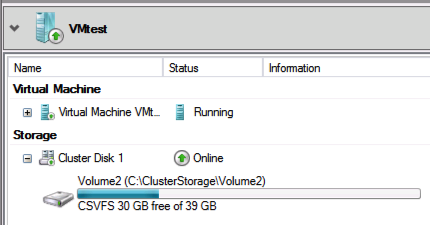
Everything looks good inside VMM and also the VM works nicely but when looking at the failover cluster manager the resource is not updated which resulted in failure in backup with DPM and probably more issues.
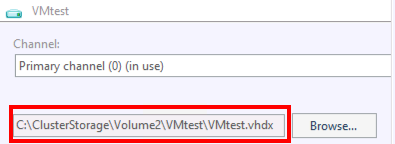
Here is a screendump of the VM in failover cluster manager and also an screendump of the VM in VMM after the migration, as you can see these values does not match
There is a way to solve this but that will mean that we have to use the failover cluster and Hyper-V cmdlets. Also should be noted that if we use the failover cluster manager it works so it is a bug in VMM.
So I opened a new PowerShell console and typed the following:
And here you can now see that the cluster resource reflects the right data
There is actually one more solution and that is to remove the VM from the cluster and then add it again but it is easier to just update the cluster virtual machine configuration 🙂
On the management computer I always install the RSAT tools for Hyper-V and also Failover Cluster along with the VMM console to be able to do all management from one place even if I cannot do it all in VMM.
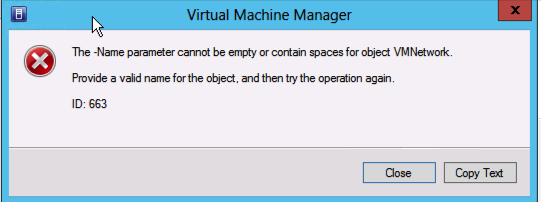
Today when I was going to test the P2V functionality of the VMM 2012 SP1 I found a strange issue.
walking through the wizard for the p2v migration, it gave me an error that I first did not understand, but as it did not allow me to continue the wizard I had to start searching. Based on the object name VMNetwork I concluded that it probably had something to do with the VM Networks.
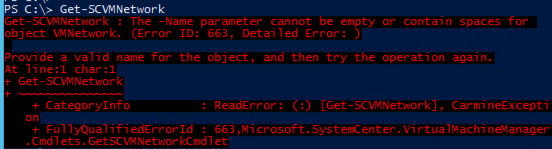
Using PowerShell with the VMM module and the cmdlet Get-SCVMNetwork gave me the following error, and that did not look so good, it should be working right?!
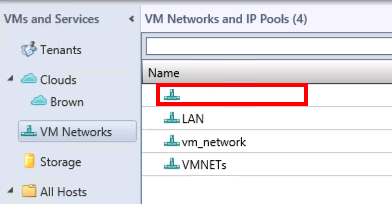
And looking in the VMM console over the VM networks showed me the following, and yes it is not possible to create a VM Network that has no name but somehow it had happend in my system!
When I restarted the VMM Console the whole list was empty so surely the system did not like this..
So how did I fix it? As all data except the library files are stored in the VMM database I went in there. Here is an excellent place for a reminder for you guys out there that not yet have set up any backup for your VMM servers and particularly the DB, DO IT!
Now my system is a test/lab so if I would break it there is no production systems that will be dependent of any errors or failures.
To be on the safe side I stopped the VMMService before I edited the database and that of course with PowerShell:
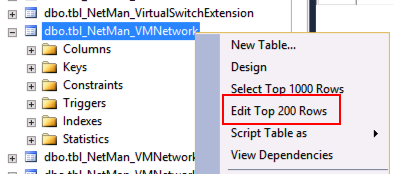
And when that was done I opened the SQL Management Studio and expanded the VMM database, they have a good best practice in naming the tables so it did not take so long time for me to find the one that I wanted to edit, in this case dbo.tbl_NetMan_VMNetwork , right click and chose the edit top 200 rows (if you have more than 200 vm networks you will have to do a query instead 🙂 )
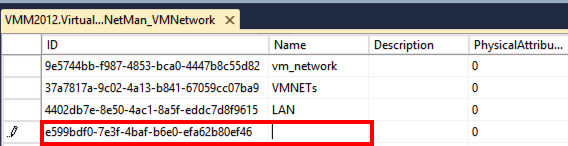
And as you can see on the rows in this table there is one that has in a mysterious way gone blank on the name field, I edited it with the name “Internal” as that was the name I had before and then hit Enter, closed the table and then I started the VMMService again.
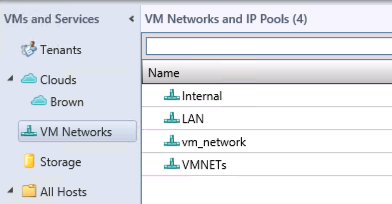
And in the VM Networks view of the VMM Console everything was back to normal again:
Now I will look at some logs and try to find out why the VM Network´s name disappeared in the first place 🙂
I was going to download the evaluation VHD´s for System Center 2012 SP1 and doing that the manual way by clicking on each of the links on the download pages and that for all SC 2012 products could seriously give you mental illness, If I counted the files correct it is 99 total + documents.
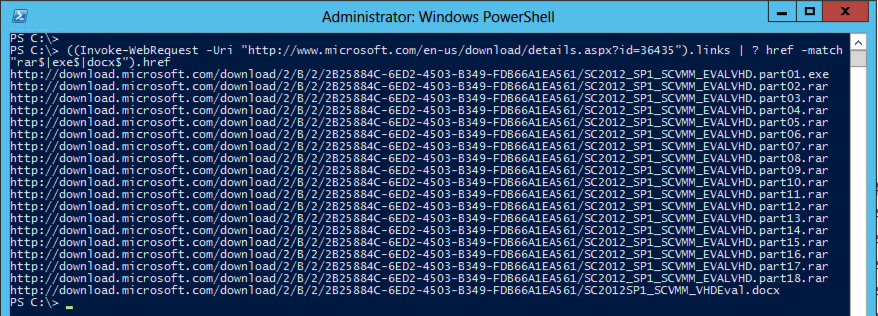
I found this guest post on the ScriptingGuys page where Marco did a PowerShell line how to not only find the files but also add them to BITS for download. This script only works on PowerShell v3.0 because it is using the new Invoke-WebRequest cmdlet, and as you can see on the screendump how easily you can get all download links.
I have set the new url´s for SC 2012 SP1 RTM eval vhd´s and added the .docx files and also do a check that in the volume you will store them have enough space, I made the assumption that it is approximately 70 GB total (99 files * ~700 MB each)
Here You can copy this and run on your environment, It will take some hours but at least it saves you the time in clicking 😛
As the articles on technet tells you it is not supported but I wanted to try and see how I could do it in my lab environment and what consequences it would have . I have one DC Server, one VMM/ORCH/SCOM server (maybe not best practice to have all three roles on the same server but it works 😀 ) and one Hyper-V host with some lab-VM´s
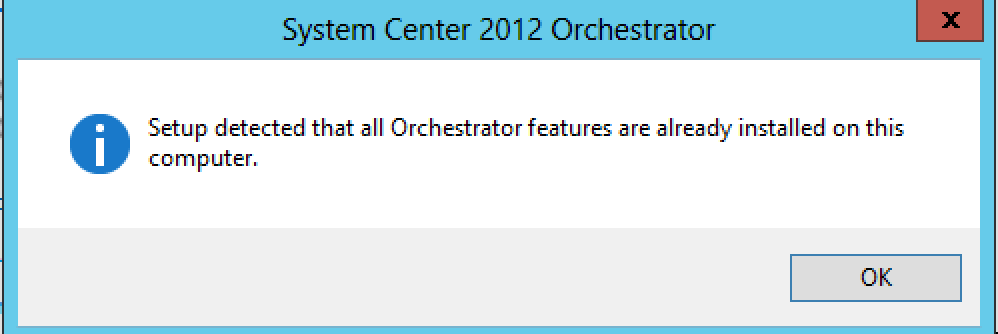
I started with the Orchestrator and when I connected the ISO to the server/servers and try to install I got an dialog that I already have it installed, but it is the wrong version so I have to uninstall everything first, So did that and then during the installation selected the old DB in the wizard and after that I could see all my runbooks and IP´s still are there.
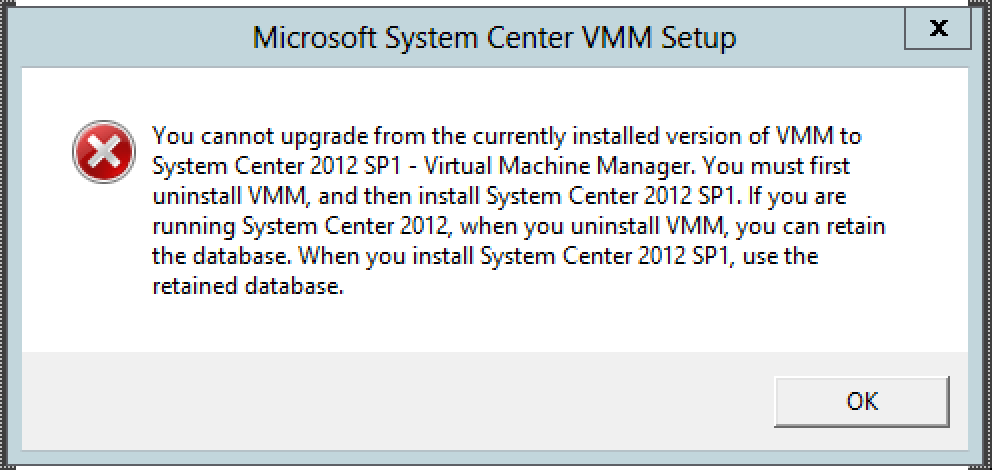
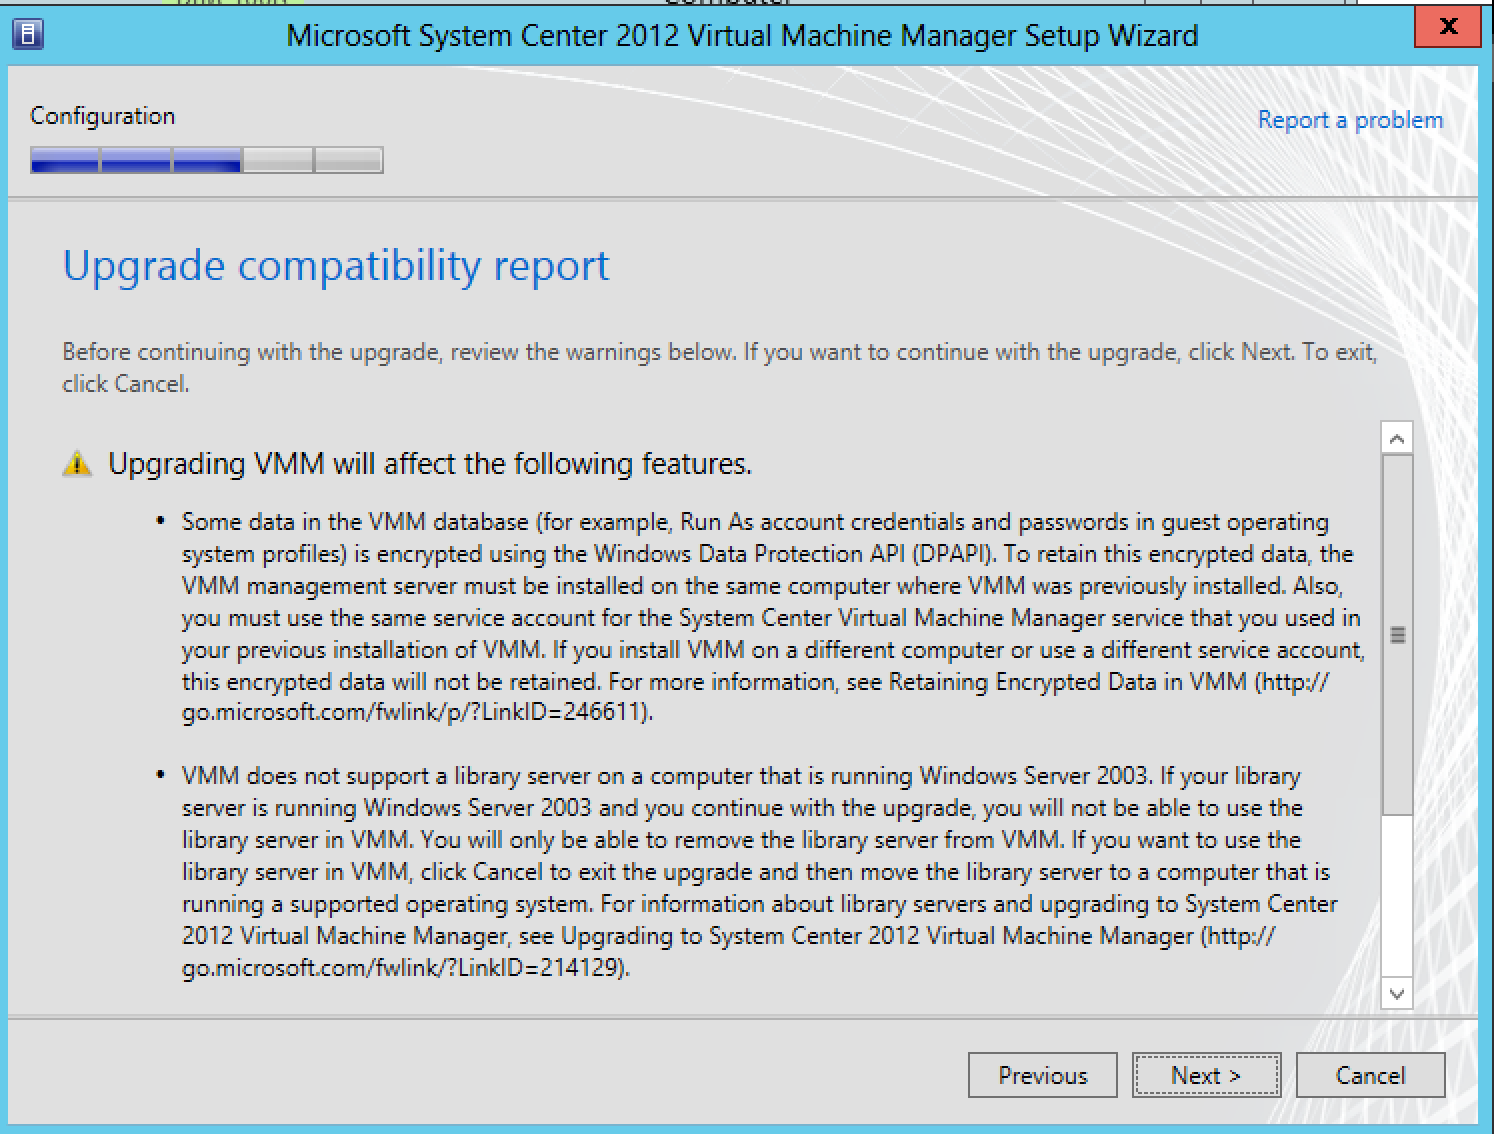
Then It was time for the SC VMM, but now the installation guide clearly told me that I had to uninstall the product, although as you can read on the screen dump: if I am running SC 2012 I can retain the database when uninstalling.
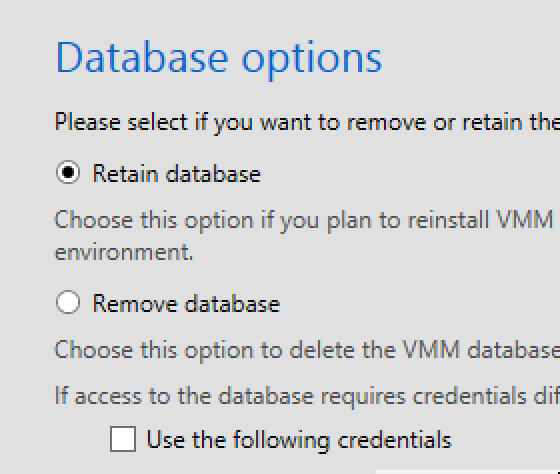
In the uninstall wizard, be sure to check this box:
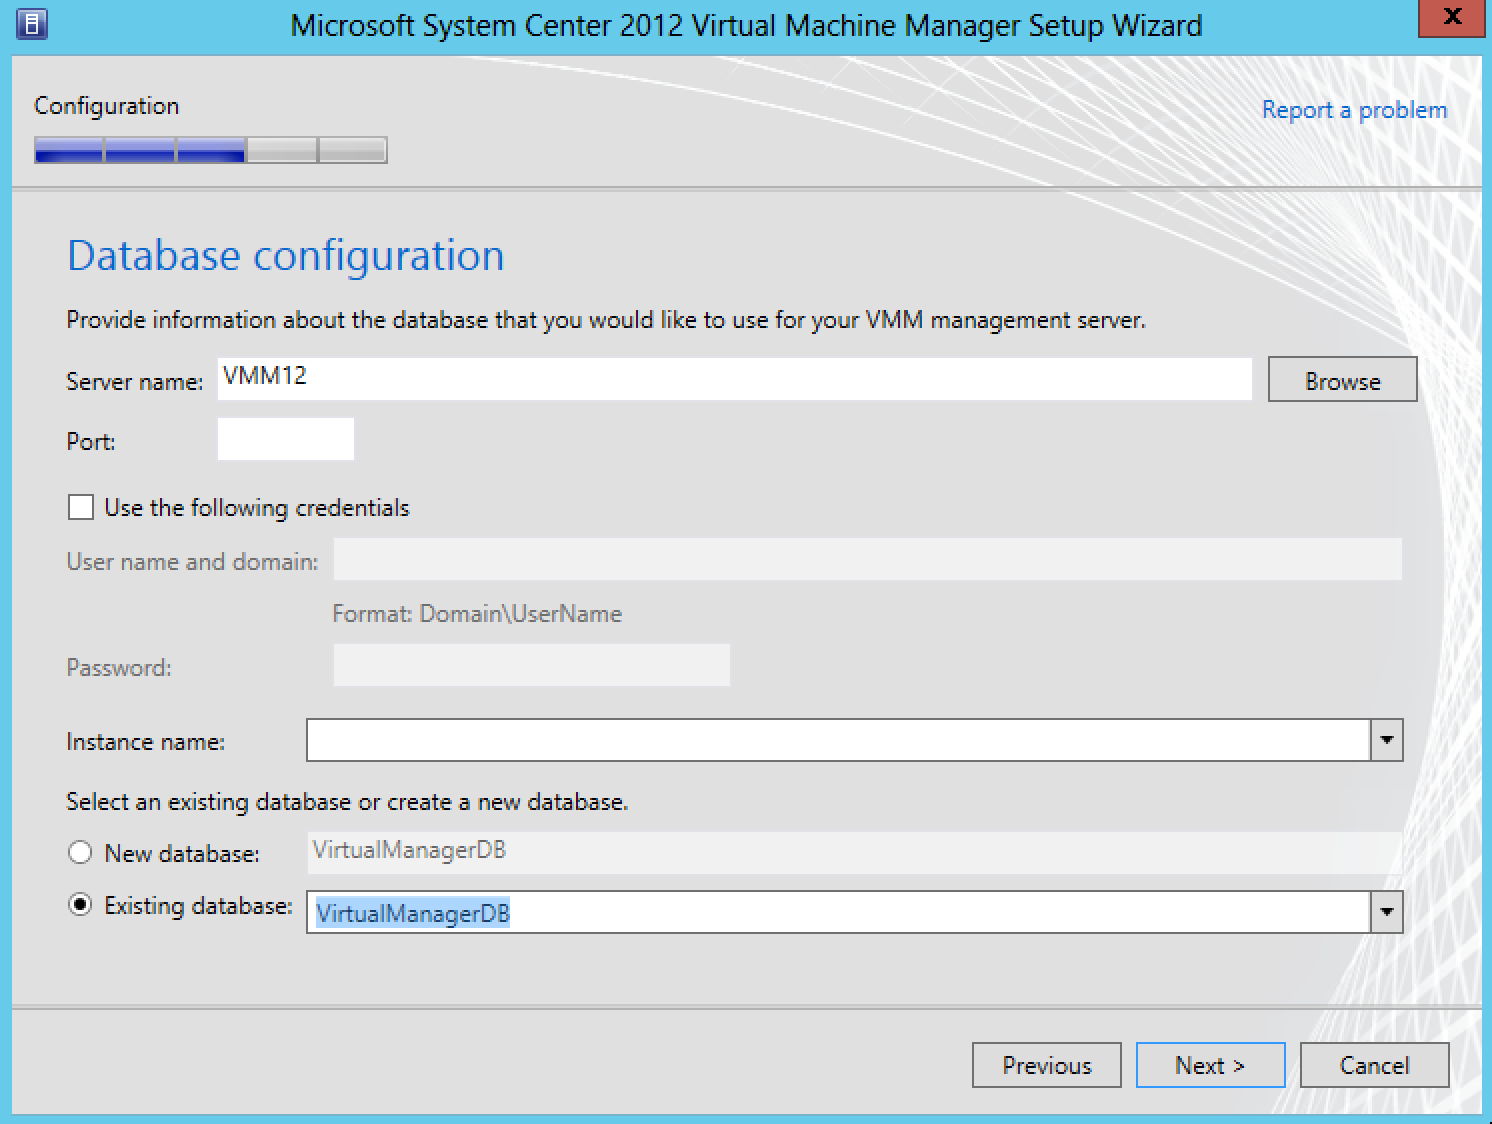
And then during the new installation be sure to point out the old database
The installation wizard will then check and ask if you want to upgrade it, pretty nice and for not supporting an upgrade they have made it quite easy to do it anyway!
Also, the wizard recognizes the library share that I had configured before. In the last step I get an summary that tells me what potential issues might occur with this upgrade, As you can read in the first part it is important to use the same server as the vmm was installed on before and that you use the same service account for VMM this for the Run-As accounts to work!
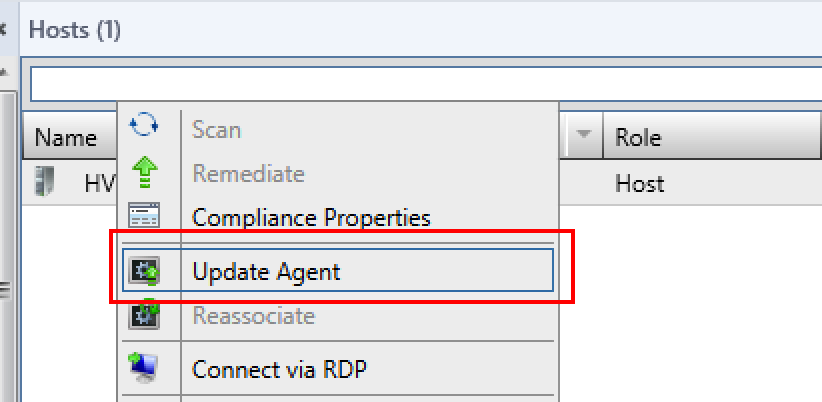
When the installation is complete I had to update the Agent on the Hyper-V host.
After this I continued to upgrade the SCOM, when starting the installation wizard I did not need to uninstall anything and right away the SCOM accepted an upgrade to the RTM version.
After successfully “upgrading” these components there are some more work that needs to be done, such as the SCOM-SCVMM integration that need upgrading and also Orchestrator IP that should be taken care of but that in another blog post 🙂
So with the storage explorer view I can get valuable information about the capacity and also the configuration of the datastores, such as what path selection, number of VM´s and IO etc
With the Change Explorer I get an overview of what has changed in my environment, this is data from the latest 7 days and if I want more I can always activate the vOPS server trial and then buy an license.
The Server Explorer can be installed/imported into VMware vSphere or Microsoft Hyper-V and also Redhat Enterprise Virtualization, and you can connect it to several vCenter servers and also Hyper-V and RHEV at the same time 🙂
I have tested to install it on Microsoft Hyper-V, I tried to use the guide and import the VM on a Windows 2008 R2 Hyper-V, this worked excellent. On windows 2008 r2 it is important that the config.xml file is present in the folder of the VM you try to import or it will fail, this is not a problem on windows 2012 hyper-v where you can import VM´s without exporting them first.
I changed the settings for the imported VM to
4096 MB (I have also been able to start it with 2048 MB)
removed the legacy Network Adapter and replaced it with a Network Adapter (the synthetic)
Updated: The synthetic Network Adapter cannot be used when deploying on windows 2012 Hyper-V because the IC for linux on the vKernel Server Explorer appliance is version 3.1 and the OS is OpenSuse 11.4, and the IC 3.4 which is needed for 2012 cannot be installed on that OS. You can find out the version on your Linux VM by typing modinfo hv_vmbus or modinfo hv_netvsc for the network adapter. The recommendation from Microsoft is that you should use the Network Adapter when possible.
Then I started it and although the VM/VHD´s says 6.0 the VM after start says 6.3 So I know it is the latest and it starts successfully.
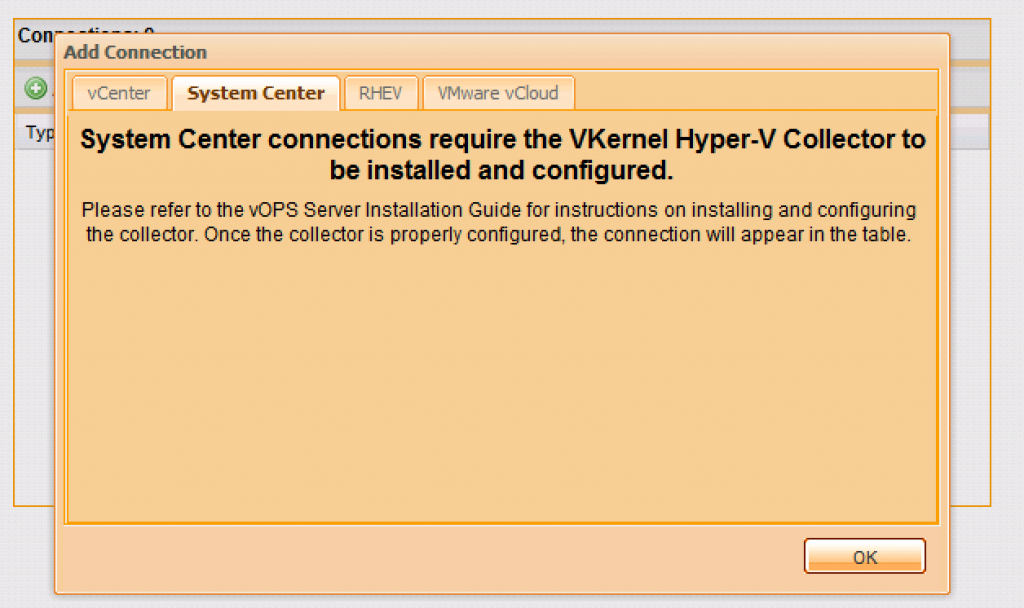
Next step is to configure the vKernel Hyper-V Collector, as you can see this is kind of mandatory before adding the System Center in the vOPS Server Explorer.
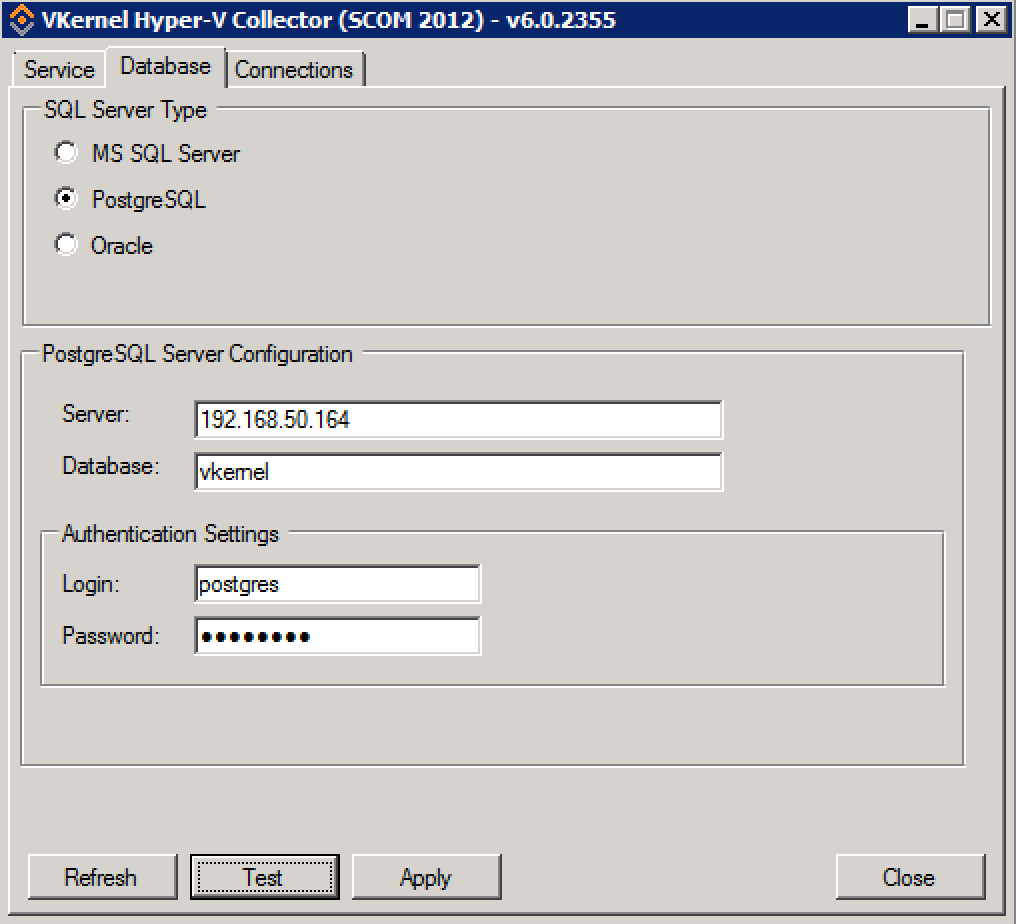
There are two different folders on the download and if you have System Center 2012 you should install the Hyper-V Collector 2012. If I had chosen the internal vOPS database I will use the SQL Server type PostgreSQL, the ip adress of the vOPS Server Explorer and the username and password postgres / postgres
Next step is to configure the connections tab where we add a connection to the SCOM server and when that is done we can after a while check the data in the web, the address is http://ip_of_the_vOPS , the name of my SCOM server is VMM12 so it is not the VMM server I connect to, although this server do have vmm and scom on the same OS.
Free tools are always nice and with these new change and storage explorers you get more insight into your environment and this for free!!
Good luck in your deployment of this updated tool!
I have been helping a customer to populate their VMM 2012 console with information that they think is good to have, I have made a blog post about this some time ago but now I have added some new valuable information.
The information I retrive are where the VM resides on what CSV volume, if the VM has dynamic VHD´s, if the VM has snapshots and if the snapshots also have been merged, this can only happen when the VM is in Saved State or Stopped on a Win 2008 R2 Hyper-V (this is not an issue on a win 2012 hyper-v as it can live merge)
Here is a screenshot how it looks when you add the custom properties to the console,
In the powershell script I iterate down through all the snapshots/differencing disks to the parent VHD and check if that is fixed or dynamic. And as you see in the image I check if there is a snapshot or a removed but not merged snapshot (I still have a small problem with the VMM name Checkpoint 😉 )
After visiting a customer this friday we talked about their environment and the need to check that their cluster shared volumes in a Windows 2008 R2 SP1 Hyper-V cluster was healthy.
They have started to take host level backup but have not yet got the hardware VSS driver in place and when we checked the backup agent had got into a faulty state and locked the CSV volume in redirected access mode. When we restarted the backup agent the status got back to online.
Aidian Finn has done a white paper about backup and CSV volumes which describes the redirection and what that can make for impact on the performance. But in short, the cluster node that is the owner will during the redirected access have sole write access to the CSV volume and that means that the other nodes in the cluster must send all storage trafic to that node.
Alan Renouf´s vCheck script is a really easy and good way to keep in a daily control of your environment, it works for both a VMware vSphere environment and also for Hyper-V with SCVMM thanks to Jan Egil Ring. The best way is to configure it with scheduled tasks and to send a mail every morning.
What I have done is editing the Cluster Shared Volume check plugin to report the status also, as this can be quite important. It is just a minor addition to the plugin, I have also chosen to change so if you set it to 100 the CSV part will always be included in the report and not depending on a percentage space remaining.