Now I will show you how to add your Private and Public Cloud to your App Controller with the PowerShell cmdlets.
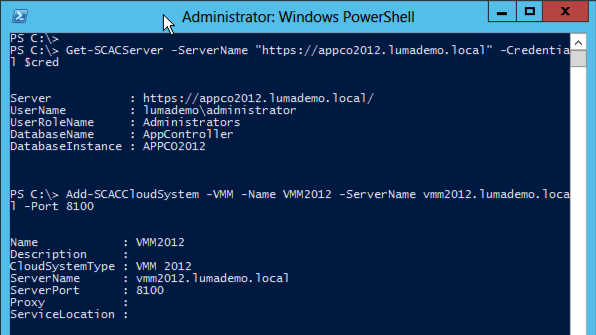
First off I will add my SC VMM server, and as you can see I first connect to the App Controller and then add the VMM server.
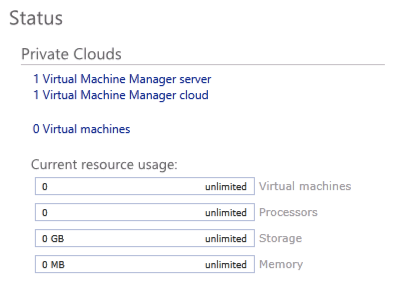
I do not know if it is my silverlight that has some issues or, but the web console did not reflect the addition of the VMM Server until I logged of and then on the App Controller portal
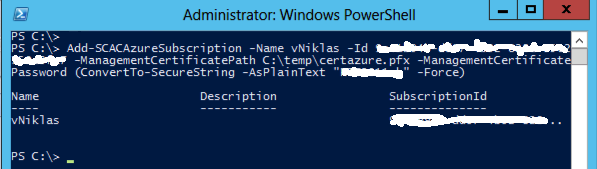
Then I will add my Azure account and that is done by adding an subscription, here you will need the certificate with the private key for the management certificate that you uploaded to your Azure subscription. And yes I have cluttered out the password and subscription Id in the screendump so it is not your monitor that broke 😉
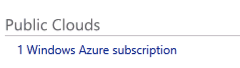
Pretty easy and now I have two clouds in my App Controller, I can also add a SPF cloud connection from a third party vendor to get a truly hybrid cloud, that I have not set up yet though so it will have to be in another post.
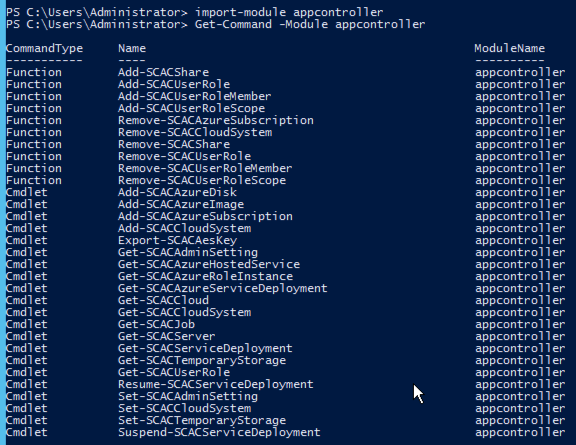
Today I have been exploring the System Center App Controller 2012 SP1 and the PowerShell module that it has.
There is not so many cmdlets in this but maybe it is enough… will find out soon 🙂
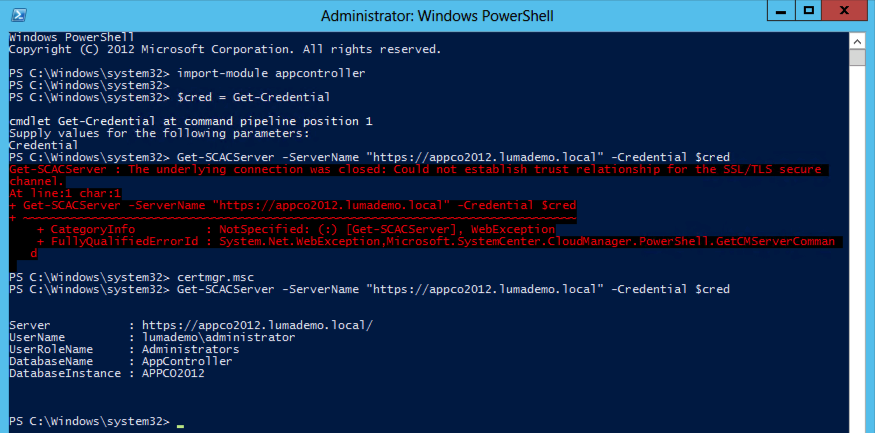
One cmdlet that is necessary is the Get-SCACServer if you are running the powershell module remote. Here comes the small problem when like me not using a certificate from a trusted CA like the AD CS or bought by a small amount of $$$ from verisign or other vendor of certs. As you can see on the next screendump I get a small error that the cmdlet does not like the certificate, well as there is no -force parameter on the cmdlet I went for another aproach and I added the self-signed cerificate from the App Controller server that was used in the IIS to the trusted root certificate authorities certificate store in the cert manager on the Management machine where I wanted to run the appcontroller PowerShell module. And now the cmdlet did not complain and I could get the App Controller server 🙂
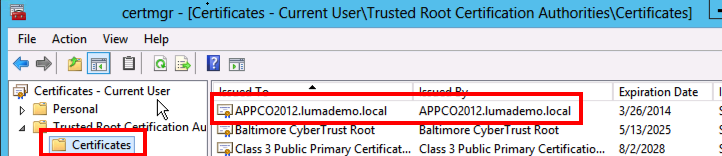
Here you can see where I added the cerificate,
When using the App Controller PowerShell module locally on the same server as the App Controller Server resides this trust of the cert is already taken care of 🙂
A good post on how to create your own certificates for example using in management of your Azure or your IIS SSL you can find here on this link.
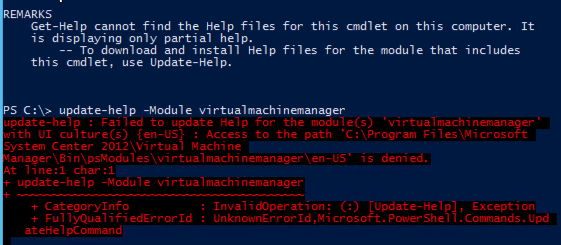
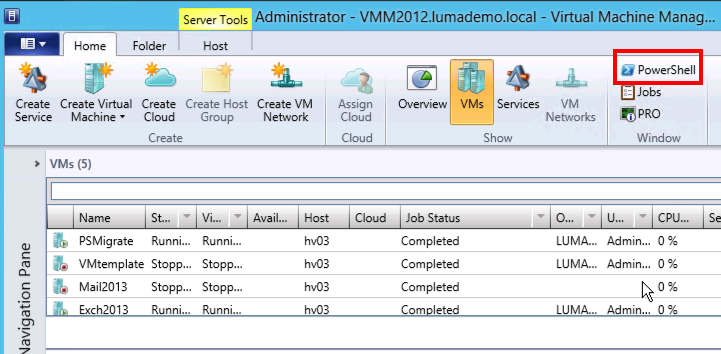
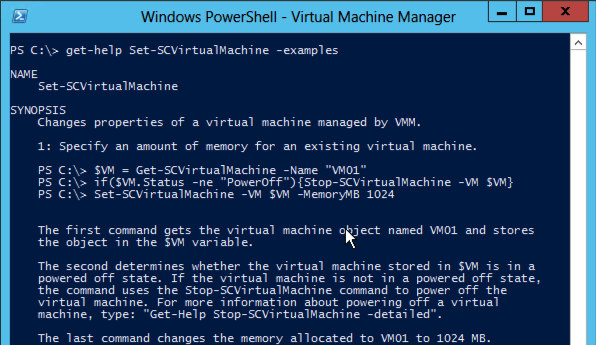
Today I wanted to use the help in SC Virtual Machine Manager PowerShell console and found that I had to download the updated help before I could see the whole, and of course I tried to do that but encountered the little error that follows in the screendump as you see,
I had used the PowerShell shortcut in the VMM Console, and was using my own login account, It is part of administrators/domain admins but still had not proper rights on the VMM server.
I opened a new PowerShell console by right click on the shortcut on the taskbar and chose Run-As Administrator and typed:
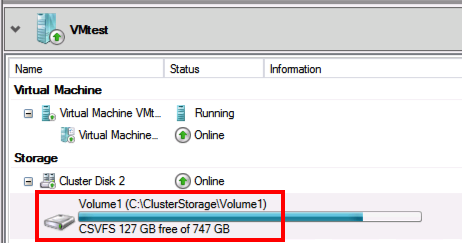
I was talking to a customer today about an issue they had with their SC VMM 2012 SP1 and when they where doing some storage migrations between their CSV SAN volumes in the Hyper-V cluster.
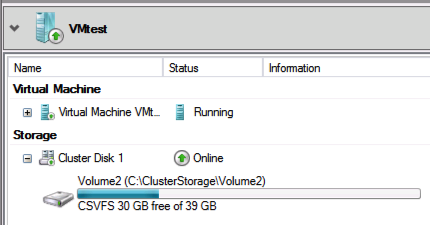
Everything looks good inside VMM and also the VM works nicely but when looking at the failover cluster manager the resource is not updated which resulted in failure in backup with DPM and probably more issues.
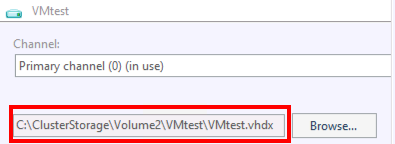
Here is a screendump of the VM in failover cluster manager and also an screendump of the VM in VMM after the migration, as you can see these values does not match
There is a way to solve this but that will mean that we have to use the failover cluster and Hyper-V cmdlets. Also should be noted that if we use the failover cluster manager it works so it is a bug in VMM.
So I opened a new PowerShell console and typed the following:
And here you can now see that the cluster resource reflects the right data
There is actually one more solution and that is to remove the VM from the cluster and then add it again but it is easier to just update the cluster virtual machine configuration 🙂
On the management computer I always install the RSAT tools for Hyper-V and also Failover Cluster along with the VMM console to be able to do all management from one place even if I cannot do it all in VMM.
The updates in this script function are the following:
I will not delete folders if they do not reside within a folder with the VM´s name (In the earlier version I just deleted and that recursive with no questions asked which could have some consequences )
And if the folder was the default or named with another name you will get an output that tells you to clean manually
If you do not give the VM´s Name in the -Path parameter I will add that for you to get a nice and tidy folder structure
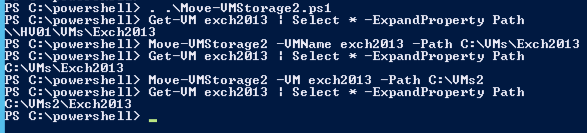
Here is a screendump on the updated function in action
And here you can see what happens if I move from a folder that is not named after the VM´s name
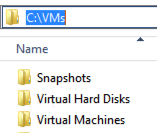
And here is a screendump of the folders that are left in the c:\vms that you need to manually delete and you might want to check that not another vm is residing inside these folders before removing them 😛
    <#
    .Synopsis
       An updated Move-VMStorage function
    .DESCRIPTION
       To also remove the folder where the VM was residing this function also deletes the folder after moving the VM
       This function also helps you in creating a folder in the path if forgotten
    .EXAMPLE
       Move-VMStorage2 -VMName test -ComputerName HV02 -Path \\SMB-srv01\VMs\test
    .NOTES
    Author: Niklas Akerlund 20130226
    Version: 0.2
    #>
    function Move-VMStorage2
    {
        [CmdletBinding()]
        [OutputType([int])]
        Param
        (
            # A name of a VM
            [Parameter(Mandatory=$true,
                       ValueFromPipelineByPropertyName=$true,
                       Position=0)]
            $VMName,
            # The name of the Hyper-V host
            [Parameter(Mandatory=$false,
                       ValueFromPipelineByPropertyName=$true,
                       Position=1)]
            $ComputerName = "localhost",
            # The path where the VM is going to be relocated to.
             [Parameter(Mandatory=$true,
                       ValueFromPipelineByPropertyName=$true,
                       Position=2)]
            [string] $Path
        )

            # Lets move and tidy the source folder
            $VM = Get-VM $VMName -ComputerName $ComputerName
            # For some reason the path does not get refreshed when moving one VM several times in the same console that is why i do a select *
            $VMOldPath = Get-VM $VMName -ComputerName $ComputerName | select * -ExpandProperty Path

            if ($Path -notmatch $VM.VMName){
                $Path = $Path + "\" + $VM.VMName
                Move-VMStorage -VM $VM -DestinationStoragePath $Path
            }else{
                Move-VMStorage -VM $VM -DestinationStoragePath $Path
            }

            if (($VMOldPath.StartsWith("\\")) -and $VMOldPath -match $VM.VMName) {
               Remove-Item -Path $VMOldPath -Recurse -Force
            }elseif ($VMOldPath -match $VM.VMName){
                Invoke-Command -ComputerName $VM.ComputerName -ScriptBlock {Remove-Item -Path $Using:VMOldPath -Recurse -Force}
            }else{
                Write-Host "The VM :" $VM.VMName " was in the following path " $VMOldPath " Clean it manually!"
            }

    }
Today I read on a forum that they where discussing how to get a folder and the files from a virtual machine running on Windows 8 client Hyper-V by enabling and fiddeling with the network. In some cases you do not want to enable networking on that guest to the Win8 host and then you can use the way that Ben showed.
Or you can use an VHD that you first connect to the Win8 host and then copy the files and when you are done you can disconnect it from the host machine and connect it to the virtual machine, with this approach instead of the snapshot you can also add files from the host to the virtual machine and the other way around.
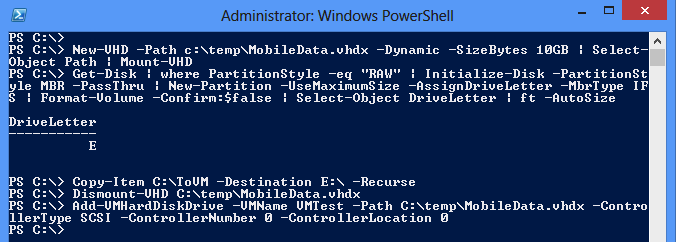
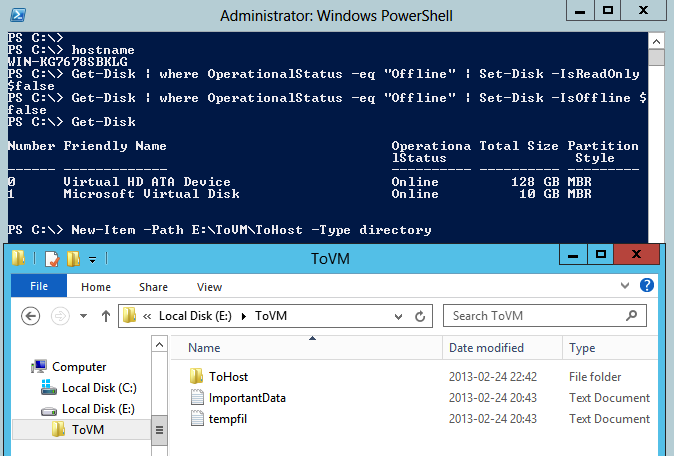
So With PowerShell I first create an VHD and mount it to the Host, create a partition and format it and then I copy the data I want to transfer and then also mount it to the VM.
As you might know, why I use the SCSI controller is to be able to hot-add the virtual hard disk to the VM while it is running and not having to shut it down 🙂
The first time in the VM I have to do some massage on the disk before it appears but the next time the VM´s OS recoginize it and it can be used directly.
And as you can see in the screendump above of the virtual machines folder with the files and also you can see that I can add data inside the VM to my virtual disk. If I would just use the Set-Disk -IsOffline $false I would get a volume that was write protected and here I wanted to add files and folders from the virtual machine also.
And when I am done moving files I can easily disconnect the disk from the VM from the host by using the following PowerShell cmdlet
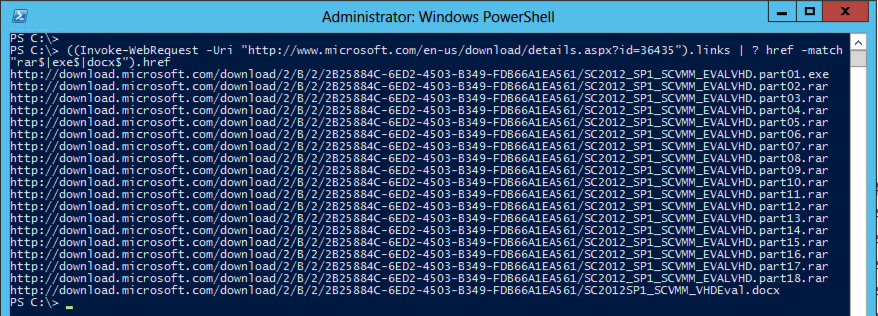
I was going to download the evaluation VHD´s for System Center 2012 SP1 and doing that the manual way by clicking on each of the links on the download pages and that for all SC 2012 products could seriously give you mental illness, If I counted the files correct it is 99 total + documents.
I found this guest post on the ScriptingGuys page where Marco did a PowerShell line how to not only find the files but also add them to BITS for download. This script only works on PowerShell v3.0 because it is using the new Invoke-WebRequest cmdlet, and as you can see on the screendump how easily you can get all download links.
I have set the new url´s for SC 2012 SP1 RTM eval vhd´s and added the .docx files and also do a check that in the volume you will store them have enough space, I made the assumption that it is approximately 70 GB total (99 files * ~700 MB each)
Here You can copy this and run on your environment, It will take some hours but at least it saves you the time in clicking 😛
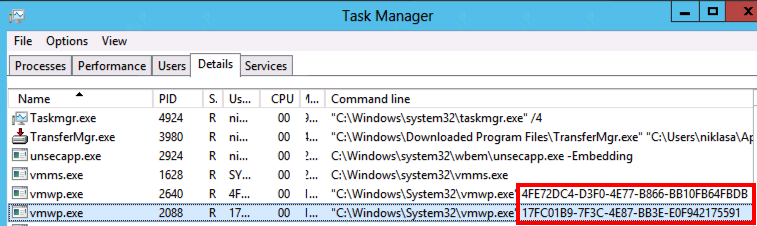
If you by some reason need to kill the process that is handling the VM in Hyper-V which is the Virtual Machine Worker Process, it can be handy to also know what vmwp process that correlates to what VM 😛 or you could accidently restart the wrong VM. Restarting the VM is the default behavior when the process dies.
If you look in the task manager of the Parent Partition you can see the processes.
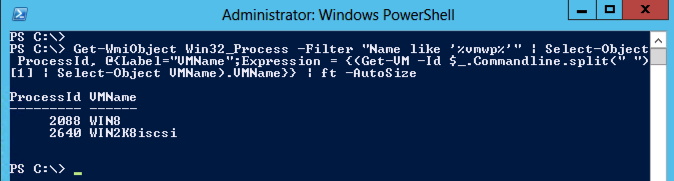
If you look a bit deeper into the task manager you can see that each process in the command line have the virtual machine ID and then digging into this with PowerShell you can find out what VMWP process each VM has. I have been trying to use the Get-Process Cmdlet but that left me with no luck, then I found this post by Ravikanth that uses the Get-WmiObject instead, so I used that and altered what process to get.
I have made a oneliner that does this and as you can see on the following screendump I get a list of the VM´s and the Process Id´s.
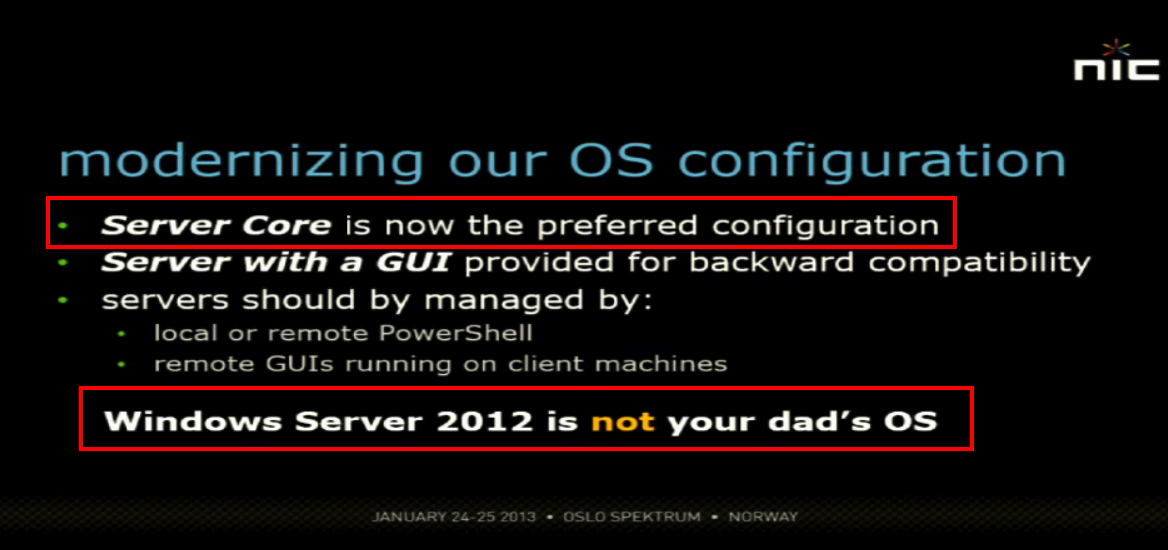
Last week on the NIC keynote we could hear Jeffrey Snover talk about Windows 2012 and also that the preferred version when installing is Core, but then you will not have the Hyper-V manager locally (yes you could use the PowerShell module….).
So how do we enable our management station for remote Hyper-V tasks…
If you have a Windows 2012 you can easily just enable the Remote Server Administration Tools for Hyper-V and that preferably with PowerShell
And if you want to check if you have the Hyper-V management features installed you can use the Get-WindowsFeature
I usually also add the Failover cluster RSAT feature also to be able to manage the cluster.
If you want to add the Hyper-V tools in a Windows 8 you would guess that you have to use the DISM tools and there are some DISM cmdlets, You might have noticed that the Hyper-V tools are not part of the RSAT package for windows 8 this as the client Hyper-V role is part of the OS. But either I am doing something wrong or someone in Redmond has not thought this part through regarding the enabling of features in PowerShell for Win8!
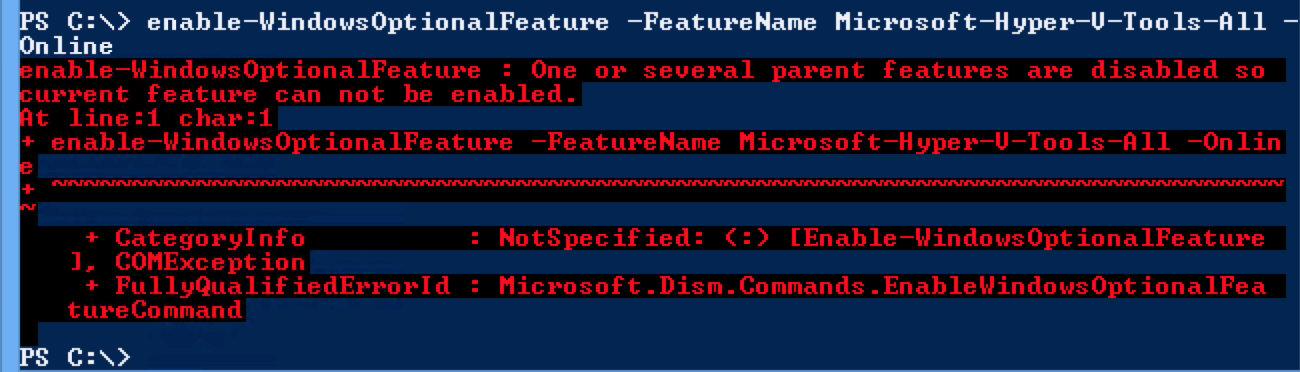
because when I try the following Cmdlet with parameters
The PowerShell console barf out an error because when trying to add the Management tools with the powershell cmdlet I get info that it needs a parent feature which would be the Hyper-V feature and in this virtual windows 8 client that is not what I want,
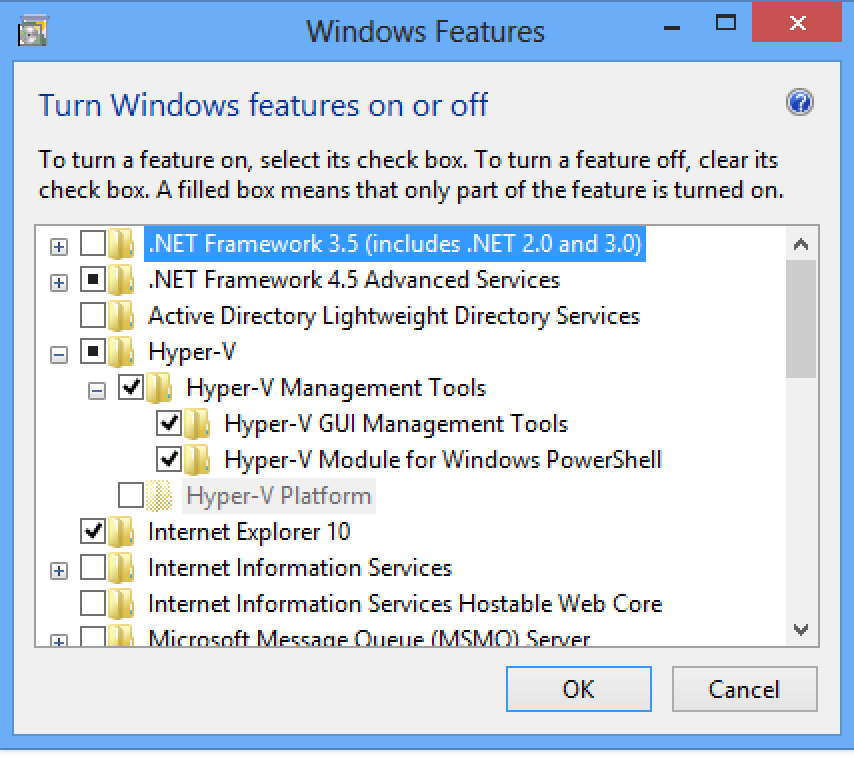
When using the Control Panel, Add/Remove software/Windows Features you can add the Hyper-V Management tools in your Windows 8 without adding the Hyper-V Platform!
I will pursue this with some smart PowerShell gurus and see if they have an answer to why this happens 🙂
In the meantime good luck in creating your management pc!
I have altered his bits to work also when not running on a Hyper-V host (as Mount-VHD does not work when not Hyper-V is enabled), and you have the VM´s on a smb share, this also works if you take a snapshot and then copy the vhdx file to a windows 8 or windows 2012 machine.
The cool part is that I can use a UNC share path with Mount-DiskImage which is the Cmdlet used.
If I have the right permissions I can then easily with just a PowerShell script as Ben showed mount the virtual harddisk and copy the files, and this from a remote server and not on the Hyper-V host.
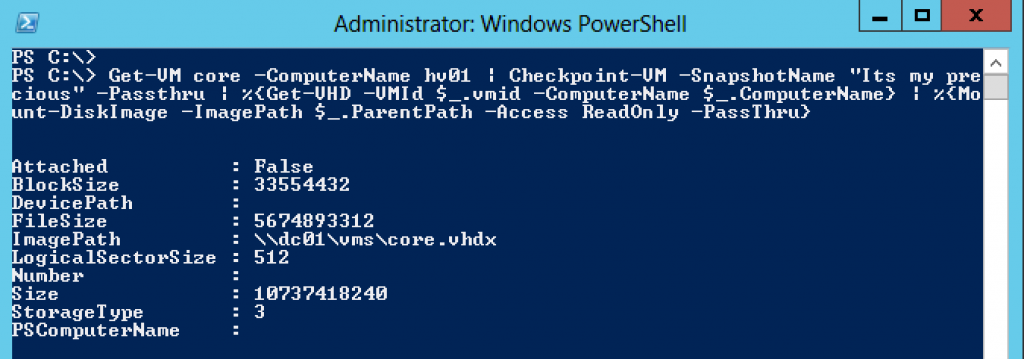
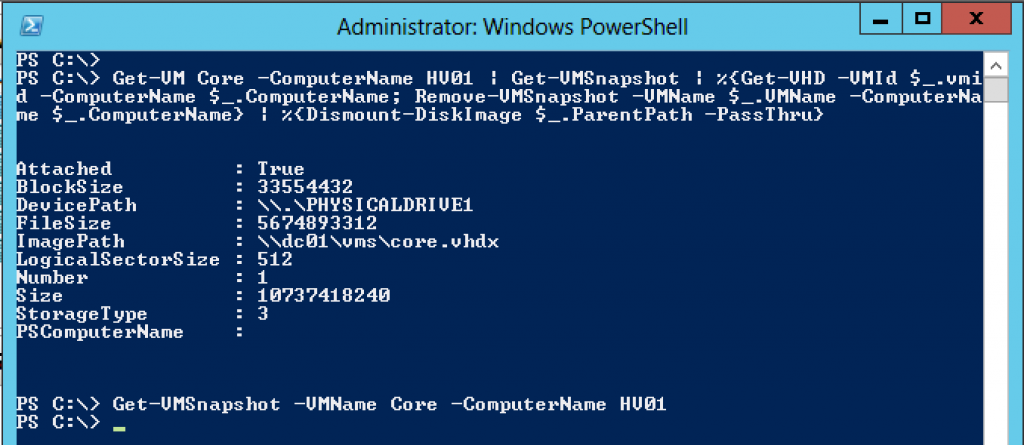
Get-VM core -ComputerName hv01 | Checkpoint-VM -SnapshotName "Need to look at these disks" -Passthru | %{Get-VHD -VMId $_.vmid -ComputerName $_.ComputerName} | %{Mount-DiskImage -ImagePath $_.ParentPath -Access ReadOnly -PassThru}
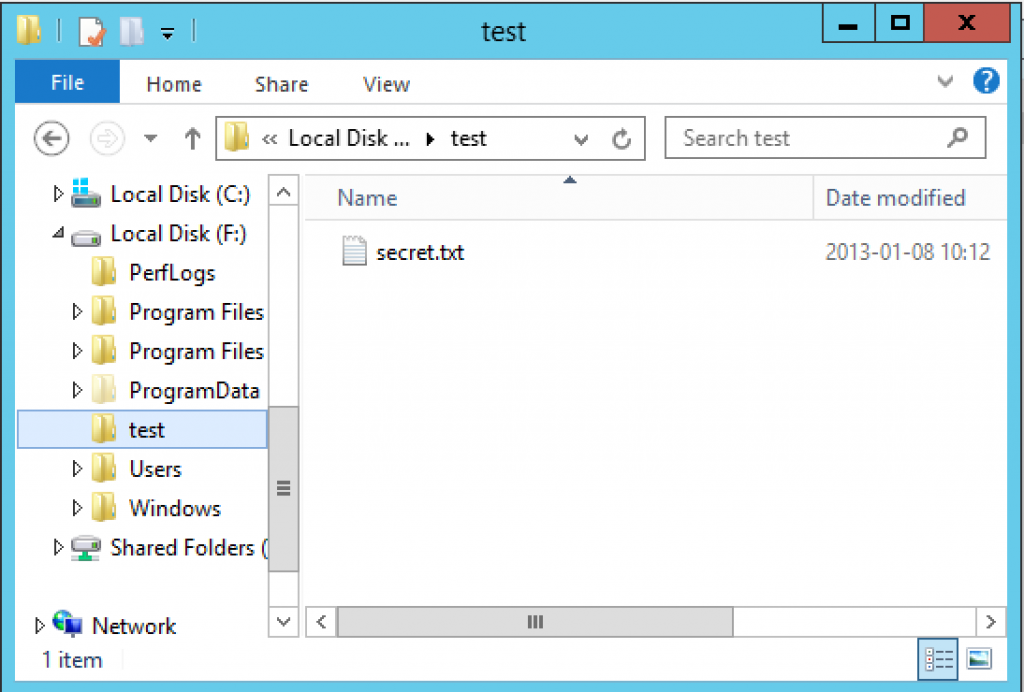
After I have run this you see that I can then get the secret file out of the running virtual machine
and when I am finished copying the secret files from the running virtual machine I can unmount the disk and remove the snapshot.
So what is the conclusion on this in a security perspective, as you can see it is quite easy for a person with the right permissions on a host level to get access of files that he or she maybe not should see. Talented hackers can get permissions and accounts that they need. This leads to the discussion of course where you should put your hosts, is it enough security and boundaries on your network and in your Active Directory Domain or should you set up another for the Hyper-V hosts and management servers?!